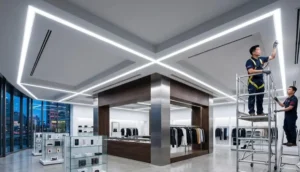
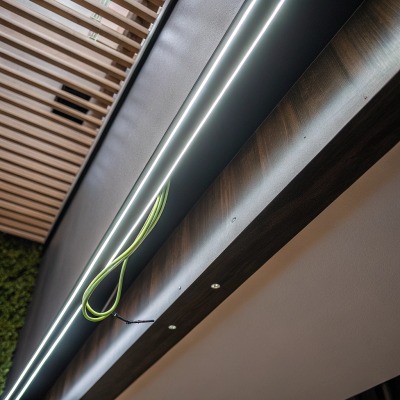
Our production team ships thousands of meters of LED strips destined for ceiling coves and cabinet installs across Europe and Australia. Yet the most common feedback we hear from contractors isn't about the strips themselves — it's about poor design choices and sloppy installation ruining the final look.
LED strip lights are highly effective for home ceiling and cabinet decoration, offering energy savings of up to 80%, lifespans exceeding 50,000 hours, and versatile color options. Their success depends on choosing the correct color temperature, brightness level, and using proper diffusers and mounting channels for a clean, uniform glow.
In this guide, we break down the key decisions you need to make — from brightness and color temperature 1 to custom lengths, color consistency, and long-run reliability — so your LED strip project delivers the polished result your home deserves.
How do I choose the right brightness and color temperature for my ceiling cove lighting?
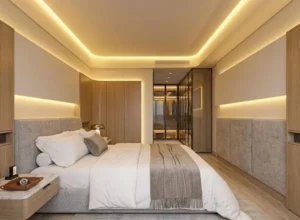
One lesson we learned early on our production floor is that the "brightest" strip is rarely the best strip for a ceiling cove. Contractors call us frustrated because their client wanted a cozy living room but ended up with a space that feels like a hospital hallway. The problem almost always traces back to a mismatch between brightness, color temperature, and the cove's depth.
Choose 2700K–3000K warm white at 400–600 lumens per meter for relaxed living spaces, or 4000K–5000K neutral-to-cool white at 800+ lumens per meter for kitchens and task areas. Match brightness to the cove depth — shallow coves need lower output to avoid hot spots.
Understanding Color Temperature
Color temperature is measured in Kelvin (K). Lower numbers feel warm and yellow. Higher numbers feel cool and blue-white. Here is a simple breakdown:
| Color Temperature | Appearance | Best Use |
|---|---|---|
| 2700K | Warm, candle-like | Bedrooms, living rooms, dining areas |
| 3000K | Soft warm white | General living spaces, hallways |
| 4000K | Neutral white | Kitchens, bathrooms, offices |
| 5000K | Cool daylight | Garages, workspaces, task areas |
| 6500K | Bright daylight | Commercial, utility spaces |
Most homeowners find 3000K to be the sweet spot. It feels welcoming without looking yellow. For kitchens and bathrooms, 4000K gives you enough clarity to see food colors and skin tones accurately. We usually recommend CRI 90+ strips for any space where color accuracy matters — under cabinets, near mirrors, or in cooking zones.
Matching Brightness to Cove Depth
Brightness is measured in lumens per meter 2. But lumens alone don't tell the full story. A deep cove (over 10 cm) absorbs more light, so you need a higher-output strip. A shallow cove (5–7 cm) bounces light quickly, so a lower-output strip works better and avoids harsh glare.
Here is what we typically suggest based on cove depth:
| Cove Depth | Recommended Lumens/m | LED Density | Typical Use |
|---|---|---|---|
| 5–7 cm (shallow) | 300–500 lm/m | 60–120 LEDs/m | Accent glow, ambient mood |
| 8–12 cm (medium) | 500–800 lm/m | 120–240 LEDs/m | General room lighting support |
| 12+ cm (deep) | 800–1200 lm/m | 240–480 LEDs/m | Primary overhead illumination |
Dimming Makes All the Difference
Even if you pick the "perfect" brightness, rooms change throughout the day. A strip that feels great at night can look washed out in the afternoon. That is why we always tell our clients to budget for a quality dimmer. PWM dimmers 3 work best with LED strips because they maintain color consistency at low levels. Cheap TRIAC dimmers can cause flickering, especially below 20% output.
A Common Mistake to Avoid
Many people pick RGB strips thinking they will get "all colors including warm white." They won't. RGB strips mix red, green, and blue to approximate white, but the result looks pinkish or greenish — never truly warm. If you want both color effects and quality white light, go with RGBW or RGB+CCT strips 4. These include a dedicated white LED chip alongside the color channels. Our RGBW strips, for example, use a separate 3000K warm white chip so you get genuine warm light when you need it and full color when you want to play.
Can I get custom-length LED strips that fit my specific cabinet dimensions without visible joints?
This question comes up constantly from the contractors and distributors we work with in Germany and Australia. They have oddly-shaped kitchen islands, L-shaped cabinets, or display cases with non-standard dimensions. Cutting a strip to fit is easy enough. Making the joints invisible — that is the real challenge.
Yes, custom-length LED strips can be manufactured or field-cut to exact cabinet dimensions. To eliminate visible joints, use high-density strips (120+ LEDs/m) paired with aluminum diffuser channels, and request factory-soldered connections instead of clip connectors for seamless, continuous light lines.
How Custom Cutting Works
LED strips have cut marks — small copper pads spaced at regular intervals. Standard strips can be cut every 5 cm or 10 cm. Higher-density strips often allow cuts every 2.5 cm. The closer the cut intervals, the more precisely you can match your cabinet width.
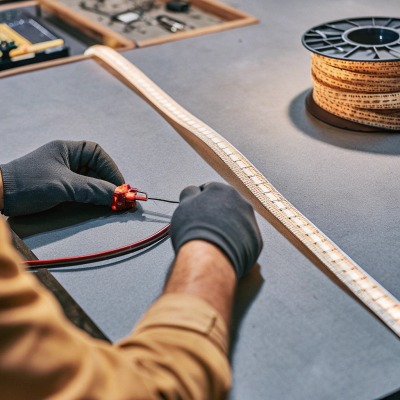
At our facility, we offer factory-cut and factory-soldered services. This means we cut to your exact measurement, solder the power leads, and apply heat-shrink tubing at the connection point. The result is a strip that drops in with zero field work needed. For our Australian distributor Roy, we pre-cut and label every strip by cabinet zone — "Island Left 1420mm," "Upper Right 890mm" — to speed up installation on site.
Why Joints Show (and How to Fix It)
Visible joints happen for three reasons:
- Gap between strip segments. Even a 2 mm gap creates a dark spot. Factory soldering eliminates this gap.
- Connector shadows. Plastic clip connectors are bulky. They sit higher than the strip surface and block light. Solder joints sit flat.
- Low LED density. At 30 or 60 LEDs per meter, each individual LED is visible as a dot. At 120 or 240 LEDs per meter, the dots merge into a continuous line, and minor joints become invisible.
The Role of Diffuser Channels
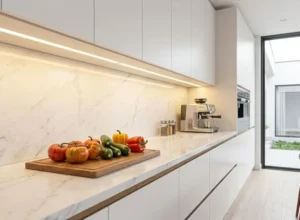
Even with perfect soldering, a bare strip will show individual LED dots at close range — and cabinets are close range. That is why aluminum channels with frosted diffuser covers are essential for cabinet work. aluminum diffuser channels 5 The diffuser blends the light from individual LEDs into a smooth, even wash.
There are two main types:
- Milky / frosted diffusers reduce total light output by about 15–20%, but they deliver a perfectly smooth light line. Best for cabinet fronts and visible edges.
- Clear diffusers preserve maximum brightness but do little to hide individual LED dots. Best for areas where the strip itself is not directly visible.
For cabinet installations, we almost always recommend milky diffusers. The small brightness reduction is a worthwhile trade-off for a clean, professional finish.
Waterproof Ratings for Kitchen and Bathroom Cabinets
Cabinets near sinks or stoves face moisture and grease. Waterproof Ratings 6 A basic IP20 strip works fine inside a dry bedroom wardrobe, but kitchen cabinets need at least IP54 (silicone-coated) or IP65 (silicone-sleeved) protection. We produce IP67 strips with full silicone tubing for bathroom vanity cabinets where water splashes are a real risk.
How do I ensure the color consistency of my LED strips stays uniform across multiple project phases?
We once had a distributor in Germany order three separate batches of 3000K warm white strips over six months for a multi-phase hotel renovation. The first batch looked perfect. The second batch looked slightly pinkish next to the first. The designer was furious. That experience taught us — and our clients — that color consistency across batches is not automatic. It has to be engineered and controlled.
To ensure uniform color across project phases, specify a tight LED binning range (e.g., 3-step MacAdam ellipse), request that your supplier reserve LEDs from the same bin for all phases, and always test samples from each batch against a reference strip under identical conditions before installation.
What Is LED Binning?
LED chips come off the manufacturing line with slight variations. Even within the same batch, one chip might emit light at 2980K and another at 3050K. The human eye can detect differences as small as 50K when two strips are side by side.
LED manufacturers sort chips into "bins" based on their measured color coordinates. LED binning 8 A tighter bin means less variation. The standard measurement uses MacAdam ellipses 9:
| MacAdam Ellipse Step | Color Variation | Suitability |
|---|---|---|
| 1-step | Virtually identical | Laboratory, medical |
| 3-step | Not noticeable to most people | High-end architectural |
| 5-step | Slight difference visible side-by-side | Mid-range residential |
| 7-step | Noticeable difference | Budget, general use |
For any project where strips from different batches will be visible together — such as a living room ceiling and adjacent hallway — we strongly recommend 3-step binning. Our standard production uses 3-step MacAdam as the default for all project-grade orders. For standard residential, 5-step is acceptable if strips are in separate rooms.
How We Maintain Consistency Across Batches
When a client tells us their project will span multiple orders, we take several steps:
- Reserve the bin. We purchase enough LED chips from the same bin at the start of the project to cover all planned phases. The chips are stored and allocated to each order.
- Reference sample. We produce a 30 cm reference strip from the first batch. The client keeps one, and we keep one. Every future batch is compared against this reference under controlled lighting.
- Aging test. New batches are powered on for 24 hours before shipping. This burns off the initial brightness surge and gives us a stable reading to compare against the reference.
- Documentation. Every reel ships with a test report showing measured CCT, CRI, lumens, and color coordinates (x, y on the CIE diagram). Clients can verify these numbers against their reference.
Real-World Tip: Mixing Batches on the Same Run
If you absolutely must install strips from two different batches on the same wall or ceiling run, place the transition point at a natural break — a corner, a column, or a channel joint. The eye doesn't compare color across corners the way it compares two parallel strips on a flat surface. This simple trick hides minor batch differences effectively.
Environmental Factors That Shift Color
Even perfectly matched strips can look different after installation if the environment differs. A warm-toned wood ceiling will reflect yellowish light, making the strip look warmer. A white plaster ceiling keeps the color neutral. Glossy surfaces amplify color shifts more than matte surfaces. Always do a test install on the actual surface material before committing to a full order.
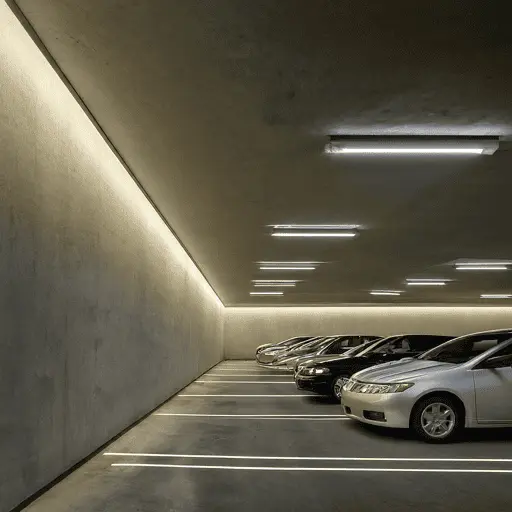
What are the most reliable long-run solutions for my large-scale home decoration installations?
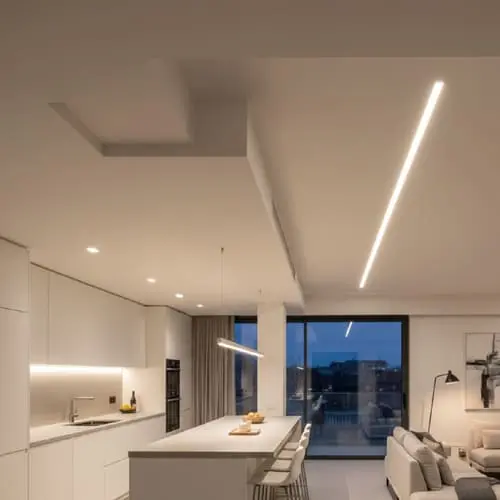
Long-run installations — anything over 5 meters in a continuous line — are where cheap LED strips fail most visibly. We see it constantly: the strip starts bright at the power feed and dims noticeably toward the end. Or worse, the color shifts from white to yellowish as voltage drop 10s across the run. For large homes with open-plan living areas, tray ceilings, or wraparound cove lighting, getting the long-run engineering right is non-negotiable.
The most reliable long-run solutions use constant-current LED strips or high-voltage (AC 220V/120V) strips that maintain uniform brightness over 15–30+ meters without voltage drop. Pair these with aluminum heat-sink channels, quality drivers, and factory-soldered connections for installations that last 50,000 hours without color shift or dimming.
Why Standard Strips Fail on Long Runs
Standard 12V or 24V DC LED strips suffer from voltage drop. Electricity flows through thin copper traces on the flexible PCB. Over distance, resistance builds and voltage decreases. LEDs at the far end receive less power, so they glow dimmer and sometimes shift in color. On a 12V strip, this becomes visible after just 3–5 meters. On a 24V strip, you might get 5–8 meters before it shows.
Solutions include:
- Power injection — feeding power from both ends or at multiple midpoints. Effective but adds wiring complexity.
- Constant-current strips — the driver regulates current instead of voltage, so every LED receives the same power regardless of position. These run reliably up to 15–20 meters on a single feed.
- High-voltage strips (AC 110V/220V) — these operate at mains voltage, dramatically reducing current in the traces and virtually eliminating voltage drop over 30, 50, or even 100 meters. We produce 220V strips that our German clients install across entire apartment hallways — 25 meters, one power point, zero dimming.
Comparing Long-Run Strip Technologies
| Feature | 12V DC Strip | 24V DC Strip | Constant Current | AC 220V High-Voltage |
|---|---|---|---|---|
| Max run (single feed) | 3–5 m | 5–8 m | 15–20 m | 30–100 m |
| Voltage drop visible? | Yes, after 3 m | Yes, after 5 m | Minimal | Virtually none |
| Driver needed? | Yes (external) | Yes (external) | Yes (specialized) | Built-in rectifier |
| Dimmable? | Yes (PWM) | Yes (PWM) | Yes (specific driver) | Yes (with compatible dimmer) |
| Best for | Short accents | Medium coves | Large rooms | Whole-home, commercial |
| Safety consideration | Low voltage, safe | Low voltage, safe | Low voltage, safe | Mains voltage, needs proper insulation |
Heat Management Is Half the Battle
LED strips generate heat. Not as much as halogen bulbs, but enough to degrade the adhesive, shorten LED lifespan, and accelerate color shift if not managed. On a long run, heat builds up cumulatively. Aluminum channels serve double duty — they act as both a mounting track and a heat sink. The channel draws heat away from the strip and dissipates it across its surface area.
For runs over 10 meters, we recommend aluminum channels with a wall thickness of at least 1.5 mm. Thin 0.8 mm channels look similar but transfer heat poorly. This is one of those areas where the cheap option costs more in the long run through premature failures.
Planning for Future Maintenance
Large-scale installations should be designed for serviceability. That means using channel-mounted strips (which slide in and out) instead of direct-adhesive mounting. It means leaving accessible power connection points. And it means labeling every run with its specifications — CCT, wattage, driver model — so that if a section needs replacement in five years, the new strip can be matched precisely.
We include a technical data sheet with every project order. It lists the bin code, production date, driver compatibility, and recommended replacement part number. Contractors who keep these records on file save themselves enormous headaches when maintenance calls come in years later.
Smart Controls for Whole-Home Integration
Modern long-run installations increasingly use smart controls. DALI, DMX, or Zigbee protocols let you control zones independently — dim the hallway, brighten the kitchen, shift the living room to warm amber. We now see Matter-compatible controllers entering the market, which promise cross-brand interoperability. For future-proofing, we suggest our clients specify drivers and controllers that support at least one open smart home standard alongside their proprietary app.
Conclusion
LED strip lights are one of the most effective tools for ceiling and cabinet decoration — when the details are done right. Choose your color temperature and brightness carefully, invest in proper diffuser channels, demand tight color binning for multi-phase projects, and use long-run-rated strips for large spaces. The strips themselves are reliable. Your results depend on the decisions made before installation day.
Footnotes
- Explains the concept of color temperature in lighting and its measurement. ↩︎
- Provides the SI unit definition and explanation of luminous flux. ↩︎
- Explains how Pulse Width Modulation (PWM) dimming works for LEDs. ↩︎
- Differentiates between various types of RGB LED strips with white light options. ↩︎
- Details the purpose and benefits of aluminum channels for LED strips. ↩︎
- Explains IP ratings for LED strips and their protection levels against solids and liquids. ↩︎
- Compares soldered and solderless connectors, highlighting reliability. ↩︎
- Describes the process of sorting LEDs by color and brightness characteristics. ↩︎
- Explains how MacAdam ellipses are used to define LED color consistency. ↩︎
- Explains the phenomenon of voltage drop in LED installations and its causes. ↩︎