Every year, our team reviews dozens of supplier samples where the datasheet numbers look perfect but the actual strips tell a different story.
You can verify LED strip specifications by requesting third-party test reports, performing sample burn-in tests, physically inspecting PCB and component quality, and confirming certifications directly through issuing bodies. Suppliers who can explain their testing methods in detail are far more trustworthy.
Below, I break down the exact steps you can follow — from optical testing to certification checks — so you never get caught off guard by inflated specs again.
How do I confirm that the lumen output and CRI on the datasheet match the actual performance?
We have seen samples arrive at our lab claiming 120 lm/W, only to measure closer to 80 lm/W under proper conditions SDCM (Standard Deviation of Color Matching) 1. This gap can ruin a project bid.
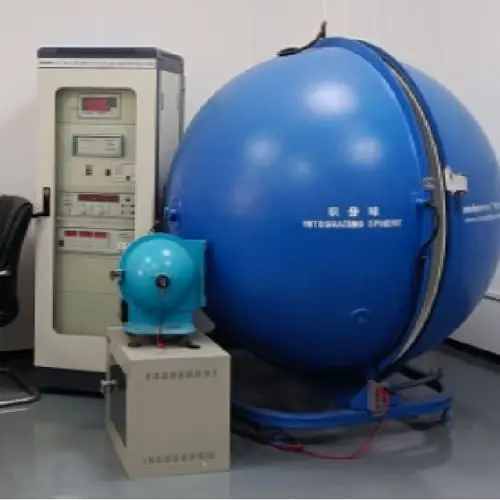
Request an integrating sphere test report from an accredited lab, or test samples yourself with a calibrated photometer. Compare measured lumens per meter and CRI against the datasheet at the rated voltage and temperature after a 30-minute warm-up period.
Why Datasheet Numbers Often Look Too Good
Most datasheets show LED chip-level specs, not strip-level performance 2 oz copper 2. Once you factor in driver losses, PCB resistance, and thermal effects, real output drops. A strip rated at 1000 lm/m at the chip level might deliver 750–850 lm/m in practice UL's online directory 3.
Always ask: "Is this lumen value measured at strip level or chip level?" That single question filters out many misleading suppliers EU declaration of conformity 4.
How to Test Lumen Output
You need an integrating sphere 5 or a goniophotometer. If you do not have access to one, request a report from a lab like TÜV, Intertek, or a local CNAS-accredited facility. The report should include:
- Test temperature (25°C standard)
- Input voltage and current
- Lumen output per meter
- CRI (Ra) and R9 value
- Color temperature (CCT)
Understanding CRI Beyond the Number
CRI above 80 is standard. CRI above 90 is needed for retail, hospitality, and residential projects. But CRI alone does not tell the full story. Ask for the R9 value — it measures how well the strip renders deep reds. A strip can have CRI 90 but a poor R9 below 50.
| Spec | Acceptable | Good | Premium |
|---|---|---|---|
| Luminous Efficacy | 80–100 lm/W | 100–130 lm/W | 130+ lm/W |
| CRI (Ra) | ≥80 | ≥90 | ≥95 |
| R9 Value | ≥0 | ≥50 | ≥80 |
| Test Standard | None stated | LM-79 | LM-79 + LM-80 |
A Practical Tip
When we send samples to clients in Germany and Australia, we include a one-page test summary showing measured vs. rated specs. If your supplier cannot provide this, that is a red flag. The best suppliers test every production batch, not just the initial sample.
What methods can I use to test if the color consistency stays within my required SDCM range?
On a recent hospitality project, our client installed 200 meters of strips from a new supplier. Under dim lighting, some sections looked noticeably warmer. The issue was poor color binning — an expensive mistake to fix on site.
Use a spectroradiometer or colorimeter to measure the chromaticity coordinates of multiple strip segments, then calculate the SDCM (Standard Deviation of Color Matching). For architectural projects, insist on SDCM ≤3 to ensure no visible color difference between strips.
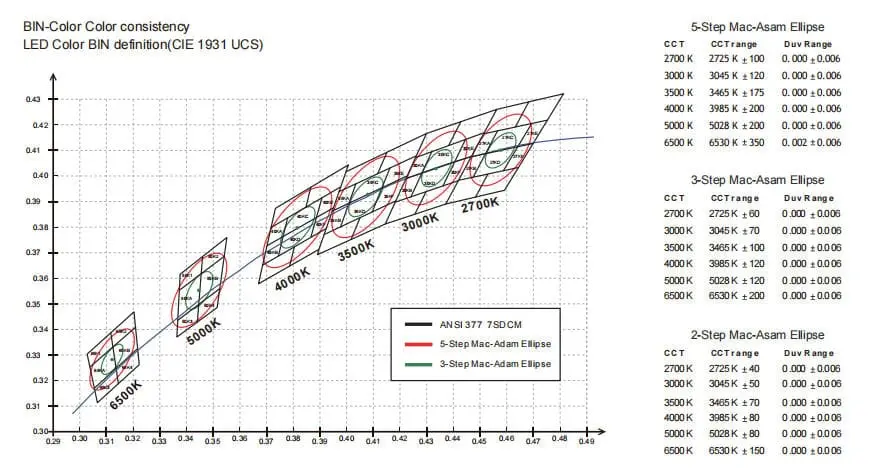
What Is SDCM and Why It Matters
SDCM measures how far the actual color point of an LED deviates from the target color on the CIE chromaticity diagram 6. Lower is better. Here is a quick reference:
| SDCM Step | Visible Difference | Typical Use |
|---|---|---|
| 1–2 | Not noticeable | Lab-grade, premium architectural |
| 3 | Barely noticeable | High-end commercial, hospitality |
| 5 | Noticeable side by side | General commercial |
| 7+ | Clearly visible | Budget / non-critical |
Most quality LED strip suppliers bin their LEDs to SDCM 3 or tighter. If a supplier cannot tell you their binning range, that is a warning sign.
How to Test Color Consistency Yourself
You do not need a full lab. A handheld spectroradiometer like the Sekonic C-800 or UPRtek MK350 can measure CCT and chromaticity coordinates. Here is a simple process:
- Cut five segments from different positions on the reel (start, 1/4, 1/2, 3/4, end).
- Power them at rated voltage for 30 minutes.
- Measure CCT and x,y coordinates of each segment.
- Compare readings. If CCT varies more than ±100K, color consistency is poor.
Batch-to-Batch Consistency
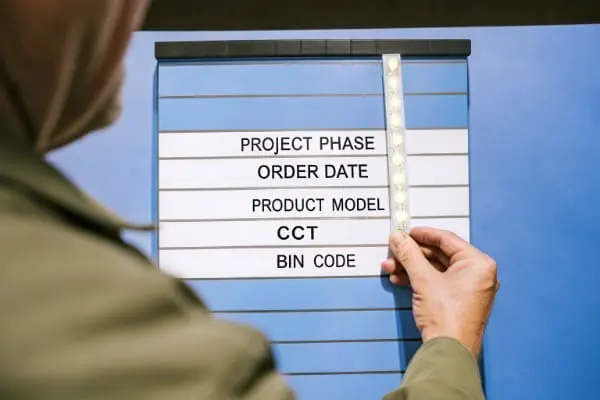
Single-reel consistency is one thing. Batch-to-batch consistency across months of production is harder. When we supply long-run projects, we record the LED bin codes for every batch. This way, if a client reorders six months later, we can match the exact same bin. Ask your supplier if they track bin codes per order.
COB vs. SMD for Color Uniformity
COB (Chip-on-Board) strips naturally offer better visual uniformity because the phosphor layer covers a continuous line of chips. SMD strips (2835, 5050) can show individual LED hot spots. For projects where smooth, dot-free light matters, COB is worth the premium.
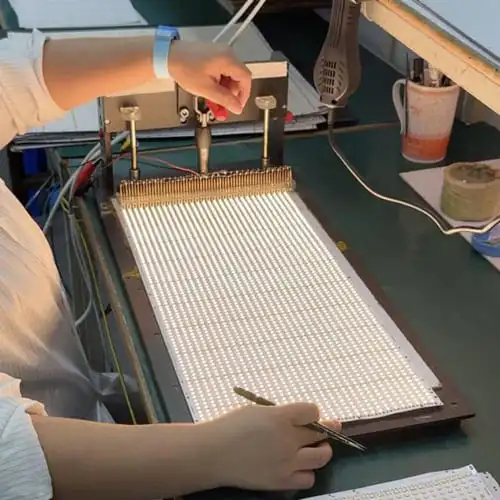
How can I inspect the PCB quality and component durability before placing a bulk order?
One of our Australian partners once received strips where the adhesive backing peeled off within weeks. The root cause was a thin, single-layer PCB that overheated. Physical inspection before ordering could have caught this.
Inspect PCB thickness (minimum 2 oz copper), solder joint quality, LED chip brand markings, coating type, and adhesive strength. Request a small sample batch and run a 24–48 hour burn-in test at full power to check for early failures, discoloration, or excessive heat.
What to Look for on the PCB
Hold the strip flat. A quality strip should not flex too easily. Check the following:
- Copper weight: 2 oz minimum. Thicker copper means better heat dissipation and lower voltage drop. Ask the supplier directly.
- Solder joints: Should be smooth, shiny, and uniform. Cold solder joints 7 look dull and grainy — they will fail.
- Resistor placement: Evenly spaced, properly aligned. Crooked components suggest sloppy SMT processes.
Coating and Waterproofing
For outdoor or wet-area projects, coating matters a lot.
| Coating Type | Durability | Flexibility | Best For |
|---|---|---|---|
| Epoxy (PU glue) | Low — yellows over time | Stiff | Budget indoor |
| Silicone extrusion | High — UV and heat resistant | Flexible | Outdoor, wet areas |
| Nano coating | Moderate | Very flexible | Splash-proof indoor |
| IP68 silicone tube | Very high | Moderate | Submersible |
We always recommend silicone over epoxy for anything exposed to sunlight or temperature swings. Epoxy looks fine initially but degrades within 6–12 months outdoors.
The Burn-In Test
Power the sample strip at full rated current for 24–48 hours. Check for:
- Any dead LEDs
- Color shift (measure CCT before and after)
- Surface temperature (should stay below 60°C for most strips)
- Adhesive integrity — does it still stick?
This simple test catches 90% of quality problems before you commit to a bulk order. Our production line runs aging tests on every batch, and we still have strips from 2019 running in our test rack without failure.
LED Chip Identification
Look for markings on the LEDs themselves. Branded chips (Cree, Lumileds, Samsung, Epistar) can sometimes be identified by package shape or markings. Ask the supplier for the chip datasheet. If they cannot name the chip manufacturer, the chips are likely low-tier.
Where should I look to validate that the supplier's certifications are authentic and up to date?
We once lost a week helping a client verify a CE certificate that turned out to be self-declared with no actual test report behind it. Fake or misleading certifications are more common than you think.
Check certification authenticity by searching the certificate number on the issuing body's official database — UL's online directory, TÜV's Certipedia, or ETL's listing. Request the full test report, not just the certificate. Verify the report covers the exact product model you are buying.
Where to Verify Each Certification
Each certification body has a public database. Here is where to look:
- UL: Search at ul.com/database
- ETL (Intertek): Search at intertek.com/ETL-listed
- TÜV: Search at certipedia.com
- CE: No central EU database — ask for the Declaration of Conformity and the test report from a Notified Body
- RoHS: Request the material test report; no central registry exists
- LM-80: Ask for the LED manufacturer's LM-80 report for the specific chip used
Certificate vs. Test Report
A certificate is just a summary. The test report is the evidence. Always ask for the full report. It should include:
- Testing lab name and accreditation number
- Date of testing
- Exact model numbers tested
- Test standards referenced (e.g., EN 62031, UL 2108)
- Pass/fail results for each test
If the supplier only provides a certificate image but refuses to share the report, walk away.
Common Red Flags
Watch for these signs of fake or misleading certifications:
- Certificate covers a "family" of products but your model is not listed
- No lab accreditation number on the report
- Certificate expired (check valid dates)
- The testing lab does not appear in ILAC or CNAS databases
- Supplier claims "CE certified" but has no EMC or LVD test reports
Market-Specific Certifications
For Australia, you may need SAA or RCM compliance. For Germany and the EU, CE with proper EN standards is mandatory. For Brazil, INMETRO certification requires factory audits by bodies like TÜV SÜD. Always confirm which certifications your target market requires before evaluating a supplier.
Our approach is straightforward: we keep all test reports and certificates in a shared folder for each client. When a project requires specific documentation for bidding, we can send it within hours. If your supplier cannot do the same, their certification process may not be solid.
Conclusion
Verifying LED strip specs takes effort, but it protects your projects and your reputation. Test samples, read full reports, and verify certifications at the source.
Footnotes
- Defines the standard for color consistency in LED products. ↩︎
- Explains the significance of copper weight in PCB manufacturing. ↩︎
- Direct link to UL's database for verifying product certifications. ↩︎
- The official European Union website provides comprehensive information on CE marking, including the declaration of conformity. ↩︎
- Explains the device used for measuring total luminous flux. ↩︎
- Provides context for color measurement and deviation in lighting. ↩︎
- Defines a common soldering defect and its visual characteristics. ↩︎