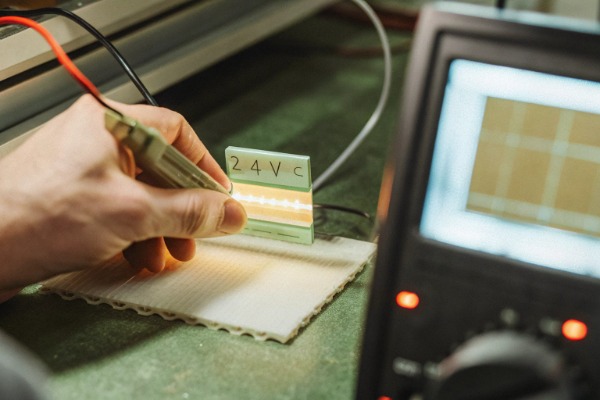
Every week, our production team ships thousands of reels to contractors and wholesalers across Germany and Australia Product specification sheet 1. Yet one question keeps coming back from buyers: how do I know the bulk shipment matches what I approved?
To conduct proper sampling inspection and acceptance testing for incoming LED strip lights, draw random samples from multiple cartons based on a statistically sound plan, then verify documents, visual quality, electrical performance, optical consistency, and waterproof integrity against your purchase specification before issuing a pass or fail decision.
This guide walks you through a repeatable incoming quality control process 2. Whether you purchase 50 reels for a hotel fit-out or 5,000 for distribution, the steps below will help you catch problems before they reach a job site.
How can I create a reliable sampling plan for my bulk LED strip shipments?
When we prepare shipments in our facility, we tag every reel with a batch code, production date, and bin number Third-party certifications 3. But once the goods leave our dock, the buyer needs their own system to verify what actually arrived.
A reliable sampling plan starts with defining the lot, selecting a sample size based on a recognized standard like ISO 2859-1 (AQL), randomizing the draw across cartons and pallets, and setting clear accept/reject numbers before you open a single box.
Why Random Sampling Matters
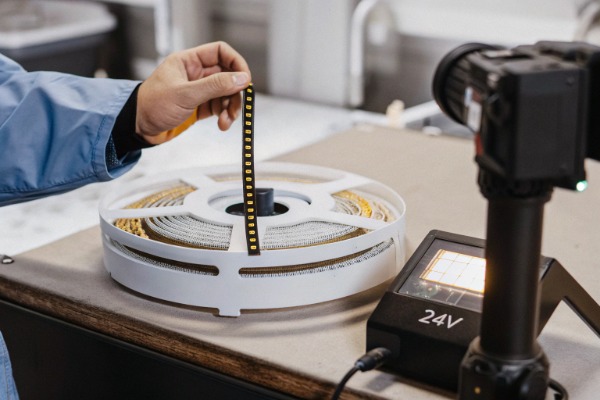
The biggest mistake buyers make is grabbing the first three reels off the top of a pallet. That tells you almost nothing. The top cartons may have been packed last, from the end of a production run, or stored in different conditions during transit. True random sampling 4 means numbering every carton and using a random method to select which ones to open. This removes bias and gives every reel an equal chance of being inspected.
Lot Integrity Comes First
Before you even pick up a box cutter, check the packing list. A single shipment from our warehouse might contain two or three production batches. If you mix batches into one inspection pool, you could pass a lot that contains a hidden problem batch. Always separate by batch code. Each batch is its own lot. Inspect each lot independently.
Choosing Your AQL Level
AQL stands for Acceptance Quality Limit 5. It is the maximum percentage of defective units you are willing to accept. For LED strips, we typically see buyers use the following levels:
| Defect Type | Suggested AQL | Inspection Level |
|---|---|---|
| Critical (safety hazard, wrong voltage) | 0 % | Tightened / 100 % |
| Major (dead LEDs, color shift, wrong CCT) | 1.0 % | General II |
| Minor (slight cosmetic marks, label misalignment) | 2.5 % | General II |
Once you know your AQL and lot size, refer to the ISO 2859-1 6 tables to find your sample size and accept/reject numbers. For example, a lot of 500 reels at General Inspection Level II gives you a sample size of 50. If you set Major AQL at 1.0 %, the table tells you to accept the lot if you find 1 or fewer major defects and reject it if you find 2 or more.
Scale Your Effort to Risk
Not every shipment needs the same scrutiny. Here is how we advise our partners:
| Scenario | Recommended Approach |
|---|---|
| First order from a new supplier | Tightened inspection, larger sample |
| Repeat order, stable supplier history | Normal inspection |
| Safety-critical or outdoor project | Tightened inspection + 100 % check on critical items |
| Low-risk decorative or sample order | Reduced inspection |
A good plan also states who inspects, where, with what tools, and how results are recorded. Write this down as a one-page SOP. Tape it to the inspection bench. Consistency matters more than complexity.
What specific tests should I perform to verify color consistency and brightness in my order?
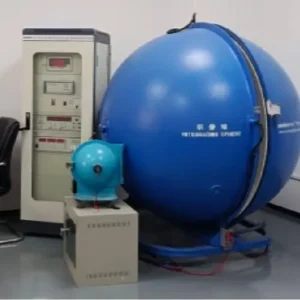
On our production lines, we use integrating spheres and spectrometers 7 to bin every LED chip before assembly. But binning at the factory does not guarantee that the finished product in your warehouse still meets spec after soldering, aging, and shipping.
You should measure luminous flux, correlated color temperature, color rendering index, and color uniformity across multiple reels using a calibrated lux meter or spectrometer, then compare readings against the approved sample and specification sheet to confirm brightness and color consistency.

The Difference Between "It Lights Up" and "It Matches"
A strip can power on perfectly and still fail commercially. Imagine installing 200 meters of cove lighting in a hotel corridor. If half the reels run at 3,200 K and the other half at 2,800 K, the hallway looks patchy. Guests notice. The contractor gets a callback. This is why optical testing is not optional for project-grade work.
Key Optical Parameters to Measure
| Parameter | What It Tells You | Tool Needed | Acceptable Tolerance |
|---|---|---|---|
| Luminous Flux (lm/m) | Brightness per meter | Integrating sphere or calibrated lux meter at fixed distance | ±10 % of spec |
| CCT (K) | Warm, neutral, or cool tone | Color meter / spectrometer | ±100–200 K of stated value |
| CRI (Ra) | Color accuracy under the light | Spectrometer | ≥ 90 for architectural, ≥ 80 for general |
| SDCM (MacAdam steps) | Color consistency between units | Spectrometer | ≤ 3 steps for project grade |
| Flicker percent | Visual comfort | Flicker meter or high-speed camera | < 5 % at rated driver |
A Simple Bench Test Workflow
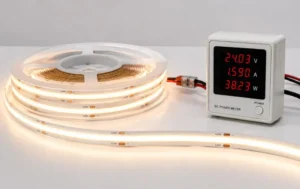
- Set up a regulated DC power supply at the strip's rated voltage. Do not use an unregulated adapter—voltage fluctuation skews readings.
- Power each sampled reel for at least 15 minutes before measuring. LEDs shift slightly during initial thermal stabilization.
- Measure lux at a fixed distance (e.g., 30 cm) at three points: start, middle, and end of the reel.
- Record CCT and CRI 8 at the same three points.
- Compare every reading to your approved sample and the supplier's spec sheet.
If any reel shows a CCT deviation beyond ±150 K from the average, flag it. If more than the AQL allowance of reels fail, reject the lot or request a sort.
Cross-Batch Comparison
Color consistency within a single reel is usually fine. The real risk is between reels from different production batches. Always test at least one reel from each batch code in the shipment. Line them up side by side on a white surface in a dark room. Your eyes can detect a 200 K shift easily. If it looks off, it is off—measure it to confirm.
Addressing the "Sample Passes, Bulk Fails" Problem
We have seen this pattern many times. A pre-production sample looks perfect because it came from a carefully selected LED bin. Then the mass production uses a wider bin range. To prevent this, require your supplier to state the LED bin code on the spec sheet and verify it on the reel label during incoming inspection. If the bin code changes, treat it as a new product and re-approve.
How do I check the waterproof rating and build quality of my project-grade LED strips?
Our engineering team spends weeks designing silicone extrusions and potting processes for IP65, IP67, and IP68 strips. But a small nick in the sleeve during packing or a loose end cap from vibration during sea freight can compromise the entire seal.
Check the waterproof rating by visually inspecting the silicone sleeve or potting for cracks, gaps, and bubbles, verifying end cap adhesion, confirming the IP rating on the label matches the spec sheet, and performing a basic insulation resistance test with a megohmmeter on sampled reels.
Visual and Mechanical Checks
Start with your eyes and hands. Unroll each sampled reel slowly on a clean table. Look for:
- Silicone sleeve damage: cuts, tears, bubbles, delamination, or yellowing.
- End cap integrity: both ends must be sealed. Press gently—a loose end cap means water will enter.
- PCB/FPC condition: no cracks, bent sections, or exposed copper traces.
- Solder joints: inspect under a magnifier. Cold joints look dull and grainy. Good joints are shiny and smooth.
- LED alignment: chips should sit flat and centered on their pads. Tilted or rotated LEDs indicate poor pick-and-place accuracy.
- Adhesive backing: peel back a small section. It should release cleanly from the liner and feel uniformly tacky.
Bend and Pull Test
Flex the strip to the minimum bend radius stated on the datasheet. For most standard flexible strips, this is around 30 mm. Look at the bend zone under magnification. If a solder joint cracks or an LED pad lifts, that is a build quality failure. Also do a simple pull test on connectors and solder-free joints. A firm tug should not separate anything.
Insulation Resistance Test
For waterproof strips, insulation resistance testing 9 is critical. Use a 500 V DC megohmmeter. Connect one lead to the positive input and the other to the outer surface of the strip (or to any exposed metal). A reading above 100 MΩ indicates good insulation. Below 10 MΩ suggests moisture intrusion or a seal defect.
Quick Thermal Check
Power the strip at rated current for 30 minutes. Use an infrared thermometer or thermal camera to scan for hot spots. A healthy strip will show a relatively uniform thermal profile. A localized hot spot—more than 10 °C above the surrounding area—may indicate a high-resistance solder joint, a damaged trace, or a failed LED.
Understanding IP Ratings for Incoming Inspection
Many buyers confuse IP ratings 10 with what they should test on the dock. Full IP testing requires a certified lab and specialized equipment. At incoming inspection, your job is to confirm the strip appears consistent with its claimed rating and that transit has not degraded the seal.
| IP Rating | What It Means | What to Check at Receiving |
|---|---|---|
| IP20 | No water protection | PCB condition, LED alignment, solder quality |
| IP54 | Splash-proof | Sleeve coverage, no gaps at cut points |
| IP65 | Protected against water jets | Silicone sleeve integrity, end cap seal, insulation resistance |
| IP67 | Submersible to 1 m | Full sleeve + end cap + insulation resistance ≥ 100 MΩ |
| IP68 | Continuous submersion | All IP67 checks + verify potting fill, no air pockets |
If your project spec calls for IP67, do not accept a strip that claims IP67 on the label but has a visibly loose end cap. Label claims must match physical condition.
What documentation should I require from my supplier to pass the final acceptance testing?
When we ship an order, we include a full document package tied to the purchase order number. We do this because we know that missing paperwork can hold up a project just as much as a defective product. Not every supplier does the same.
Require your supplier to provide a purchase-order-matched packing list, product specification sheet, factory test report with batch-specific data, third-party certification copies (CE, UL, SAA, RoHS, REACH), an LED bin code record, and any project-specific compliance documents before you sign off on acceptance.

Why Documents Come Before Physical Tests
Many buyers skip straight to powering up strips. That is a mistake. Document review should be your first step. Here is why: if the packing list says 3,000 K but the spec sheet says 4,000 K, you have a discrepancy before you even open a carton. If the test report references a different model number, the data may not apply to your product. If certifications are missing, your end customer or building inspector may reject the installation even though the strip works perfectly.
The Complete Document Checklist
At minimum, require these documents for every shipment:
- Purchase order confirmation — confirms the supplier acknowledged your exact requirements.
- Commercial invoice and packing list — with item codes, quantities, batch codes, carton numbers, and net/gross weights.
- Product specification sheet — covering LED type, LED density, voltage, wattage per meter, CCT, CRI, IP rating, cut interval, dimensions, beam angle, lifespan, and operating temperature range.
- Factory test report — batch-specific, not generic. Should include electrical measurements (voltage, current, power), optical measurements (lumen output, CCT, CRI), and any defect rate data.
- LED bin code record — confirms which LED bins were used in the batch. Essential for color consistency verification.
- Third-party certifications — CE, RoHS, REACH for Europe; UL or ETL for North America; SAA for Australia. Copies must reference the exact product model and be within their validity period.
- Material safety or compliance declarations — RoHS and REACH declarations signed by the supplier, especially for European market buyers.
- Warranty terms — written warranty period and conditions.
Matching Documents to Physical Product
Once you have the paperwork, cross-check it against the physical goods. This is where many discrepancies hide.
| Document Field | Physical Check |
|---|---|
| Model number on spec sheet | Model number printed on reel label |
| Batch code on test report | Batch code sticker on each reel |
| LED density (e.g., 120 LEDs/m) | Count LEDs in a 10 cm segment, multiply by 10 |
| Rated voltage (e.g., 24 V DC) | Verify label and test with power supply |
| CCT on spec sheet (e.g., 3,000 K) | Measure with color meter |
| IP rating on spec sheet | Visual inspection of waterproof construction |
| Roll length (e.g., 5 m) | Measure a sample reel |
| Certification mark on document | Certification mark printed on product or label |
If any field does not match, flag it immediately. Do not assume it is a typo. A wrong voltage on the label, for example, can create a safety hazard if an installer follows the label instead of the spec sheet.
When to Hold a Shipment
There are clear situations where you should quarantine a shipment even if the product looks fine:
- Certifications are expired, missing, or reference a different model.
- The factory test report is generic and does not reference the specific batch.
- The packing list quantity does not match the physical count.
- The spec sheet CCT or CRI differs from the purchase order.
- There is no LED bin code documentation, making color matching impossible for future reorders.
In our experience, the best buyer-supplier relationships are built on transparency. A good supplier will provide these documents proactively. If you have to chase paperwork repeatedly, that itself is a quality signal worth noting.
Conclusion
A strong incoming inspection process does not require a laboratory. It requires a clear sampling plan, the right tests for your application, and documented pass/fail criteria tied to your purchase specification.
Footnotes
- Describes a product specification sheet as a blueprint outlining design, functionality, and requirements. ↩︎
- Defines quality control as a systematic process to ensure products meet specific standards. ↩︎
- Defines third-party certification as an independent review verifying product compliance with specific standards. ↩︎
- Explains random sampling as a method where every population member has an equal chance of selection. ↩︎
- Replaced HTTP 404 with a Wikipedia article, which is a preferred authoritative source, providing a clear definition of Acceptance Quality Limit (AQL). ↩︎
- Replaced HTTP 403 with a reputable quality inspection company's explanation that references and follows the ISO 2859 standard. ↩︎
- Describes spectrometers as scientific instruments used to separate and measure spectral components of phenomena. ↩︎
- Explains CCT as correlated color temperature and CRI as color rendering index in lighting. ↩︎
- Explains insulation resistance testing as a diagnostic procedure to evaluate insulation effectiveness in electrical systems. ↩︎
- Replaced HTTP 403 with an authoritative source from the International Electrotechnical Commission (IEC), which developed the IP rating system. ↩︎


 English
 Spanish
 German
 Russian
 Arabic
 French
 Portuguese