
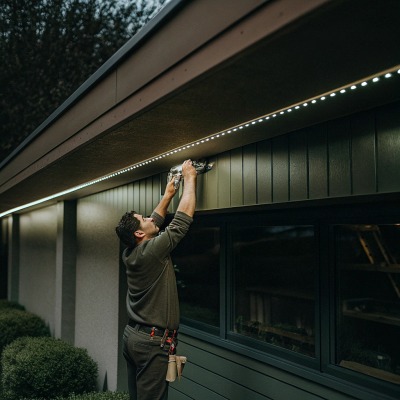
Our LED strips to contractors who install them in wildly different environments — and the installation method often matters more than the strip itself.
The best LED strip installation methods include adhesive backing, aluminum mounting channels, clips or brackets, double-sided reinforcement tape, solderless connectors, and soldered joints. Each method suits different surfaces, budgets, and project goals, so the ideal approach depends on your specific environment and performance requirements.
There is no single "right" way to install LED strips CE for Europe 1. The method that works perfectly in a clean, dry kitchen may fail completely on a textured outdoor wall. Below, we break down the key decisions you will face and help you choose based on real-world conditions rather than assumptions.
How do I decide between adhesive backing and aluminum profiles for my commercial lighting project?
When we run production samples for our export clients, we always ask one question first: where is this strip going? The answer shapes everything, from the mounting method to the thermal design.
For commercial lighting, adhesive backing works best on smooth, clean, indoor surfaces where cost and speed matter most. Aluminum profiles are the better choice when you need a professional finish, improved heat dissipation, and long-term durability — especially for high-output or long-run installations.
Understanding Adhesive Backing
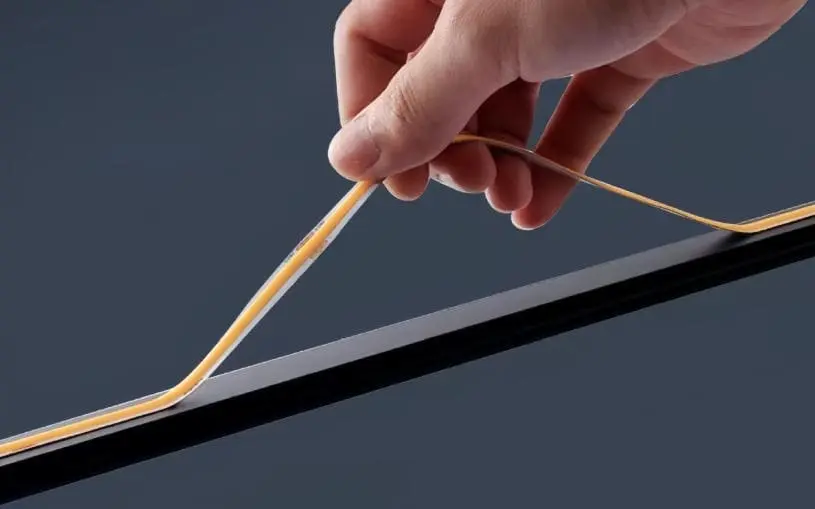
Adhesive backing is the fastest and cheapest way to mount LED strips. Most quality strips come with 3M VHB tape 2 pre-applied. You peel, press, and you are done. For smooth surfaces like glass, metal, or sealed wood, it holds well. But here is the catch: adhesive is only as good as the surface beneath it.
Poor surface preparation is the number one reason adhesive fails. Before applying, clean the surface with isopropyl alcohol 3 and let it dry fully. Avoid sticking strips to dusty, oily, or textured surfaces. One tip from our QC team: peel and press a short section at a time. Do not remove all the backing at once. This keeps the strip straight and reduces misalignment.
Understanding Aluminum Profiles
Aluminum channels, also called profiles or extrusions, are the go-to for professional-grade installs. They serve three purposes at once. First, they act as a heat sink 4, pulling heat away from the LEDs and extending lifespan. Second, they protect the strip from physical damage. Third, when paired with a diffuser cover, they eliminate visible LED dots and create a smooth, linear light output.
The trade-off is cost and labor. Aluminum profiles require measuring, cutting, and mounting with screws or clips. They add material expense. But for high-end retail, hospitality, or architectural projects, they are almost always worth it.
When to Choose Which
| Factor | Adhesive Backing | Aluminum Profile |
|---|---|---|
| Installation Speed | Very fast | Moderate — requires measuring and mounting |
| Cost | Low | Higher — material and labor |
| Heat Management | Minimal | Excellent — acts as heat sink |
| Appearance | Visible LED dots | Clean, diffused linear light |
| Durability | Depends on surface and environment | High — strip is protected |
| Best Use Case | Smooth indoor surfaces, temporary installs | Commercial, architectural, long-run installs |
| Removability | Easy but may leave residue | More permanent, requires hardware removal |
A Practical Middle Ground
Many of our contractor clients use a hybrid approach. They apply adhesive strips inside aluminum channels, getting the speed of tape with the performance benefits of the profile. This is especially useful for under-cabinet kitchen lighting, cove lighting in hotels, and media wall installs where appearance is critical.
If your project involves high-output strips (above 14W per meter), enclosed coves, or runs longer than 5 meters, we strongly recommend aluminum channels. The heat buildup alone can degrade adhesive and reduce LED life. For short, low-power accent lighting in a dry indoor space, adhesive alone is usually fine.
What are the best ways to install waterproof LED strips in my outdoor or wet environment projects?
Our engineering team has tested dozens of IP-rated strip configurations for clients in Australia and Germany, where outdoor compliance standards are strict. Waterproofing is not just about the strip — it is about the entire installation system.
For outdoor or wet environments, use IP65 or IP67-rated LED strips combined with sealed connectors, waterproof end caps, and corrosion-resistant mounting hardware. Silicone-coated strips (IP65) suit sheltered outdoor areas, while fully encased strips (IP67/IP68) are necessary for direct water exposure or submersion.
IP Ratings Explained Simply
IP stands for Ingress Protection. IP Ratings 5 The first digit rates dust resistance. The second rates water resistance. For LED strips, the most common ratings are:
| IP Rating | Protection Level | Typical Use |
|---|---|---|
| IP20 | No water protection | Indoor dry areas only |
| IP65 6 | Silicone coating on surface — splash-proof | Sheltered patios, bathrooms, covered outdoor areas |
| IP67 | Silicone sleeve encasement — submersible briefly | Outdoor exposed to rain, garden paths |
| IP68 | Fully sealed — continuous submersion | Pools, fountains, underwater features |
Choosing the wrong IP rating is a common and expensive mistake. We have seen contractors use IP20 strips under outdoor eaves, thinking they are "covered." But condensation, wind-driven rain, and humidity still reach the strip. For any outdoor application, IP65 is the minimum.
Mounting Methods for Wet Environments
Adhesive backing alone is unreliable outdoors. Moisture, temperature swings, and UV exposure weaken tape over time. Instead, use these methods:
- Aluminum profiles with sealed end caps. The profile protects the strip and the sealed caps prevent water ingress at the ends. Use stainless steel or aluminum screws to avoid rust.
- Mounting clips rated for outdoor use. Plastic or stainless steel clips hold the strip mechanically. They work well on brick, stone, or wood where adhesive would fail.
- Silicone-filled channels. For maximum protection, some installers fill the channel with clear silicone after placing the strip inside. This creates a fully sealed unit.
Connectors and Joints
Every connection point is a potential failure point outdoors. Use waterproof connectors with silicone gaskets. If you must solder, seal the joint with heat-shrink tubing and apply marine-grade silicone. Solderless connectors are convenient indoors, but outdoors they risk moisture ingress at the contact points.
Drainage and Ventilation
Even waterproof strips can fail if water pools around them. Mount strips at a slight angle or in channels with weep holes so water drains away. In humid climates, allow some ventilation around the strip to prevent condensation buildup inside sealed housings.
Our team always recommends a full mock-up test before committing to a large outdoor install. Run a one-meter test section in the actual environment for 48 to 72 hours. Check for condensation, adhesive performance, and connector integrity. This small step saves huge rework costs later.
How can I prevent voltage drop and light discontinuity in my long-run LED strip installations?
Voltage drop 7 and visible joints are two of the most common complaints we hear from distributors and contractors. When we developed our high-voltage strip lines, solving these issues was our primary engineering goal.
To prevent voltage drop in long LED strip runs, use parallel wiring or multiple power injection points instead of daisy-chaining strips end to end. For light discontinuity, choose strips with tightly spaced LEDs and use seamless connectors or soldered joints to eliminate dark spots at connection points.
What Causes Voltage Drop?
LED strips are essentially long, thin circuit boards. As current travels along the copper traces, resistance causes voltage to decrease over distance. The result: LEDs at the far end of the strip appear dimmer and sometimes shift in color temperature 8. On a 5-meter 12V strip, voltage drop is often visible by the last meter. On a 10-meter run, it can be dramatic.
Practical Solutions
There are several proven ways to manage this problem:
Power injection. Instead of feeding power from one end only, inject power at both ends or at regular intervals along the run. This shortens the effective distance current must travel. For runs over 5 meters, we recommend injection points every 5 meters at minimum.
Higher voltage strips. A 24V strip carries the same wattage at half the current of a 12V strip, which means less voltage drop over the same distance. For very long runs, 48V or AC high-voltage strips (such as 220V) reduce drop even further. Our high-voltage lines are specifically designed for 10 to 50-meter continuous runs in commercial settings.
Thicker copper traces. Not all strips are equal. Wider or thicker copper PCB traces carry more current with less resistance. When specifying strips for long runs, ask your supplier about trace width. We use 2oz copper on our long-run products to reduce this issue at the source.
Eliminating Light Discontinuity
Light discontinuity — those visible dark spots or gaps at connection points — is a separate but related problem. It happens when:
- LED spacing near the cut point leaves a gap.
- Connectors add physical distance between LED segments.
- Strips are bent sharply at corners, causing uneven light output.
Solutions for Seamless Light
| Problem | Cause | Solution |
|---|---|---|
| Dark spots at joints | Physical gap between strip segments | Use zero-gap connectors or solder directly |
| Dim ends on long runs | Voltage drop over distance | Add power injection points or use higher voltage strips |
| Color shift at far end | Voltage-dependent color temperature change | Use constant-current strips or inject power at both ends |
| Visible dots instead of line | LED spacing too wide | Choose strips with 120 or 160 LEDs per meter |
| Uneven light at corners | Sharp bending damages traces | Use flexible corner connectors or angle the strip in segments |
Planning the Power Supply
Always calculate total wattage 9 before selecting a power supply. Add up the watts-per-meter rating across the full length. Then add 20 to 25 percent headroom. An undersized power supply causes flickering, dimming, and shortened lifespan. For example, a 10-meter run at 14.4W per meter needs 144W. With 20 percent headroom, spec a 180W supply.
For very long commercial runs, consider distributed power supplies placed at intervals along the run rather than one large central supply. This also reduces wire gauge requirements and simplifies maintenance.
Which installation techniques will help me minimize labor costs and simplify my project-based supply chain?
Over the years, we have worked closely with contractors and wholesalers who tell us the same thing: the strip itself is only part of the cost. Labor, coordination, and rework eat into margins fast. That feedback shaped how we package, cut, and accessorize our products.
To minimize labor costs, choose LED strips with pre-applied adhesive and pre-attached connectors, use solderless clip connectors for fast joins, specify pre-cut lengths matched to your project layout, and source strips, profiles, and accessories from a single supplier to reduce coordination overhead.
Pre-Cut and Pre-Wired Strips
One of the simplest ways to reduce on-site labor is to move preparation off-site. When we fulfill project orders, we can pre-cut strips to exact lengths, pre-solder lead wires, and pre-attach connectors based on the client's layout drawings. This means the installer opens the box and mounts — no cutting, no soldering, no guessing.
For contractors managing multiple job sites, pre-cut kits dramatically reduce skilled labor time. A technician who would spend 30 minutes measuring, cutting, and connecting can complete the same section in under 10 minutes with a pre-built kit.
Solderless Connectors vs. Soldering
This is a practical trade-off every project must weigh:
| Factor | Solderless Connectors | Soldered Joints |
|---|---|---|
| Speed | Very fast — clip and go | Slow — requires iron, flux, skill |
| Reliability | Good short-term, can loosen over time | Excellent — permanent bond |
| Skill Required | Minimal | Moderate to high |
| Appearance | Slightly bulky | Compact and flush |
| Best For | Temporary installs, fast turnarounds, DIY | Permanent commercial installs, outdoor, high-vibration |
| Cost | Low per connector | Low material cost, high labor cost |
For most commercial indoor projects, solderless connectors strike the right balance. They are fast, require no special tools, and perform well in stable environments. For outdoor, high-vibration, or premium installations, soldering remains the gold standard.
Single-Source Supply Chain
A hidden cost in many LED strip projects is multi-vendor coordination. One supplier for strips, another for profiles, a third for power supplies, and a fourth for connectors. Each vendor has different lead times, shipping schedules, and quality standards. When something does not fit, nobody takes responsibility.
We solve this by offering a full kit approach. Strips, aluminum channels, diffusers, end caps, connectors, power supplies, and controllers — all from one source, tested together before shipment. This eliminates compatibility guesswork and reduces procurement overhead.
Smart Controls and Future Maintenance
Modern commercial projects increasingly require smart controls — dimming, color tuning, scheduling, and app or voice integration. The installation method affects where you place controllers, how you route wiring, and how accessible components are for future maintenance.
Plan controller placement during the layout phase, not after. Hide controllers in accessible cavities — not sealed behind drywall. Use quick-disconnect connectors at controller junctions so a failed controller can be swapped without cutting wires. These small choices during installation save significant service costs later.
Certification and Compliance
For project-based procurement, having the right certifications is not optional. SAA for Australia 10, CE for Europe, UL or ETL for North America. We maintain these certifications across our core product lines so our clients can include compliance documentation directly in their project bids. This eliminates the delay of waiting for test reports or requesting special certification runs.
When you simplify the supply chain to one qualified source, you also simplify the paper trail. One invoice, one set of test reports, one point of contact. For project estimators and procurement officers, this is often as valuable as the product itself.
Conclusion
The best LED strip installation method is almost always a combination — adhesive or channels for mounting, connectors or solder for joins, and proper planning for power and environment. Choose based on your actual conditions, not assumptions.
Footnotes
- Details CE marking as a mandatory certification for products sold in the European Union, ensuring health and safety. ↩︎
- Official product page for 3M VHB tapes, detailing their properties and applications. ↩︎
- Guide on surface preparation, including the use of isopropyl alcohol for cleaning before adhesive application. ↩︎
- Explains what a heat sink is, how it works, and its importance in dissipating heat from electronic components. ↩︎
- Official IEC explanation of Ingress Protection (IP) ratings, defining the standard and its two-numeral code. ↩︎
- Detailed explanation of the IP65 rating, specifying its protection against dust and water jets. ↩︎
- Explains voltage drop in electrical circuits, its causes (resistance), and consequences for equipment performance. ↩︎
- Defines lighting color temperature, its measurement in Kelvins, and its impact on visual effect. ↩︎
- Guide on calculating wattage for electrical appliances, differentiating between apparent and real power. ↩︎
- Explains SAA certification as a mandatory safety requirement for electrical products in Australia and New Zealand. ↩︎

 English
 Spanish
 German
 Russian
 Arabic
 French
 Portuguese