
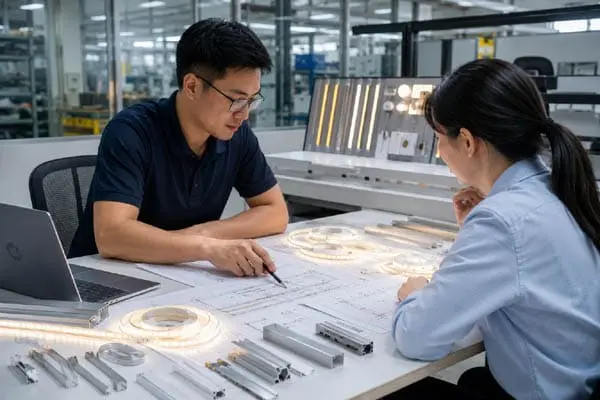
We Usually get requests from contractors and distributors who need LED strips that fit exact project specs — not off-the-shelf guesses. LED strip lights 1
Yes, LED strip lights can be fully customized in length, interface type, and protective housing. You can order strips built to exact measurements, fitted with specific connectors, and enclosed in housings rated for your environment. However, minimum order quantities usually apply, and skipping MOQ thresholds can drive unit costs up significantly.
Customization is not a single feature. It is a system of decisions that work together. Get one layer wrong — say, the connector type or the housing profile — and the whole installation suffers. This guide walks you through the three layers of LED strip customization: cut, connect, and protect. We also cover how OEM private labeling ties it all together for brands that need product consistency across projects.
How can I get custom LED strip lengths that eliminate light discontinuity in my long-run projects?
Light gaps and visible joints are the number one complaint we hear from contractors installing long-run LED strips in commercial spaces. It is a problem that starts before the strip ever leaves the factory.
You can eliminate light discontinuity by ordering pre-built custom lengths matched to your project dimensions, using COB strips for dot-free output, and choosing 24V or 48V systems that support longer single runs without voltage drop or brightness fade.
Understanding Cut Points
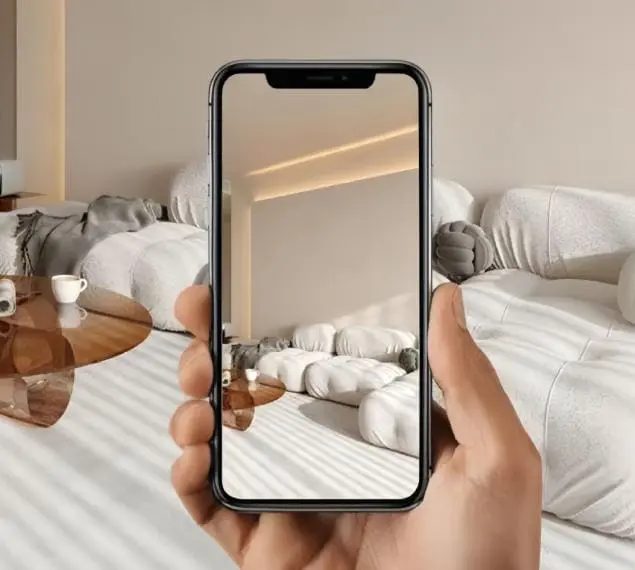
Every LED strip has designated cut marks printed on the PCB. These marks usually appear as small copper pads or scissor icons. You can only cut at these points. If you cut between them, you damage the circuit and that segment will not work.
Cut intervals depend on the strip type. A standard 12V strip with 60 LEDs per meter might have a cut point every 3 LEDs, which means roughly every 5 cm. A 24V strip with the same density might allow cuts every 6 LEDs, roughly every 10 cm. High-density COB strips 2 often have shorter cut intervals, giving you more precision.
Cut-to-Length vs. Custom-Built-to-Length
There is an important difference here. "Cut-to-length" means someone trims a standard reel to your size. "Custom-built-to-length" means the strip is manufactured to your exact specification from the start — with solder joints, leads, and end caps already attached.
When our engineering team builds strips to length, we eliminate the field splices that cause light discontinuity. The result is a single, unbroken run of light. For long corridors, retail display walls, and cove lighting, this matters enormously.
| Feature | Cut-to-Length (Field) | Custom-Built-to-Length (Factory) |
|---|---|---|
| Precision | Limited to nearest cut point | Exact to project spec |
| Light Continuity | Possible gaps at joints | Seamless, no visible joints |
| Labor On-Site | Higher — cutting, soldering, testing | Lower — plug in and mount |
| Waste | Offcuts from each reel | Near zero |
| Cost Per Unit | Lower upfront, higher labor | Higher upfront, lower total cost |
Why Voltage Matters for Long Runs
Voltage drop 3 is the silent killer of long LED strip runs. On a 12V strip, brightness can visibly fade after about 5 meters from the power feed. On a 24V strip, you can often run 10 meters or more before noticing a drop. For very long runs — say, 15 to 20 meters — 48V constant-voltage systems or constant-current designs are the better choice.
Power injection 4 is another solution. By feeding power at multiple points along the strip, you keep brightness even from end to end. In our experience exporting to Australia and Germany, most commercial projects over 8 meters benefit from a power injection plan.
COB Strips and Dot-Free Light
COB (chip-on-board) LED strips produce a continuous line of light with no visible LED dots. This is a major advantage for architectural lighting where clean aesthetics matter. COB strips can reduce the need for heavy diffusion, but we still recommend aluminum channels for thermal management 5 and physical protection.
One thing to note: COB strips draw more power per meter in many configurations. Make sure your power supply and wiring can handle the load, especially on longer runs.
What interface and connector options are available to help me reduce installation time on-site?
When we talk to contractors about what slows down their LED strip projects, the answer is almost never the strip itself. It is the wiring, the connections, and the compatibility headaches between components.
You can choose from soldered leads, solderless snap connectors (2-pin through 6-pin), pigtail wires, terminal blocks, and quick-tap connectors — all matched to your strip type, voltage, and control system. Factory-terminated leads save the most installation time and reduce on-site errors.
Soldered vs. Solderless Connections
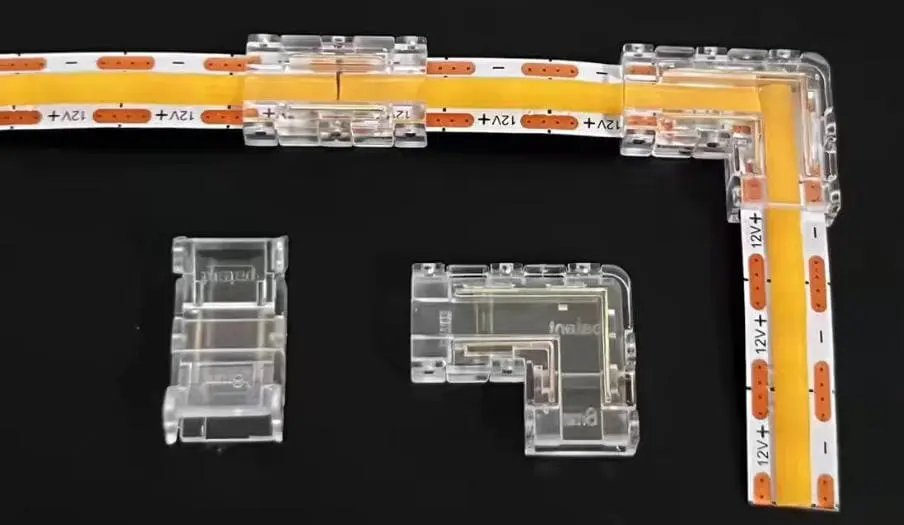
Soldering gives you the strongest, most reliable electrical bond. For permanent installations — especially in commercial or outdoor settings — soldered connections 6 are the gold standard. They resist vibration, temperature changes, and moisture better than any clip-on connector.
Solderless connectors 7, on the other hand, are fast. A snap-on 2-pin connector takes seconds to attach. For residential jobs, temporary setups, or projects where the installer is not comfortable soldering, they work well. But cheap connectors are a common failure point. We have seen projects come back with flickering or dead sections because a low-quality connector loosened over time.
Our recommendation: if the installation is permanent and high-value, use soldered connections or order factory-terminated leads. If speed matters and the project is lower-risk, quality solderless connectors are fine.
Pin Configurations by Strip Type
The number of pins on your connector must match the strip type. Pin Configurations 8 Here is a quick reference:
| Strip Type | Pin Count | Wires | Notes |
|---|---|---|---|
| Single color (white) | 2-pin | Positive + Negative | Simplest setup |
| CCT / Tunable white | 3-pin | Positive + Warm + Cool | Requires CCT controller |
| RGB | 4-pin | R + G + B + Common | Needs RGB controller |
| RGBW | 5-pin | R + G + B + W + Common | Needs RGBW controller |
| Addressable (WS2812B, etc.) | 3-pin | Data + Power + Ground | Requires compatible digital controller |
Mismatching pin count is a surprisingly common mistake. If your controller outputs 4-pin RGB but your strip is RGBW, you will lose a channel. Always confirm the strip type and controller type before ordering connectors.
Factory-Terminated Leads and Pigtails
The fastest way to reduce on-site labor is to have your strips arrive with leads already soldered and sealed at the factory. We call these "pigtails" — short wire leads with bare ends, JST plugs, or terminal-ready tips attached before the strip ships.
When we prepare custom orders for distributors in Germany and Australia, factory-terminated leads are one of the most requested features. The installer just connects the lead to the driver or controller. No soldering iron, no stripping wire, no guesswork.
Power Injection and Long-Run Wiring
For runs longer than 5 to 10 meters, power injection becomes critical. This means feeding power at multiple points along the strip, not just at one end. Without it, the LEDs farthest from the power source will appear dimmer or shift in color.
Power injection usually requires tap connectors or T-splices placed at intervals along the run. The exact interval depends on the strip's wattage per meter and the voltage. A general rule: inject power every 5 to 10 meters for 24V strips and more frequently for 12V strips.
Controller and Driver Compatibility
Your interface is not just the physical connector. It also includes the controller, the driver, and any automation system the strip must talk to. RGB strips need an RGB controller. Addressable strips need a digital controller that speaks the correct protocol (WS2812B, SK6812, APA102, etc.). Tunable white strips need a CCT driver or a 0-10V dimmer, depending on the setup.
If your project integrates with a smart home system — KNX, DALI, Zigbee, or Wi-Fi — the controller must bridge between the LED strip and the automation platform. This is where custom interface planning saves time and avoids expensive rework. We often work with specifiers and designers early in the project to map out the full signal chain from wall switch to LED chip.
Can I customize the protective housing and IP rating to meet my specific outdoor project safety standards?
Our quality team spends a lot of time testing housings and IP rating 9s because outdoor failures are expensive — not just in replacement cost, but in reputation damage for the contractor or brand that specified the product.
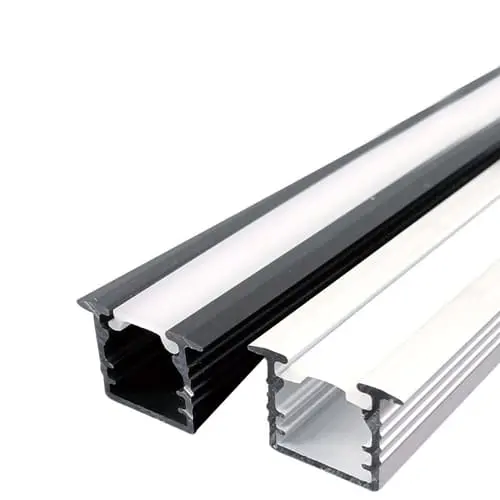
Yes, protective housings and IP ratings are fully customizable. You can select from aluminum extrusion profiles, silicone sleeves, polycarbonate covers, and waterproof end caps in various shapes and IP levels — from IP20 for dry indoor use up to IP68 for full submersion — to match your project's environmental and safety requirements.
What Protective Housings Actually Do
A housing is not just decoration. It serves at least four functions at once:
- Physical protection — shields the strip from dust, fingers, cleaning chemicals, and minor impacts.
- Thermal management — aluminum profiles draw heat away from the LEDs, which extends lifespan and prevents color shift.
- Light diffusion — a frosted or opal cover smooths out individual LED dots into a continuous line of light.
- Directional control — angled profiles (like 45-degree corner channels) aim the light where you need it instead of letting it scatter.
Common Housing Types
| Housing Type | Best Use Case | Diffusion | Heat Dissipation |
|---|---|---|---|
| Surface-mount aluminum channel | Under cabinets, shelving, cove lighting | Flat opal or clear lens | Good |
| Recessed aluminum channel | Flush-mount in drywall or millwork | Opal lens, sits flush | Good |
| 45-degree corner channel | Inside corners, angled throw | Opal lens | Good |
| Silicone sleeve (IP65–IP67) | Outdoor accents, wet areas | Semi-transparent silicone | Moderate |
| Polycarbonate tube (IP68) | Submersible, fountain, pool edge | Clear or frosted tube | Low — requires design care |
| Plastic surface channel | Low-cost indoor, lightweight | Clear or opal snap-on | Poor |
The Waterproofing vs. Heat Dissipation Tradeoff
This is one of the most misunderstood areas of LED strip specification. Higher IP ratings mean more protection from water and dust, but they also mean more material between the LED and the open air. That material can trap heat.
For example, a silicone-filled IP67 strip sealed inside a polycarbonate tube might survive rain, but the trapped heat can shorten LED life and cause premature lumen depreciation. This is especially true for high-output strips running at 15W per meter or more.
The solution is careful thermal design. Aluminum extrusions with sealed end caps and gaskets can achieve IP65 or IP66 while still dissipating heat effectively. In our factory, we test housing combinations under thermal load to make sure the junction temperature stays within safe limits.
Choosing the Right IP Rating
Not every outdoor project needs IP68. Here is a simple guide:
- IP20 — Dry indoor environments. No moisture protection.
- IP44 — Splash-resistant. Suitable for bathroom mirrors or covered outdoor areas.
- IP65 — Jet-resistant. Good for most outdoor accent lighting under eaves or in landscaping.
- IP67 — Temporary submersion. Suitable for ground-level installations where water may pool briefly.
- IP68 — Continuous submersion. Required for fountain edges, pools, and underwater features.
Over-specifying IP rating wastes money and can hurt thermal performance. Under-specifying risks failure and safety liability. We always ask our clients about the actual installation environment — not just "outdoor" or "indoor" — before recommending an IP level.
Aesthetic Considerations
Housing choice also affects how the light looks. A deep aluminum channel with a heavy opal diffuser creates a wide, soft glow. A shallow channel with a clear lens preserves maximum brightness but may show individual LED dots. For COB strips, a shallow profile with a lightly frosted lens often gives the best balance of brightness and smoothness.
Corner profiles at 45 degrees are popular for retail displays and architectural coves where you want the light to hit a wall or ceiling at an angle. Recessed channels are preferred for high-end residential and hospitality projects where the strip should be invisible when turned off.
How do I partner with you for OEM private labeling to ensure my brand's product consistency and quality?
Many of our long-term partners started with a single test order and grew into full private-label programs. The path from first sample to branded product line is shorter than most people think — but it does require planning.
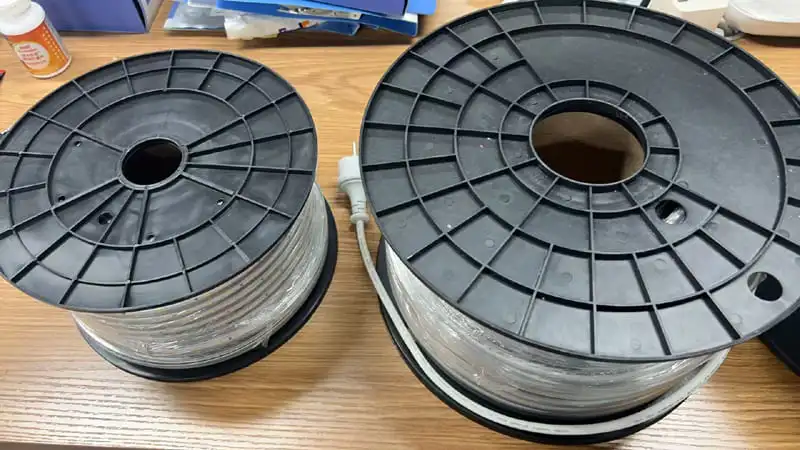
You can partner with us for OEM private labeling by sharing your brand specs, packaging design, and technical requirements. We handle custom printing, product marking, QC to your standards, and consistent batch-to-batch production — typically starting from a low MOQ to let you test the market before scaling.
What OEM Private Labeling Includes
OEM private labeling is more than printing a logo on a box. At our facility, it covers:
- Product marking — your brand name, model number, and certification marks printed or laser-etched on the strip PCB and housing.
- Custom packaging — your box design, insert cards, installation guides, and QR codes linking to your own support pages.
- Consistent specifications — locked-in LED bin codes, color temperatures, CRI values, and lumen outputs that stay the same order after order.
- QC aligned to your standards — we can follow your QC checklist or develop one together, with inspection photos and test reports for every batch.
Why Batch Consistency Matters
Color variance between batches is one of the biggest pain points for distributors and contractors. If your first shipment of 4000K strips looks slightly different from your second, your end customer notices — especially in open-ceiling offices, retail spaces, or residential renovations where old and new strips sit side by side.
We control this by locking LED bin codes at the component purchasing stage. Each production run uses LEDs from the same bin, so color temperature, brightness, and CRI stay within a tight tolerance. For critical projects, we can also provide MacAdam ellipse data 10 to prove color consistency.
The Typical OEM Partnership Process
Here is how most partnerships develop:
- Initial inquiry — you share your project requirements, target specs, and brand guidelines.
- Sample development — we build samples to your spec. This usually takes 5 to 10 business days.
- Sample approval — you test, review, and approve. We adjust if needed.
- First production order — low MOQ to let you test market response.
- Ongoing orders — we hold your specs on file. Reorders are faster and more consistent.
- Scaling — as volumes grow, unit costs drop and we can offer warehousing, kitting, or drop-ship options.
Certifications and Compliance
If you are selling into Australia, you likely need SAA or RCM certification. For Germany and the EU, CE marking is mandatory, and many projects require additional compliance with EN standards. We help our OEM partners navigate these requirements by providing test reports, certificates, and documentation packages that speed up the approval process.
Having the right certifications on your private-label product is not optional — it is a gatekeeper for project bids and retail shelf placement. We keep our core product lines certified and can extend or update certifications for custom variants.
Cost and MOQ Reality
Here is the honest truth: customization costs more when volumes are small. Logo printing, custom packaging, and locked bin codes all add setup costs. At very low quantities — say, under 100 meters — those setup costs get spread across fewer units, and the per-meter price goes up.
But the tradeoff is worth it for most serious brands. A branded, consistent, project-ready product commands higher margins and builds customer loyalty. Most of our partners find that the break-even point comes quickly once they move past the initial test phase.
Conclusion
LED strip customization is a system design choice, not a single feature. Plan your length, interface, and housing together — and partner with a supplier who can deliver all three consistently under your brand.
Footnotes
- Provides a comprehensive overview of LED strip lights. ↩︎
- Explains the Chip-on-Board technology used in COB strips. ↩︎
- Authoritative source (Wikipedia) providing a comprehensive explanation of voltage drop in electrical circuits. ↩︎
- Details how power injection prevents brightness fade in long LED runs. ↩︎
- Emphasizes the critical role of thermal management in LED reliability. ↩︎
- Detailed guide on electronic soldering, covering what it is, necessary tools, and techniques for making good soldered connections. ↩︎
- Comprehensive explanation of solderless terminals, including their types, advantages, and applications in electrical connections. ↩︎
- Illustrates different pin configurations for various LED strip types. ↩︎
- Explains the International Protection (IP) rating system for enclosures. ↩︎
- Defines MacAdam ellipse as a measure of color difference in lighting. ↩︎

 English
 Spanish
 German
 Russian
 Arabic
 French
 Portuguese