
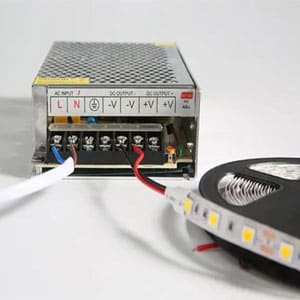
When contractors and wholesalers placing their first orders will confuse: should I go with 12V or 24V LED strips thermal performance 1? It sounds simple, but the wrong choice leads to dim spots, overheated wires, and costly rework on site.
Choose 24V LED strips for runs longer than 5 meters to minimize voltage drop, reduce current draw, and simplify wiring. Choose 12V for short runs under 5 meters where tighter cut intervals and compatibility with 12V battery systems matter most. Always match your power supply voltage to the strip voltage exactly.
The real answer depends on your project's run length, budget, and installation complexity. Below, we break down four key decision factors so you can spec the right voltage with confidence and avoid expensive mistakes in the field.
How do I choose between 12V and 24V to ensure zero voltage drop in my long-run project?
Voltage drop 2 is the single biggest headache we hear about from our export partners in Germany and Australia. Contractors install a beautiful 10-meter cove run, and the far end looks noticeably dimmer. The root cause is almost always a mismatch between voltage spec and run length.
To minimize voltage drop in long runs, choose 24V LED strips. They carry half the current of 12V strips at the same wattage, which dramatically reduces resistive losses over distance. A 24V strip can run up to 10 meters from one power feed point, while a 12V strip typically maxes out at 5 meters before visible dimming occurs.
What Exactly Is Voltage Drop?
Voltage drop is the gradual loss of electrical pressure 3 as current travels through a conductor. Think of it like water pressure dropping at the end of a long garden hose. The longer the wire (or the LED strip's internal copper traces), the more voltage is lost to resistance. When the voltage at the end of the strip falls too low, the LEDs there receive less power and appear dimmer.
The formula is straightforward: Voltage Drop = Current (I) × Resistance (R). Since resistance increases with distance, and current is higher in a 12V system for the same wattage, the problem compounds quickly.
The Math Behind 12V vs. 24V Voltage Drop
Let's use a real-world example. Suppose you need 48 watts of LED power over a 10-meter run.
| Parameter | 12V System | 24V System |
|---|---|---|
| Voltage | 12V DC | 24V DC |
| Power | 48W | 48W |
| Current (I = P/V) | 4.0A | 2.0A |
| Max single-feed run | ~5m (16.4 ft) | ~10m (32.8 ft) |
| Voltage drop at 10m | Severe (>10%) | Manageable (<5%) |
| Power injection needed? | Yes, at midpoint or both ends | Usually not for 10m |
At 12V, you are pushing 4 amps through the strip's thin copper traces. Over 10 meters, the voltage at the far end can drop by 15% or more. That is well beyond the 10% threshold where the human eye starts to notice uneven brightness. At 24V, the same 48 watts only requires 2 amps. The voltage drop is cut roughly in half, keeping the far end bright and uniform.
When 12V Still Works Fine
For runs under 5 meters, 12V performs perfectly well. We produce a lot of 12V strips for under-cabinet kitchen lighting and display case accent strips. These are short, contained applications where voltage drop is negligible. If your project fits inside a 5-meter window from the power feed, 12V is a completely valid and often more convenient choice.
Practical Tips From Our Production Line
When we test long-run samples for wholesale clients, we always measure voltage at the far end under full load. Our engineers have found that even within the "safe" range of 10 meters on 24V, high-density strips (120 LEDs/m or more) can still benefit from center-feed wiring or power injection at the far end. The key takeaway: voltage spec sets your baseline, but good wiring practice seals the deal.
If you are specifying for a commercial project with runs over 10 meters, talk to your supplier about power injection points regardless of voltage. No LED strip—12V or 24V—delivers perfect results at 15 or 20 meters from a single feed without help.
Will a 24V system help me reduce installation complexity and power supply costs?
When our team works with contractors on large commercial projects—retail fit-outs, hotel corridors, facade lighting—cost conversations always go beyond the strip itself. The real expense is in the wiring, the power supplies, the controllers, and the labor hours on site.
Yes, a 24V system typically reduces overall installation complexity and cost. Because 24V strips draw half the current, you can use thinner gauge wire, fewer power injection points, and higher-capacity controllers. A single 20-amp controller handles 480W at 24V versus only 240W at 12V, meaning fewer components and less wiring labor for the same total project wattage.
Wiring Gauge and Cable Cost
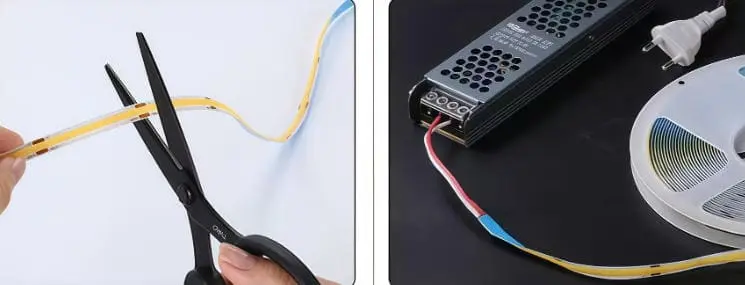
Thinner wire is cheaper and easier to pull through conduit. Because a 24V system carries half the current, you can often step down one wire gauge size compared to a 12V system for the same power delivery. Over a large installation with hundreds of meters of cable runs, this difference adds up fast—both in material cost and in installation speed.
Controller and Power Supply Capacity
This is where 24V really shines for larger projects. Consider the numbers:
| Equipment Rating | Power at 12V | Power at 24V | Advantage |
|---|---|---|---|
| 6A Power Supply | 72W | 144W | 24V handles 2× the strip length |
| 10A Power Supply | 120W | 240W | Fewer supplies needed overall |
| 20A Controller | 240W | 480W | One controller covers more zones |
| 30A Dimmer | 360W | 720W | Significant reduction in dimmer count |
For a project requiring 960W total, you would need four 20A controllers at 12V but only two at 24V. That is fewer devices to mount, wire, program, and troubleshoot. Our Australian distribution partners have told us this controller consolidation alone justifies the switch to 24V on any project over 50 meters of total strip length.
Fewer Power Injection Points
With 12V, you typically need a power injection point every 5 meters. With 24V, you can stretch to 10 meters between injection points. On a 30-meter architectural cove, that is 6 injection points with 12V versus 3 with 24V. Each injection point requires additional wire, a connection, and labor. Cutting that number in half simplifies the installation dramatically.
The 12V Cost Advantage in Small Projects
To be fair, 12V power supplies are more abundant, especially in the low-wattage range. For a single 3-meter under-counter run, a small 12V adapter from any electronics supplier does the job cheaply. You do not need the infrastructure savings of 24V when the entire project fits on a desk. The cost advantage of 24V only kicks in at scale.
A Note on Cut Points
One area where 12V has an edge is cut flexibility. A 12V strip can be cut every 3 LEDs, roughly every 50mm. A 24V strip cuts every 6 LEDs, roughly every 100mm. For intricate designs with tight corners or very specific lengths, 12V gives you finer control. However, for most commercial and architectural projects, 100mm cut intervals are precise enough. We rarely see cut-point spacing as a deal-breaker on projects over 2 meters.
| Feature | 12V Strips | 24V Strips |
|---|---|---|
| Cut interval | ~50mm (3 LEDs) | ~100mm (6 LEDs) |
| Min. cut length | Shorter | Longer |
| Best for tight corners | Yes | Adequate for most uses |
| Best for long commercial runs | No | Yes |
How does the voltage specification affect the thermal performance and longevity of my LED strips?
Heat is the silent killer of LED installations. When we run accelerated life testing in our lab, the strips that fail earliest are almost always the ones that ran hottest. And voltage choice plays a bigger role in heat generation than most people realize.
24V LED strips generally produce less waste heat than 12V strips at equivalent power output. In a 12V system, each LED segment wastes roughly 25% of its energy as heat in the current-limiting resistors, because three 3V LEDs in series leave a 3V surplus that must be dissipated. A 24V system distributes voltage more efficiently across six LEDs in series, reducing resistor waste and keeping operating temperatures lower, which directly supports longer LED lifespan.

Why 12V Strips Waste More Energy as Heat
Here is the core physics. A typical white LED has a forward voltage 5 of about 3V. In a 12V strip, LEDs are arranged in groups of three in series: 3V + 3V + 3V = 9V. That leaves 3V out of 12V (25%) that must be absorbed by the current-limiting resistor 6. That resistor converts the excess voltage directly into heat.
In a 24V strip, LEDs are arranged in groups of six: 3V × 6 = 18V. The remaining 6V out of 24V (also 25% by ratio) is handled by resistors, but the key difference is that the current flowing through those resistors is half as much (since I = P/V). Since heat generated in a resistor follows P = I² × R, halving the current reduces resistor heat by a factor of four for each individual resistor, even though there are more resistors in the circuit. The net result is less total heat per meter of strip.
Real-World Thermal Impact
On our production line, we use thermal imaging cameras during quality control. When comparing identical LED densities and power output, 24V strips consistently measure 3–8°C cooler on the PCB surface than their 12V equivalents. That temperature difference may sound small, but in LED engineering, every 10°C reduction in junction temperature 7 roughly doubles the expected lifespan of the LED chip. Over a 50,000-hour rated life, even a few degrees matter.
Heat and Installation Context
In enclosed aluminum channels (which are standard for architectural installations), heat buildup is already a concern. The channel acts as a heat sink, but airflow is limited. Starting with a cooler-running 24V strip gives you more thermal headroom. This is especially important in:
- Recessed ceiling coves with limited ventilation
- Outdoor enclosures rated IP65 or higher
- High-density strips (120–240 LEDs per meter)
- Continuous 24/7 operation environments like retail or hospitality
Does Voltage Affect LED Chip Lifespan Directly?
No. The LED chip itself does not care whether it is in a 12V or 24V circuit. The chip only sees its own forward voltage (about 3V) and forward current. What changes is the thermal environment around the chip. A 24V strip's lower waste heat keeps the chip cooler, which indirectly extends its life. If you cool a 12V strip adequately (larger heat sink, better airflow), you can match the lifespan. But 24V gives you that advantage by default, without extra engineering effort.
Our recommendation to clients—especially those specifying for high-use commercial environments—is straightforward: start with 24V to give yourself thermal margin. You can always add heat sinking. But you cannot remove heat that the circuit is generating at the resistor level.
Can I achieve more consistent brightness across my entire installation by switching to 24V?
Brightness uniformity is non-negotiable for our clients in architectural and retail lighting. When a designer specifies a continuous cove light running 15 meters around a hotel lobby ceiling, even a 10% brightness dip is visible and unacceptable. We have seen projects rejected during final inspection over exactly this issue.
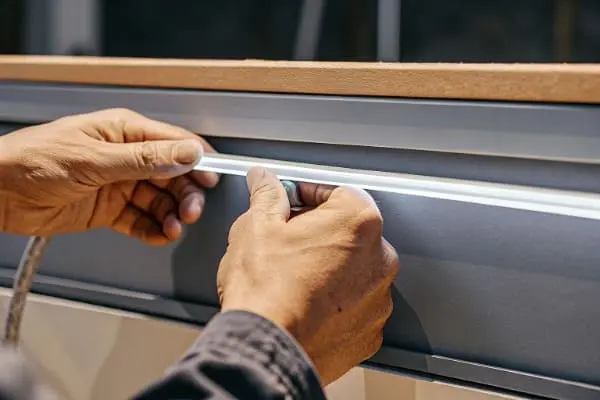
Yes, switching to 24V delivers noticeably more consistent brightness across long installations. The lower current draw reduces voltage drop along the strip, which means LEDs at the far end receive nearly the same voltage as LEDs near the power feed. For runs between 5 and 10 meters, 24V can maintain brightness uniformity within 2–3%, while a 12V strip over the same distance may show 10–15% dimming at the far end.
Why Brightness Drops in the First Place
LED brightness is directly related to the current flowing through the chip, and that current is determined by the voltage available at each LED segment. As voltage drops along the strip's copper traces, each successive segment receives slightly less voltage. The current-limiting resistor cannot compensate—it is sized for the nominal voltage. So less voltage means less current, which means less light output.
This effect is cumulative. The first meter might lose 1%. The fifth meter might be down 5%. By the eighth or tenth meter on a 12V strip, you can see the difference with your eyes in a dark room. On a white wall or a translucent diffuser, it is obvious.
Dimming Performance at 24V
Consistent brightness matters even more when you dim the strip. At low dim levels (say 10–20%), voltage drop has a proportionally larger impact because the absolute voltage margin is smaller. A 24V system maintains better signal stability to each LED segment, resulting in smoother dimming curves and fewer visible "steps" or dead zones at the far end.
PWM (Pulse Width Modulation) dimmers 8 also perform better on 24V circuits because the higher voltage provides a cleaner, more stable switching signal over longer cable runs. Several of our German wholesale partners have reported that switching from 12V to 24V eliminated flickering issues they had experienced with certain DMX and DALI dimming setups 9.
Color Consistency Across Long Runs
For RGB and tunable white strips, voltage drop does not just reduce brightness—it can shift the color. If the red, green, and blue channels do not drop equally (and they rarely do, because different color LEDs have different forward voltages), the color temperature or hue at the far end drifts. This is especially noticeable in tunable white applications where you are trying to hit a precise Kelvin value across the entire run.
24V reduces this effect significantly. Our QC team tests color consistency 10 at 1-meter intervals on every batch, and 24V strips hold their specified CCT within a tighter tolerance over the full rated run length.
Best Practices for Maximum Uniformity
Even with 24V, here are steps we recommend to our contractor and distributor clients:
- Center-feed whenever possible. Powering from the middle of a 10-meter run effectively gives you two 5-meter runs, cutting voltage drop further.
- Use power injection on runs over 10 meters. Add a feed point at the far end or at regular intervals.
- Spec adequate wire gauge. Even though 24V allows thinner wire, do not undersize it. Use a voltage drop calculator for your exact run length and load.
- Test under load before final installation. Measure voltage at the last segment with all LEDs at full brightness. If it is more than 5% below nominal, add an injection point.
Brightness uniformity is not just a voltage specification issue—it is a system design issue. But choosing 24V gives you the strongest possible starting point.
Conclusion
Choose 24V for long runs, large projects, and commercial installations where voltage drop, heat, and brightness uniformity matter most. Choose 12V for short, simple setups under 5 meters. When in doubt, 24V gives you more room to grow and fewer problems to solve later.
Footnotes
- Discusses how heat affects LED performance and the importance of thermal management. ↩︎
- Authoritative explanation of voltage drop. ↩︎
- Explains voltage drop using the analogy of 'electrical pressure'. ↩︎
- Provides a fundamental explanation of Ohm's law in electrical circuits. ↩︎
- Defines forward voltage for LEDs and its significance in circuit design. ↩︎
- Comprehensive explanation of current-limiting resistors and their function. ↩︎
- Explains the critical role of junction temperature in LED lifespan and reliability. ↩︎
- Describes how PWM dimming works for LEDs and its benefits for brightness control. ↩︎
- Compares DMX and DALI protocols for lighting control, highlighting their applications. ↩︎
- Explains the importance of color consistency in LED lighting and relevant metrics. ↩︎


 English
 Spanish
 German
 Russian
 Arabic
 French
 Portuguese