We see how vital the phosphor layer is for COB strips. If this coating fails, your entire lighting project suffers from inconsistent color and early degradation.
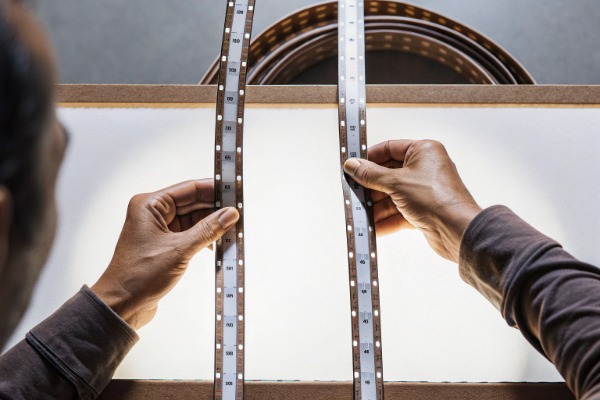
To determine if the phosphor coating is up to standard, inspect the unpowered strip for physical lumps, bubbles, or inconsistent thickness. Verify the encapsulation material is gas-phase silicone, not epoxy, to prevent yellowing. Finally, perform a burn-in test for 8–12 hours to check for thermal quenching or color shifts.
Let's look at the specific visual signs and testing methods that reveal the true quality of the phosphor encapsulation.
What visual signs indicate poor quality phosphor encapsulation on my COB strips?
When our QC team inspects incoming raw materials, we look for specific red flags. Ignoring these visual cues often leads to expensive replacements and angry clients later on.
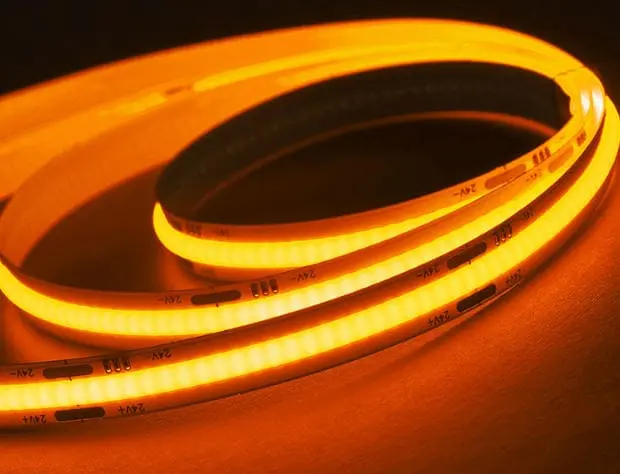
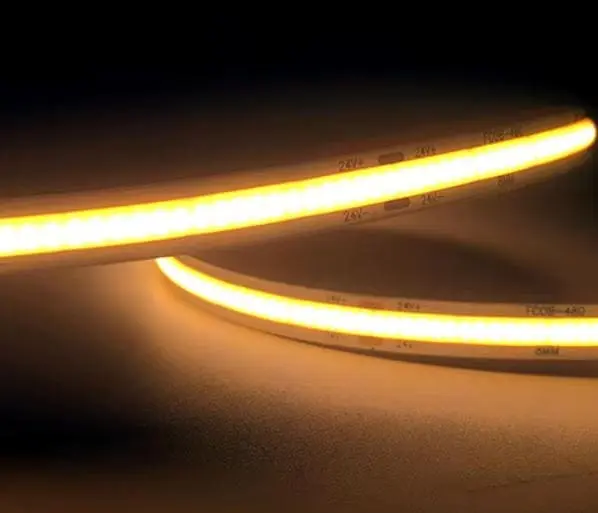
Poor quality phosphor encapsulation often shows visible lumps, air bubbles, or uneven thickness when the strip is unpowered. You may also see "blue leakage" at the beam edges or significant color shifting when viewing the lit strip from extreme side angles, indicating phosphor sedimentation.
Visual inspection is the first line of defense against inferior COB (Chip on Board) LED strips. Because the phosphor coating is applied directly over the LED chips in a continuous line, any physical imperfection immediately impacts the light quality. At our production facility, we reject any reel that shows surface irregularities, but in the open market, these defects are unfortunately common.
Inspecting the Unpowered Strip
Before you even connect the power supply, look closely at the yellow phosphor surface. A high-quality COB strip should have a smooth, matte finish with a perfectly uniform height. If you see "lumps" or small bumps, it indicates poor dispensing control during the manufacturing process. These lumps act like lenses, distorting the light path and creating uneven brightness.
Air bubbles are another critical defect. If the silicone mixing process was not done in a vacuum environment, tiny air pockets get trapped in the gel. Over time, these bubbles expand with heat, leading to cracks in the coating. If you see even microscopic bubbles, it is a sign that the manufacturer lacks precise environmental controls.
The "Blue Leakage" Phenomenon
When you power on the strip, look at the very edges of the beam angle. In cheaper productions, the phosphor layer might be too narrow to fully cover the blue LED chip underneath. This results in "blue leakage" or color fringing, where a rim of blue light escapes around the edges of the white light. This is unacceptable for high-end architectural projects where the light needs to be clean and uniform.
Angular Color Uniformity
We also recommend viewing the lit strip from an extreme side angle. If the color shifts significantly—usually becoming very yellow—it indicates "phosphor sedimentation." This happens when heavy phosphor particles sink to the bottom of the liquid silicone before it cures. The result is a strip that looks white from the top but yellow from the side, which ruins the effect in wall-grazing applications.
Common Visual Defects and Their Causes
| Visual Defect | Appearance | Root Cause | Consequence |
|---|---|---|---|
| Bubbles | Tiny air pockets in the yellow gel | Poor vacuum mixing | Cracking, heat accumulation |
| Lumps | Uneven surface height | Unstable dispensing pressure | Uneven brightness, hotspots |
| Blue Fringing | Blue light at beam edges | Coating too narrow/thin | Poor color mixing, visual discomfort |
| Yellow Side-View | Color shift at angles | Phosphor sedimentation | Inconsistent wall washing |
How do I verify that the coating thickness ensures uniform light distribution without dark spots?
We calibrate our dispensing machines precisely to avoid uneven light output. If the coating thickness varies even slightly, the seamless "dotless" effect you paid for disappears completely.
Verify coating thickness uniformity by using an external UV blacklight on the unpowered strip to reveal density inconsistencies hidden by white light. Additionally, power the strip and check for "mura" or clouding effects, which signal that the phosphor layer is too thin in specific areas.
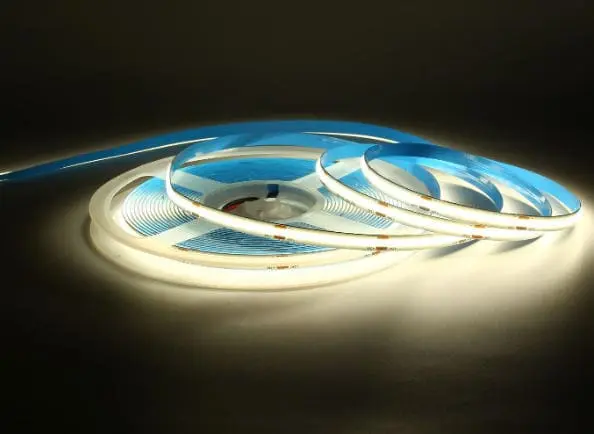
Achieving a truly "dotless" effect requires more than just placing chips close together; it requires a phosphor coating of exacting thickness. If the coating is too thin, blue light punches through too strongly, raising the color temperature (making it look colder). If it is too thick, the light becomes yellower and dimmer.
The UV Blacklight Test
One of the most effective tricks we use in the lab—which you can easily do yourself—is inspecting the strip under a UV blacklight while the strip itself is unpowered. The UV light excites the phosphor particles independently of the underlying blue LED chips.
Under normal white light, the brightness can mask subtle density issues. However, under UV light, the phosphor glows on its own. If the coating thickness is inconsistent, you will see patches that glow brighter or dimmer. Darker patches under UV usually indicate a thinner coating or a lack of phosphor density in that specific area. This reveals hidden manufacturing flaws that will eventually lead to color drift as the strip ages.
The "Mura" or Clouding Effect
When the strip is powered on, look for "mura" (a Japanese term used in the display industry for unevenness). On a COB strip, this looks like faint clouds or shadows within the continuous line of light. This is often caused by the silicone gel flowing unevenly before it cures.
In high-quality production, we use thixotropic gels that hold their shape immediately after dispensing. Cheaper gels tend to flow or "slump," causing the coating to be thinner on the sides and thicker in the middle, or pooling in certain areas. This variation creates a dirty look to the light, which is particularly visible when the strip is installed in an aluminum profile with a diffuser.
Impact of Thickness on Color Temperature
The relationship between coating thickness and color temperature (CCT) is sensitive. A variation of just a few microns can shift the color by 100K or more.
- Thinner Coating: Allows more blue light from the chip to pass through. The light appears cooler (e.g., a 3000K strip looks like 3200K or 3500K).
- Thicker Coating: Absorbs more blue light and converts it to yellow/red. The light appears warmer and the total brightness (lumen output) drops.
Thickness Consistency Checklist
| Inspection Method | What to Look For | What It Means |
|---|---|---|
| UV Blacklight (Unpowered) | Patchy glowing intensity | Inconsistent phosphor density |
| Direct View (Powered) | "Clouding" or shadows | Uneven gel flow (slumping) |
| Color Comparison | Sections looking cooler/warmer | Dispensing pressure fluctuation |
Can I test the phosphor layer for resistance to cracking and yellowing over time?
Our engineers test various encapsulation gels to ensure they withstand bending and heat. A coating that cracks or yellows turns a premium installation into a cheap-looking failure.
You can test resistance to cracking by bending the strip to its minimum radius; the coating should not wrinkle or delaminate. To check for yellowing risks, confirm the manufacturer uses gas-phase silicone rather than epoxy resin, and request data from accelerated sulfurization and thermal aging tests.
Durability is the hidden killer of LED projects. A strip might look perfect on day one, but if the chemical composition of the coating is inferior, it will degrade rapidly. The two biggest enemies of the phosphor coating are mechanical stress (cracking) and chemical degradation (yellowing).
The Bend Radius Test
COB strips are prized for their flexibility, but the phosphor coating must be just as flexible as the PCB (Printed Circuit Board). We recommend a simple stress test: take a sample of the strip and bend it to its rated minimum bending radius (usually around 50mm or 2 inches).
Watch the surface of the yellow coating closely as you bend it.
- Pass: The surface remains smooth.
- Fail: You see tiny wrinkles, "orange peel" texture, or hairline cracks appearing.
- Critical Fail: The coating delaminates (lifts off) from the PCB.
If the coating cracks, moisture and sulfur will penetrate the strip and corrode the silver wires inside the LED chips, leading to dead sections.
Material Composition: Silicone vs. Epoxy vs. Polyurethane
The material holding the phosphor powder is crucial. In the past, manufacturers used epoxy resin or polyurethane (PU). Today, high-quality COB strips must use Gas-Phase Silica Gel (Silicone).
- Epoxy Resin: Very hard and brittle. It yellows quickly when exposed to UV light or heat. It is almost obsolete for high-end strips but still found in very cheap products.
- Polyurethane (PU): Flexible but has poor thermal stability. It tends to yellow over time and can become sticky.
- Silicone: Excellent thermal stability, high transparency, and remains flexible over a wide temperature range. It is permeable to gas but repels liquid water.
Anti-Sulfurization and Environmental Resistance
Standard silicone is breathable, which is good for heat dissipation but bad if there are pollutants in the air. Sulfur (found in vehicle exhaust, industrial fumes, and even some cleaning agents) can penetrate the silicone and react with the silver in the LEDs, causing them to turn black and lose brightness.
We use modified silicone formulas with anti-sulfurization properties for industrial clients. To verify this, ask your supplier for "Salt Spray" or "Sulfurization" test reports. If they cannot provide them, their coating likely offers no protection against chemical attack.
Coating Material Comparison
| Material | Flexibility | Yellowing Resistance | Cost | Verdict |
|---|---|---|---|---|
| Epoxy Resin | Low (Brittle) | Poor (Yellows fast) | Low | Avoid |
| Polyurethane | Medium | Medium | Medium | Acceptable for short-term |
| Silicone | High | Excellent | High | Required for Pro Projects |
How does the quality of the phosphor mix affect the CRI and color consistency of my LED strips?
We use advanced spectrometers to verify every batch before shipping. A poor phosphor mix results in washed-out colors and inconsistent tones that ruin high-end interior designs.
The quality of the phosphor mix dictates the spectral fidelity; a superior formulation is required to achieve a CRI above 90. Furthermore, a precise mix ensures a 3-step MacAdam ellipse consistency, preventing visible color mismatches between different reels used in the same installation.

The phosphor powder itself is the magic ingredient that converts the blue LED light into the white spectrum we see. The chemical composition and quality of this powder determine how accurate colors look (CRI) and how consistent the light remains over time.
CRI and Spectral Fidelity
Standard phosphor mixes often struggle to render red colors accurately (R9 value). To achieve a CRI (Color Rendering Index) of 90 or 95+, we have to use a more expensive, complex phosphor blend that fills in the spectral gaps.
If you buy a cheap COB strip, the phosphor mix is likely basic. While it might look "white," it will make skin tones look flat and wood finishes look dull. You can verify this by checking the R9 value on the datasheet—if it is below 50, the phosphor mix is standard grade. High-quality mixes will have an R9 of 80 or higher.
Thermal and the 8–12 Hour Test
Here is a critical insight from lab: Phosphor efficiency drops when it gets hot. This is called thermal quenching. Low-quality phosphor mixes are unstable; as soon as the strip heats up, they lose brightness and shift color.
We strongly advise you to perform a simple "burn-in" test.
- Unroll the strip (to prevent overheating) and power it on.
- Leave it running for 8 to 12 hours.
- Compare the color and brightness to a fresh, cold strip.
A high-quality phosphor mix will remain stable. A poor mix will show a visible drop in brightness or a shift towards blue (as the phosphor stops converting light effectively) once it reaches thermal equilibrium. We often see cheap strips look fine for the first 5 minutes, but after an hour, the "white" light starts to look different.
Batch Consistency (SDCM)
The precision of the phosphor mixing process determines the SDCM (Standard Deviation Colour Matching). If the mix ratio varies even slightly between batches, you get different shades of white.
For professional projects, you need a 3-step MacAdam Ellipse or lower. This ensures that if you buy ten reels today and ten reels next month, they will visually match. If a supplier cannot guarantee a 3-step consistency, it means their phosphor mixing process is not controlled tightly enough.
Phosphor Quality Impact Table
| Feature | High-Quality Phosphor Mix | Low-Quality Phosphor Mix |
|---|---|---|
| CRI (Ra) | > 90 (High fidelity) | < 80 (Washed out colors) |
| R9 (Red) | > 50-80 | < 0 (Skin tones look grey/green) |
| Thermal Stability | Minimal shift when hot | Significant brightness drop/color shift |
| Consistency | < 3 SDCM (Uniform) | > 5 SDCM (Visible mismatch) |
Conclusion
Checking phosphor quality ensures your projects remain bright and uniform. By focusing on materials, visual consistency, and rigorous testing like the burn-in method, you secure long-term reliability for your clients.