
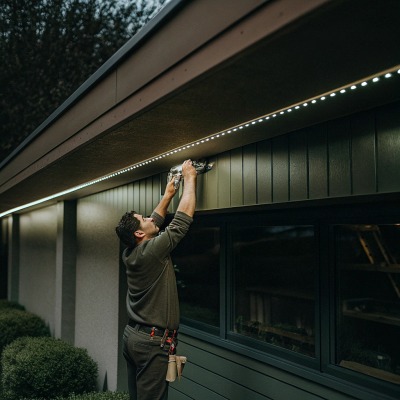
نقوم بشحن آلاف الأمتار من شرائط LED إلى المقاولين الذين يتعاملون مع لوبيات الفنادق، واجهات التجزئة، وتركيبات المستودعات — والسؤال الذي يتكرر غالبًا ليس عن الـ LED نفسه، بل عن كيفية تزويده بالطاقة بشكل صحيح على نطاق واسع.
يتطلب تصميم توصيلات أشرطة LED للمشاريع واسعة النطاق تقسيم التركيب إلى مناطق ذات تغذية متوازية، وتحديد أحجام مزودات الطاقة بهامش أمان لا يقل عن 20%، واستخدام نقاط حقن للطاقة كل 5 أمتار لأشرطة 12 فولت، واختيار مقاييس أسلاك أسمك لتقليل هبوط الجهد عبر امتدادات التوزيع الطويلة.
يرافقك هذا الدليل خلال عملية الهندسة الكاملة — من حساب الحمولة واختيار الجهد إلى تصميم توصيل الأسلاك، استراتيجية حقن الطاقة، وحلول الموصلات المخصصة توصيل أسلاك شرائط LED 1. إذا كنت مقاولًا، تاجر جملة، أو محدد إضاءة يخطط لتركيب شرائط LED كبيرة، فإن الأقسام أدناه تغطي بالضبط ما تحتاجه للحصول على نتائج متسقة وموثوقة.
كيف يمكنني حساب الحمولة الكلية للطاقة لمشروع شرائط LED واسع النطاق الخاص بي؟
عندما نساعد العملاء في مصر على تحديد نطاق مشاريعهم، يسأل مهندسونا أولاً عن طول الشريط الكلي والقدرة بالواط لكل متر — لأن الخطأ في حساب ميزانية الطاقة هو المكان الذي تبدأ فيه معظم المشاكل الحمولة الكلية للطاقة 2.
لحساب إجمالي حمل القدرة، اضرب طول شريط LED الكلي بالمتر في قدرة الشريط بالواط لكل متر، ثم اضرب الناتج في 1.2 لإضافة هامش أمان 20%. هذا يمنحك الحد الأدنى لسعة مزود الطاقة التي تحتاجها لتشغيل النظام بأمان وموثوقية.
لماذا أهمية حساب الحمولة بدقة
مزود الطاقة الذي يكون أصغر من اللازم سيسخن بشكل مفرط، يتقطع، أو يتوقف عن العمل تحت الحمل. مزود الطاقة الذي يكون أكبر بكثير يضيع المال والمساحة. الهدف هو الوصول إلى نقطة مثالية: مساحة كافية للسلامة، ولكن ليس بشكل مبالغ فيه بحيث تدفع مقابل سعة لا تستخدمها أبدًا.
إليك الصيغة الأساسية:
الطاقة الإجمالية للشرائط (W) = طول الشريط الكلي (م) × القدرة بالواط لكل متر (W/م)
ثم طبق هامش الأمان الخاص بك:
الحد الأدنى لسعة مزود الطاقة (W) = إجمالي قدرة الشريط × 1.2
على سبيل المثال، إذا كان لديك 80 مترًا من الشريط المصنف عند 14.4 واط/م، فإن إجمالي قدرة الشريط هو 1,152 واط. اضربه في 1.2 وتحتاج إلى سعة مزود طاقة لا تقل عن 1,382 واط.
جدول حساب الحمولة العملي
| طول الشريط (م) | الواط لكل متر (واط/م) | إجمالي طاقة الشريط (واط) | مع هامش 20% (واط) |
|---|---|---|---|
| 50 | 9.6 | 480 | 576 |
| 80 | 14.4 | 1,152 | 1,382 |
| 120 | 19.2 | 2,304 | 2,765 |
| 200 | 14.4 | 2,880 | 3,456 |
لا تنسَ حساب الملحقات
يجب أن يشمل إجمالي الحمل الخاص بك أي وحدات تحكم أو مضخمات أو مكررات إشارة في الدائرة. هذه تسحب الطاقة أيضًا. إذا كنت تشغل شرائط RGB أو بيضاء قابلة للتغيير، فقد تستهلك وحدة التحكم نفسها 5-15 واط اعتمادًا على الطراز. لمشروع بطول 200 متر، تتراكم هذه الأحمال الصغيرة.
قسم الميزانية عبر المناطق
من واقع خبرتنا في الشحن لمشاريع التجهيز الكبيرة في مصر، نوصي دائمًا بتقسيم إجمالي الواط إلى مناطق. بدلاً من مصدر طاقة واحد ضخم بقوة 3000 واط، استخدم ثلاث أو أربع وحدات أصغر موضوعة بالقرب من كل منطقة. هذا النهج يقلل من طول الكابلات، ويخفض انخفاض الجهد 3 المخاطر، ويسهل استكشاف الأخطاء وإصلاحها بشكل كبير. إذا فشل مصدر واحد، فإن منطقة واحدة فقط تنطفئ - وليس المبنى بأكمله.
خطأ شائع نراه هو أن المشترين يحسبون إجمالي الواط بشكل صحيح ولكنهم يحاولون بعد ذلك تشغيل كل شيء من مصدر مركزي واحد مع مسارات كابلات طويلة. قد تبدو الحسابات صحيحة على الورق، لكن فيزياء انخفاض الجهد عبر المسافة ستفسد النتيجة. قم دائمًا بإقران حساب الحمل الخاص بك بخطة أسلاك.
ما هي أفضل طريقة لمنع انخفاض الجهد في مسارات الإضاءة الطويلة الخاصة بي؟
هذه هي أكبر مشكلة نسمع عنها من المقاولين - يبدو الشريط مثاليًا بالقرب من مصدر الطاقة ولكنه يخفت بشكل ملحوظ في منتصف المسار، وأحيانًا بالكاد يضيء الطرف البعيد على الإطلاق.
أفضل طريقة لمنع هبوط الجهد هي استخدام التوصيل بالتوازي بدلاً من التوصيل المتسلسل، واختيار شرائط 24 فولت أو 48 فولت بدلاً من 12 فولت للتمديدات الأطول، واستخدام سلك بسماكة أكبر لتوزيع الطاقة، وإضافة نقاط حقن للطاقة على فواصل منتظمة — عادةً كل 5 أمتار لشرائط 12 فولت أو كل 10 أمتار لشرائط 24 فولت.
لماذا يحدث انخفاض الجهد
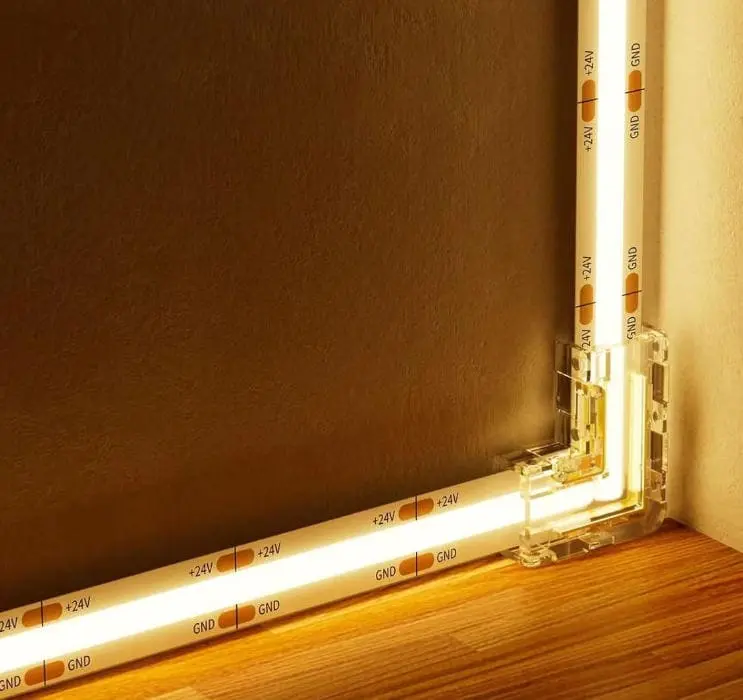
شرائط LED هي أجهزة ذات جهد منخفض. عند 12 فولت، يتسبب أي مقاومة صغيرة في مسارات النحاس أو أسلاك التوصيل في فقدان ملحوظ للجهد. كلما زادت المسافة التي يقطعها التيار من مصدر الطاقة، زاد فقدان الجهد كحرارة في الموصل. بحلول الوقت الذي تصل فيه إلى 8 أو 10 أمتار من المصدر على شريط 12 فولت، قد تكون قد فقدت جهدًا كافيًا بحيث تكون مصابيح LED في الطرف البعيد أضعف بشكل ملحوظ.
اختر جهد النظام الصحيح
أحد أبسط القرارات التي يمكنك اتخاذها في وقت مبكر من المشروع هو اختيار شريط جهد أعلى. إليك كيفية مقارنة 12 فولت و 24 فولت و 48 فولت:
| معامل | شريط 12 فولت | شريط 24 فولت | شريط 48 فولت |
|---|---|---|---|
| التيار لـ 14.4 واط/م (لكل متر) | 1.2 أ | 0.6 أ | 0.3 أ |
| الحد الأقصى النموذجي للتشغيل الفردي | ~5 م | ~10 م | ~15-20 م |
| شدة انخفاض الجهد | مرتفع | متوسط | منخفض |
| توفر المكونات | واسع جدًا | واسع | نمو |
| أفضل حالة استخدام | تشغيلات قصيرة، تركيب صغير | معظم المشاريع الكبيرة | تشغيلات طويلة جدًا، طاقة عالية |
بالنسبة لمعظم المشاريع الكبيرة، 24 فولت هو الخيار الافتراضي الأفضل. فهو يخفض التيار بنسبة النصف مقارنة بـ 12 فولت، مما يقلل من انخفاض الجهد تقريبًا إلى النصف لنفس قطر السلك والمسافة. إذا كنت تقوم بتشغيل أغطية معمارية طويلة جدًا أو إضاءة واجهات، فإن أنظمة 48 فولت تستحق التقييم.
استخدم التوصيل المتوازي، وليس التوصيل على التوالي
عندما تربط شرائط الإضاءة بشكل متسلسل من النهاية إلى النهاية، فإن الشريط الأول يحمل كل التيار لكل الشرائط التالية. هذا يحمّل مسارات النحاس ويتسبب في فقدان تدريجي للجهد. في إعداد الأسلاك الموازية 4 ، يتصل كل قسم من الشريط بمصدر الطاقة بشكل مستقل. هذا يحافظ على استقرار الجهد عند كل قسم.
فكر في الأمر كأنك تتعامل مع أنابيب المياه: أنبوب ضيق وطويل يفقد الضغط في النهاية، لكن العديد من الأنابيب القصيرة المتفرعة من مصدر رئيسي تحصل على ضغط كامل.
استراتيجية حقن الطاقة
حقن الطاقة يعني تزويد الشريط بجهد جديد عند نقاط وسطية على طوله. نقاط حقن الطاقة 5 تقوم بتشغيل زوج منفصل من الأسلاك من مصدر الطاقة (أو كتلة توزيع قريبة) إلى الشريط عند نقاط الحقن هذه. هذا يعيد الجهد الذي قد ينخفض لولا ذلك.
قاعدة عملية: قم بحقن الطاقة كل 5 أمتار على شرائط 12 فولت وكل 10 أمتار على شرائط 24 فولت. بالنسبة للشرائط عالية الكثافة التي تسحب أكثر من 20 واط/متر، قلل هذه الفواصل. يقوم مهندسونا دائمًا باختبار الجهد الفعلي في الطرف البعيد لكل مقطع قبل الموافقة على خطة الأسلاك.
قياس السلك مهم
السلك بين مصدر الطاقة والشريط لا يقل أهمية عن الشريط نفسه. السلك الرفيع لمسافة طويلة يخلق انخفاضًا في الجهد الخاص به قبل أن يصل التيار حتى إلى الشريط. استخدم سلكًا أسمك (رقم AWG أقل) رقم AWG 6لأطول مسافات توزيع. مقاييس أسلاك أسمك 7
| مسافة في اتجاه واحد (متر) | الحد الأقصى للتيار (أمبير) | مقياس السلك الموصى به (AWG) |
|---|---|---|
| حتى 5 | 5 | 18 AWG |
| 5–10 | 5 | 16 AWG |
| 10–20 | 5 | 14 AWG |
| 10–20 | 10 | 12 AWG |
| 20–30 | 10 | 10 AWG |
هذه إرشادات عامة. تحقق دائمًا مقابل الحمل المحدد وعتبة انخفاض الجهد المقبولة (عادةً أقل من 3-5%).
عندما نصمم أطقم أسلاك مخصصة لعملائنا من مصنعي المعدات الأصلية، فإننا نطابق مقياس السلك مع كل من التيار والمسافة من الإمداد إلى أبعد نقطة على الشريط. هذا الاهتمام بالتفاصيل هو ما يميز التركيب الاحترافي عن التركيب الذي ينتهي بإضاءة خافتة وغير متساوية.
كيف أضمن توازن السطوع واللون عبر موقع مشروعي بأكمله؟
في مختبر الاختبار لدينا، رأينا شرائط RGB تتحول من الأبيض الدافئ إلى لون وردي فاتح في الطرف البعيد من مسافة 10 أمتار — وكان ذلك على الطاولة، وليس حتى مركبًا. في موقع عمل حقيقي، المشكلة أسوأ لأن الكابلات أطول والاتصالات أقل تحكمًا.
يتطلب التوازن في السطوع واللون تصنيف شرائح LED متطابقة، وتوزيع طاقة موحد من خلال المناطق والنقاط المخصصة، ومتحكمات متزامنة لنظام RGB أو الأبيض القابل للتعديل، وإدارة حرارية مناسبة باستخدام ملفات الألمنيوم لمنع تغير اللون وتدهوره بسبب الحرارة.

الأسباب الجذرية لعدم الاتساق
هناك ثلاثة أسباب رئيسية تجعل شرائط LED تبدو غير متساوية عبر تركيب كبير:
- انخفاض الجهد الكهربائي — انخفاض الجهد عند الطرف البعيد يعني مرور تيار أقل عبر الـLEDs، مما يقلل من السطوع ويغير درجة حرارة اللون.
- تفاوت تصنيف الـLEDs حسب الدُفعة — يمكن أن يكون للـLEDs من صناديق تصنيع مختلفة درجات حرارة لون أو مستويات سطوع مختلفة قليلاً، حتى عندما تكون نفس رقم الطراز.
- التأثيرات الحرارية — الـLEDs التي تعمل بدرجات حرارة أعلى تتغير في اللون وتفقد السطوع بشكل أسرع من الـLEDs التي تبرد بشكل مناسب.
حل مشكلة الجهد الكهربائي
هذه هي نفس المشكلة التي تم تغطيتها في القسم السابق، ولكن من منظور بصري. حتى انخفاض الجهد بقيمة 5% يمكن أن يسبب فرق في السطوع مرئي بين الطرف القريب والطرف البعيد من الشريط. بالنسبة لشرائط RGB، يكون الأمر أسوأ: تتناقص قنوات الأحمر والأخضر والأزرق بمعدلات مختلفة قليلاً، مما يسبب تحول في اللون — وليس فقط التعتيم.
الحل هو نفسه: التوصيل على التوازي، حقن الطاقة، شرائط بجهد أعلى، وأسلاك توزيع أكثر سمكًا. ولكن للمشاريع التي تتطلب دقة في اللون مثل عروض البيع بالتجزئة، لوبيات الضيافة، أو إضاءة المتاحف، قد تحتاج إلى تقليل فواصل الحقن بشكل أكبر. على شرائط RGB ذات معدل لون مرتفع، نوصي بحقن كل 3–4 أمتار على 12 فولت وكل 7–8 أمتار على 24 فولت.
تصنيف الـLEDs وتوافق الدُفعات
عندما نقوم بتوريد الـLEDs لعمليات الإنتاج لدينا، نحدد تصنيفًا دقيقًا — مما يعني أن جميع الـLEDs في الدُفعة تقع ضمن نطاق ضيق من درجة حرارة اللون ومستوى السطوع. هذا شيء يتجاهله العديد من المشترين. إذا طلبت شريطًا من موردين مختلفين أو حتى من دفعات مختلفة من نفس المورد، قد تظهر الـLEDs بمظهر مختلف عند تركيبها جنبًا إلى جنب.
توصيتنا: اطلب جميع شرائط مشروع واحد في دفعة واحدة. إذا احتجت لإعادة الطلب لاحقًا، اطلب من المورد نفس رمز تصنيف الـLED. في Glowin، نقوم بتسجيل ومشاركة بيانات التصنيف مع شركائنا من المصنعين الأصليين (OEM) حتى يتمكنوا من الحفاظ على التناسق البصري عبر مراحل مشروع متعدد المراحل.
إدارة الحرارة
الحرارة هي القاتل الصامت لتوافق الـLEDs. شريط مثبت مباشرة على الجدران الجافة يحبس الحرارة ضد الـLEDs. مع مرور الوقت — أحيانًا خلال شهور — تتدهور الـLEDs في النقاط الأكثر حرارة بشكل أسرع، مما يخلق تفاوتًا في السطوع واللون على طول الشريط.
الحل بسيط: استخدام ملفات تعريف الألمنيوم. الألمنيوم يعمل كمشتت حراري، يسحب الحرارة بعيدًا عن الـLEDs ويبددها في الهواء المحيط. للتركيبات المغلقة أو المدمجة، تأكد من وجود تدفق هواء حول الملف الشخصي. في بيئات ذات درجة حرارة عالية (أكثر من 40°C)، قم بتقليل استهلاك الشريط أو اختر منتجًا بكثافة أقل.
تزامن وحدة التحكم
بالنسبة لنظم RGB، RGBW، أو الأبيض القابل للتعديل الذي يمتد عبر مناطق متعددة، قد يكون لكل منطقة وحدة تحكم أو مضخم خاص بها. إذا لم تكن متزامنة، ستظهر فروق زمنية مرئية في تغييرات اللون أو انتقالات التعتيم. استخدم وحدة تحكم رئيسية مع توزيع الإشارة على جميع المناطق، أو اختر نظامًا مثل DMX أو DALI 8 الذي يوفر تزامنًا على مستوى الإطار.
عندما تغذي عدة مصادر طاقة مناطق مختلفة ولكنها تشترك في وحدة تحكم واحدة، دائمًا قم بتوصيل أطراف الأرض (السالب) الخاصة بها معًا — يُطلق على ذلك اتصال أرض مشترك. بدون ذلك، لا يكون لإشارة التحكم مرجع ثابت وقد تتصرف الشرائط بشكل غير متوقع.
هل يمكنني تخصيص موصلات التوصيل والطاقة لتسريع عملية التركيب الخاصة بي؟
عمل فريقنا مع مقاولي البناء الذين قضوا وقتًا أكثر في الموقع في تثبيت الموصلات واللحام أكثر من تركيب الشريط نفسه — وهذا مشكلة سعينا لحلها باستخدام أنظمة أسلاك مسبقة التوصيل والتشغيل.
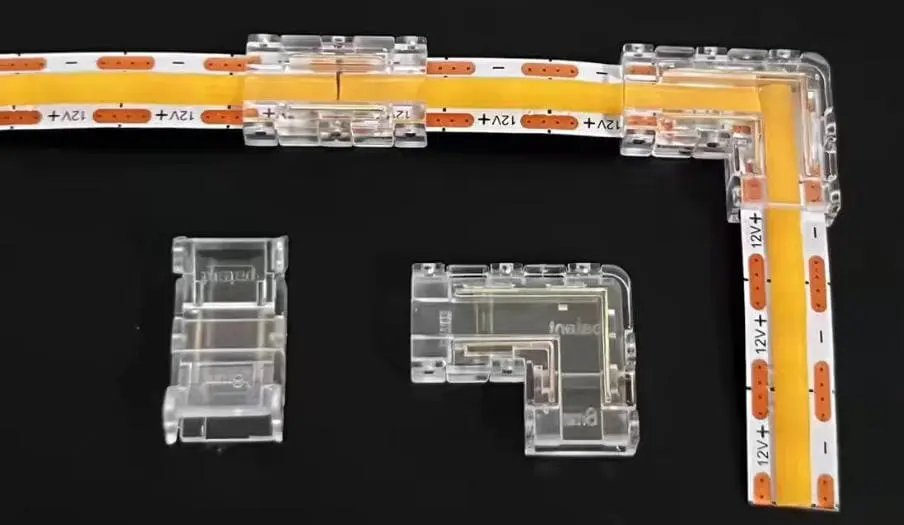
نعم، تستخدم كابلات التوصيل المسبق المخصصة، والمقابس القابلة للتوصيل، وشرائح القطع المسبقة بشكل كبير في تقليل وقت التثبيت في الموقع. من خلال نقل اللحام وتجميع الموصلات إلى المصنع، تتخلص من أخطاء الميدان، وتحسن موثوقية الاتصال، ويمكنك تقليل العمالة اللازمة للتثبيت بنسبة 30-50% على المشاريع الكبيرة.
الحجة لصناعة الأسلاك المجمعة في المصنع
في مشروع إضاءة مخفية للفندق بطول 200 متر، قد توجد 40 نقطة اتصال أو أكثر — من شريط إلى آخر، من الشريط إلى السلك، من السلك إلى مصدر الطاقة. إذا استغرق كل اتصال 3–5 دقائق في الموقع (بما في ذلك التقشير، اللحام، التقلص الحراري، والاختبار)، فذلك يعادل 2–3 ساعات من العمل فقط على الاتصالات. وكل وصلة لحام يدوية تتم في الموقع، غالبًا في أوضاع غير مريحة مع إضاءة ضعيفة، تعتبر نقطة فشل محتملة.
عندما نقوم ببناء أنظمة أسلاك مخصصة في المصنع، يتم لحام كل اتصال على طاولة عمل باستخدام أدوات مناسبة، ويتم فحصه تحت مكبرة، واختباره قبل الشحن. يقوم الكهربائي في الموقع ببساطة بتوصيل الشريط إلى النظام وتأمينه. ينخفض وقت الاتصال الإجمالي لكل نقطة إلى أقل من 30 ثانية.
أنواع الموصلات المخصصة
هناك عدة خيارات تعتمد على المشروع:
- أسلاك مسبقة اللحام — أسلاك قصيرة ملحومة مباشرة إلى كل قسم من الشريط في المصنع. يربط المثبت الأسلاك المسبقة إلى سلك التوزيع باستخدام موصلات سريعة الاتصال أو موصلات براغي.
- موصلات جاهزة للتشغيل والتوصيل — موصلات ذكر/أنثى مسبقة التوصيل إلى الكابل الشريطي وكابل التوزيع. تتشابك هذه بدون أدوات مطلوبة.
- موصلات مقاومة للماء — للمشاريع الخارجية أو المناطق الرطبة (IP65/IP67/IP68)، تمنع الموصلات المختومة في المصنع دخول الرطوبة بشكل أكثر موثوقية من السيليكون أو التقلص الحراري المطبق في الميدان.
- صناديق التوزيع صناديق مجهزة مسبقًا بكتل طرفية أو مخارج مصهورة لكل منطقة.
وصلات ملحومة مقابل وصلات مشبكية
الموصلات المشبكية (الكبس) مريحة للمشاريع الصغيرة والنماذج الأولية، ولكن لها حدودها. يمكن أن ترتخي بمرور الوقت بسبب التمدد الحراري والاهتزاز، وتخلق مقاومة أعلى عند نقطة الاتصال. بالنسبة للتركيبات الدائمة واسعة النطاق، تعتبر الوصلات الملحومة هي المعيار الاحترافي.
ومع ذلك، فإن أفضل ما في العالمين هو وصلة ملحومة في المصنع مع موصل اقتران خالٍ من الأدوات في الطرف الآخر. يمنحك هذا موثوقية اللحام حيثما كان ذلك مهمًا وسرعة القابس حيث يحتاجها المثبت.
كيفية تخطيط حزمة أسلاك مخصصة
إذا كنت تعمل مع مورد مثلنا على أساس OEM أو مشروع، فإليك المعلومات التي نحتاجها لبناء حزمة الأسلاك الخاصة بك:
- رسم تخطيط الموقع مع مواضع الشرائط وأطوالها
- مواقع إمدادات الطاقة و الكمية
- الجهد الكهربائي والقدرة الكهربائية لكل نوع شريط
- تصنيف IP المتطلبات لكل منطقة
- مواقع وحدات التحكم/المخفتات ونوع الإشارة (PWM، DALI، DMX)
بهذه المعلومات، يمكن لفريق الهندسة لدينا تصميم حزمة أسلاك كاملة - بما في ذلك مقاطع الشرائط مقطوعة مسبقًا بالطول المطلوب، وحزم الأسلاك مجهزة مسبقًا بالمقياس والطول الصحيحين، وموصلات مُعلمة لكل منطقة، ورسم تخطيطي للأسلاك للمثبت.
الفائدة الخفية: عدد أقل من الاستدعاءات
بالإضافة إلى توفير وقت التركيب، تقلل الأسلاك المخصصة من الاستدعاءات. الوصلات المفكوكة، والقطبية المعكوسة، ومقاييس الأسلاك غير المتطابقة هي الأسباب الثلاثة الأولى لطلبات الخدمة بعد التركيب بناءً على خبرتنا. حزم الأسلاك المصنعة في المصنع تقضي على الثلاثة جميعًا. يتبع المثبت الملصقات، ويوصل الموصلات، ويشغل الطاقة. إذا تم اختبار كل وصلة قبل مغادرتها المصنع، فإن احتمالات فشل ميداني تنخفض بشكل كبير.
بالنسبة للمقاولين والموزعين الذين يبنون سمعة على الموثوقية، فإن هذا النهج يؤتي ثماره بسرعة - ليس فقط في توفير العمالة، ولكن في تقليل مطالبات الضمان وزيادة رضا العملاء النهائيين.
الاستنتاج
تنجح أو تفشل مشاريع شرائط LED الكبيرة في مرحلة الهندسة — وليس أثناء التركيب. احسب الأحمال الخاصة بك، واختر الجهد الصحيح، واربط بشكل متوازٍ، وحقن الطاقة في الفترات المناسبة، وفكر في استخدام كواحل مخصصة تنقل التعقيد من موقع العمل إلى المصنع.
هوامش
- يشرح أفضل الممارسات لتوصيل شرائط LED لتجنب المشكلات الشائعة. ↩︎
- يوفر إرشادات حول حساب متطلبات الطاقة لتركيبات شرائط LED. ↩︎
- يعرف انخفاض الجهد وتأثيره على أداء شرائط LED. ↩︎
- يشرح مفهوم وفوائد التوصيلات المتوازية لشرائط LED. ↩︎
- يوفر دليلًا كاملًا لحقن الطاقة لأضواء شرائط LED. ↩︎
- يوفر تعريفًا شاملاً وشرحًا لمعيار الأسلاك الأمريكي من مصدر موثوق. ↩︎
- يوضح كيف يؤثر قياس السلك على سعة التيار وانخفاض الجهد في أنظمة LED. ↩︎
- يقارن بين بروتوكولات التحكم في الإضاءة DMX و DALI لاحتياجات التطبيقات المختلفة. ↩︎
- يصف كيف توفر الملفات الألومنيوم حماية، وتبديد الحرارة، ومظهرًا نهائيًا لشرائط LED. ↩︎
- يشرح الدور الحاسم لإدارة الحرارة في أداء عمر شرائط LED. ↩︎


 English
 Spanish
 German
 Russian
 Arabic
 French
 Portuguese