When we test new batches in our aging room, we often see how tricky balancing power and light can be. For Australian contractors, getting this wrong means failed inspections or dim lights.
To determine the correct specifications, match lumen output to your application—using 800–1000 lumens per meter for task lighting. Always prioritize 24V systems to minimize voltage drop on long runs, and ensure drivers have 20% overhead while complying with AS/NZS standards for safety and efficiency.
Let's break down the specific calculations and standards you need to know.
What are the standard lumen-per-watt requirements for commercial projects in Australia?
Our Australian clients often ask us why high wattage doesn't always equal better light quality. It usually comes down to efficiency and local energy codes 1.
Commercial projects in Australia generally require high efficacy to meet GEMS and NCC energy standards. You should aim for COB strips delivering at least 100–140 lumens per watt. This ensures sufficient brightness for office or retail spaces without exceeding maximum power density limits mandated by local energy codes.
Understanding the relationship between wattage and brightness is crucial for engineering projects. In our factory, we emphasize that "brighter" does not necessarily mean "more power." It means "more efficient."
The Efficiency Metric: Lumens per Watt (lm/W)
For commercial applications in Australia, the key metric is not just the total lumen output 2, but the efficacy. Standard COB strips typically range from 100 to 140 lm/W. While some SMD strips can reach 190 lm/W, COB technology is preferred in engineering for its dot-free consistency. However, you must balance this aesthetic benefit with energy consumption.
If you are working on a Green Star rated project or need to comply with the National Construction Code (NCC) 3, you cannot simply choose the highest wattage strip. You must calculate the total energy consumption against the allowable limits.
Matching Brightness to Application
We advise our partners to reverse-engineer their needs. Don't start with a wattage number; start with the desired lux level on the surface.
Application Guide
| Application Type | Recommended Brightness (lm/m) | Typical Wattage (W/m) | Purpose |
|---|---|---|---|
| Accent / Mood | 300 – 500 lm/m | 5 – 8 W/m | Decorative coves, under-cabinet glow. |
| Task Lighting | 800 – 1000 lm/m | 10 – 12 W/m | Kitchen benches, office desks, reading areas. |
| Primary Illumination | 1500+ lm/m | 15 – 20 W/m | Main room lighting, high ceilings, retail displays. |
Critical Thinking: The "High Wattage" Trap
Many buyers assume a 20W/m strip is superior to a 10W/m strip. This is often a mistake. A 20W/m strip generates significantly more heat. If the efficiency is low, you are paying for heat, not light. In our R&D lab, we have seen 15W/m strips outperform 20W/m competitors simply because the chips used were of a higher bin rank. Always check the datasheet for the lm/W ratio before approving a sample.
How do I calculate the maximum run length before voltage drop affects brightness?
We frequently troubleshoot dimming issues for customers who daisy-chain too many strips together. Physics is unforgiving when it comes to electrical resistance 4.
Calculate maximum run length by verifying the copper thickness of the PCB, typically 2oz or 3oz for engineering grades. For 24V COB strips, limit single-end power feeds to 5 meters. If the run exceeds this, use dual-end feeding or 48V systems to maintain consistent brightness across the entire length.
Voltage drop is the reduction in electrical potential along the path of a current flowing in an electrical circuit. In the context of LED strips, this manifests as the light looking bright at the power source and gradually dimming towards the end of the run.
The Physics of Voltage Drop
When we design PCBs for long-run series, we increase the copper weight. Standard strips use 1oz copper, but for engineering projects, we strictly recommend 2oz or 3oz copper PCBs. The thicker copper reduces resistance, allowing the current to travel further without significant loss.
12V vs. 24V vs. 48V
For any project in Australia involving runs longer than 2 meters, avoid 12V systems. The current required for 12V is double that of 24V for the same wattage, leading to four times the resistive loss.
- 12V: Suitable only for very short runs (e.g., inside a small cabinet).
- 24V: The industry standard for commercial projects. Good for runs up to 5 meters (single feed) or 10 meters (dual feed).
- 48V: Ideal for extremely long runs (up to 20-30 meters) without voltage drop, often used in large architectural coves.
Calculating Your Max Run
To ensure uniformity, you must calculate the load. If you are installing a 10-meter run of 15W/m strip, the total load is 150W.
Voltage Drop Guidelines
| Voltage System | Max Run (Single Feed) | Max Run (Dual Feed) | Recommended Use Case |
|---|---|---|---|
| 12V DC | 2 - 3 meters | 5 meters | Automotive, small joinery. |
| 24V DC | 5 meters | 10 meters | Standard architectural lighting. |
| 48V DC | 15 - 20 meters | 30 - 40 meters | Large commercial halls, long corridors. |
Leader Cable Considerations
The voltage drop doesn't just happen on the strip; it happens in the wire connecting the driver to the strip (the leader cable). If your driver is 10 meters away from the start of the light, you need to increase the wire gauge. We often see installers use thin 20AWG wire for long leader runs, resulting in only 22V reaching a 24V strip. This causes the LEDs to underperform immediately.
Do I need specific aluminum profiles to manage heat for high-wattage COB strips?
In our thermal testing lab, we watch unprotected high-wattage strips degrade rapidly. Heat is the silent killer of LED longevity.
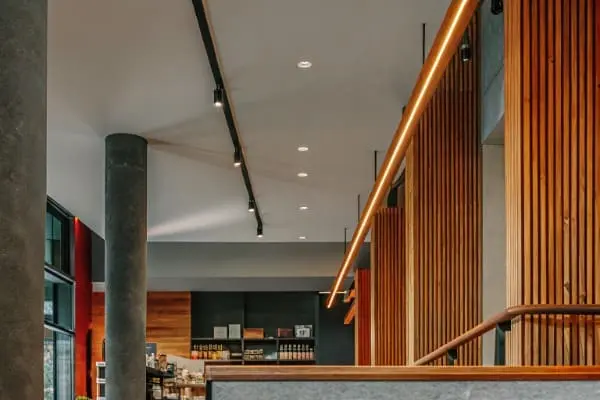
Yes, aluminum profiles are mandatory for any COB strip drawing more than 10 watts per meter. They act as essential heat sinks, dissipating thermal energy to keep the junction temperature low. Without profiles, high-density strips will suffer from premature phosphor degradation, color shifting, and significantly reduced operational lifespan.

Heat management is the single most critical factor in the longevity of an LED installation. COB (Chip on Board 5) strips pack hundreds of chips into a single meter. While this creates a beautiful, seamless line of light, it also concentrates heat generation in a very small area.
The 10-Watt Rule
Through extensive lifecycle testing, we have established a "safe zone" for bare installation. If a strip consumes less than 10W/m, it might survive being mounted directly onto wood or plaster, provided there is airflow. However, anything above 10W/m generates enough heat to damage the internal components over time.
Consequences of Overheating
When an LED strip overheats, two things happen:
- Lumen Depreciation: The light gets dimmer much faster than the rated 50,000 hours.
- Color Shift: The phosphor coating over the chips begins to degrade, causing the white light to turn blue or purple.
Choosing the Right Profile
The mass of the aluminum matters. A thin, foil-like profile won't absorb enough heat for a high-power strip. You need sufficient surface area.
Profile Selection Matrix
| Strip Wattage | Profile Type | Minimum Dimensions | Notes |
|---|---|---|---|
| < 10 W/m | Surface / Flat bar | 15mm x 6mm | Basic cooling is sufficient. |
| 10 - 15 W/m | Standard Recessed | 17mm x 7mm | Requires decent mass for heat transfer. |
| > 15 W/m | Deep / Architectural | 20mm x 15mm+ | Deep profiles aid in convection cooling. |
Installation Best Practices
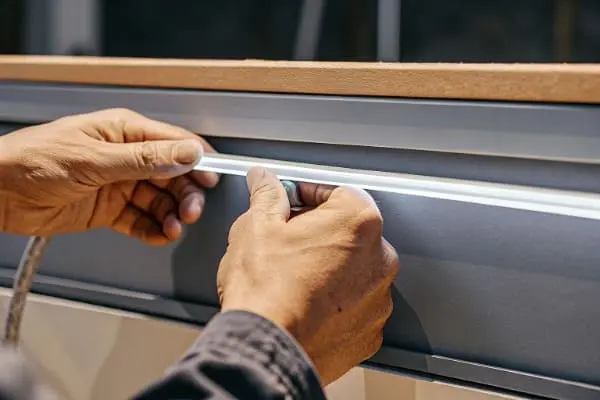
We always recommend using thermal tape 6 (usually pre-applied to the strip) to bond the strip firmly to the aluminum. Air gaps act as insulators. If the strip isn't touching the metal, the heat cannot escape. For high-end projects, verify that the profile has enough clearance for air to circulate around it, especially if installed in a ceiling cove.
Which Australian safety standards dictate the maximum power density for indoor lighting?
Navigating compliance is tough; we ensure our exports meet strict regulatory marks 7 to help you avoid liability.
The National Construction Code (NCC) Section J6 sets the maximum illumination power density (IPD) for indoor spaces. Additionally, all LED drivers must carry the RCM mark to comply with AS/NZS 3000 wiring rules. Ignoring these standards risks failed certifications and costly rework for commercial fit-outs.

Australia has some of the strictest electrical and energy standards in the world. For distributors and contractors, compliance is not optional—it is a legal requirement.
phosphor coating 8
NCC Section J6: Energy Efficiency
The National Construction Code (NCC) Section J6 focuses on energy efficiency. It limits the Illumination Power Density (IPD), which is measured in Watts per square meter (W/m²).
- For example, an office space might be limited to roughly 4.5W/m² to 6W/m².
- If you select a 20W/m LED strip and run rows every meter, you will vastly exceed this limit.
- This is why high-efficacy strips (high lumens, low watts) are essential for passing building certifications.
MacAdam ellipse 9
AS/NZS 3000: The Wiring Rules
Commonly known as the "Wiring Rules," this standard dictates how electrical installations must be carried out.
- RCM Mark: Every piece of control gear (drivers, dimmers) must carry the Regulatory Compliance Mark (RCM). If we ship a driver to Australia without this mark, an electrician cannot legally install it.
- Voltage Drop: The standard also suggests limits on voltage drop (typically max 5%) to ensure safety and device functionality.
IP Ratings and Safety
For bathroom or outdoor installations, AS/NZS 3000 defines specific "zones."
- Zone 0/1: Requires high IP ratings (IP67/IP68) and low voltage (12V/24V SELV).
- Zone 2: Typically requires IP44 or higher.
Using a standard IP20 COB strip in a wet area is a direct violation of these safety standards and poses a significant shock hazard.
MacAdam Ellipse and Consistency
While not a safety standard, professional consistency is expected in engineering. We recommend specifying strips within a 3-step MacAdam ellipse. This ensures that if you buy 50 rolls for a large office fit-out, the color temperature (e.g., 4000K) is visually identical across all rolls. Inconsistent binning is one of the most common complaints we hear from Australian lighting designers.
AS/NZS 3000 10
Conclusion
Planning is the cheapest part of any project.
Start by defining the lighting effect you need, then work backward to select the right voltage, wattage, and profile. By adhering to Australian standards and respecting the physics of voltage drop and heat, you ensure a durable, compliant installation.
Footnotes
- Official Australian government site for Greenhouse and Energy Minimum Standards. ↩︎
- Definition and background of the lumen as a unit of luminous flux. ↩︎
- Official source for Australian building codes and energy efficiency requirements. ↩︎
- Educational resource explaining the physics of resistance and voltage drop. ↩︎
- Technical specifications and product information from a leading manufacturer of COB LED technology. ↩︎
- Manufacturer documentation for thermal interface materials used in LED heat dissipation. ↩︎
- Official regulatory compliance mark information for electrical equipment in Australia. ↩︎
- Scientific explanation of how heat affects LED phosphor and color shift. ↩︎
- Industry standard for color consistency and chromaticity in LED lighting. ↩︎
- The primary standard for electrical installations in Australia and New Zealand. ↩︎


