Most common question we hear from contractors after installation is not about brightness or color—it is about what happens next Routine maintenance 1. The truth is, most LED strip failures we see returned for warranty claims trace back to neglected maintenance, not product defects.
Routine maintenance for LED strip lights includes periodic dusting with a soft cloth, inspecting electrical connections and power supplies for damage or looseness, checking adhesive integrity, monitoring heat buildup, and verifying consistent light output. These simple steps preserve brightness, extend lifespan, and prevent safety hazards.
The good news is that LED strip maintenance is light-touch, not intensive isopropyl alcohol 2. But knowing exactly what to do—and when—makes all the difference between a system that lasts five years and one that fails in eighteen months. Let me walk you through each critical area below.
How should I clean my high-output LED strips to ensure optimal heat dissipation?
Dust is the quiet enemy of high-output LED strips. On our factory test benches, we have measured surface temperature increases of 8–12°C on strips caked with just a thin layer of workshop dust. That heat shortens LED life faster than almost anything else.
Clean high-output LED strips by first powering them off, then dry-dusting with a microfiber cloth, spot-cleaning stubborn grime with mild soap or isopropyl alcohol, and drying thoroughly before restoring power. Regular cleaning prevents dust from insulating the strip surface and trapping heat.

Why Dust Causes Overheating
LED strips convert electricity into light and heat. High-output strips—anything above 14W per meter—generate significant thermal energy 3. Under normal conditions, that heat radiates away from the strip surface and into the surrounding air or an aluminum channel. Dust acts like a blanket. It traps heat against the LED chips and the PCB. Over time, this raises junction temperature 4, which accelerates lumen depreciation and can cause premature chip failure.
In our experience shipping to the Australian market, where ambient temperatures can already push 40°C in summer, even a thin film of dust on an unshielded strip can push operating temperatures into the danger zone. This is why cleaning is the single most practical maintenance task you can perform.
Step-by-Step Cleaning Process
Follow this order every time:
- Power off the strip completely. Do not just dim it. Disconnect at the driver if possible.
- Dry-dust first. Use a clean, dry microfiber cloth. Wipe gently along the length of the strip. Do not press hard on the LEDs.
- Spot-clean grime. Dampen a cloth corner with a mild soap-and-water solution. Dab or blot—do not scrub.
- Use isopropyl alcohol for adhesive residue or grease that soap cannot remove. Apply to the cloth, not directly to the strip.
- Dry thoroughly. Wipe with a dry cloth and allow at least 15 minutes of air drying before restoring power.
Cleaning Frequency Guide
| Environment | Recommended Cleaning Frequency | Primary Contaminant |
|---|---|---|
| Indoor living space | Every 2–3 months | Household dust |
| Kitchen or workshop | Monthly | Grease, particulate dust |
| Bathroom or spa | Monthly | Moisture residue, soap film |
| Outdoor sheltered | Every 4–6 weeks | Pollen, dirt, insect residue |
| Outdoor exposed | Every 3–4 weeks | Dust, debris, weather deposits |
What to Avoid
Never use abrasive pads, rough sponges, or paper towels that can snag on components. Avoid corrosive chemical cleaners—bleach, acetone, and ammonia-based sprays can damage protective coatings and silicone encapsulation. Never clean a powered strip. The combination of moisture and live current risks both shock and component damage.
If your strips are installed inside aluminum extrusion channels with diffuser covers, remove the diffuser before cleaning. Dust collects inside the channel too, and it restricts the heat-sink effect of the aluminum. A quick wipe inside the channel during your cleaning routine makes a noticeable difference in thermal performance.
What is the best way for me to inspect electrical connections in a long-run installation?
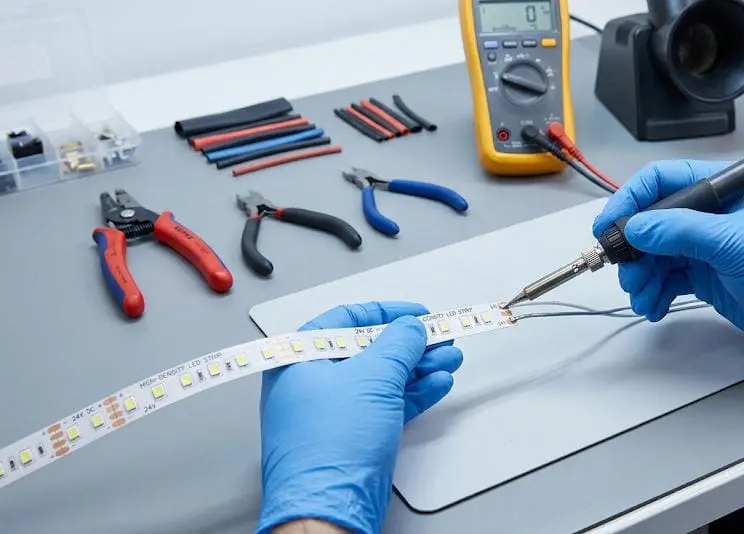
Long-run LED strip projects are where connection failures show up most. When we develop custom 20-meter or 30-meter runs for contractor clients in Germany and Australia, we stress-test every joint—because a single weak connection can cause flickering, voltage drop 5, or a dead zone in the middle of a finished ceiling.
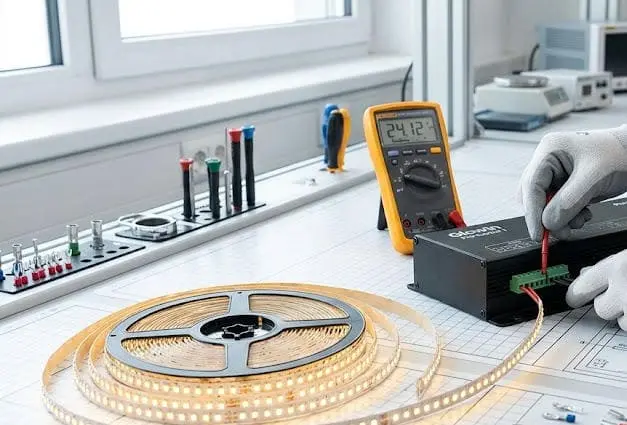
Inspect electrical connections in long-run installations by visually checking every connector, solder joint, and wire splice for discoloration, looseness, or corrosion. Use a multimeter to verify voltage at the start, middle, and end of each run. Schedule inspections quarterly for commercial projects and biannually for residential ones.
Where Failures Happen
In a long-run installation, electrical connections are the weakest link. The strip itself is factory-soldered under controlled conditions. But field connections—solderless clip connectors, on-site solder joints, wire-to-wire splices, and driver output terminals—are done under real-world conditions. Vibration, thermal cycling 6, and moisture all degrade these connections over time.
Our engineering team has found that the most common failure points are: solderless snap connectors that slowly lose spring tension, solder joints with cold solder or insufficient flux, and screw terminals on drivers that loosen from vibration. Each of these can introduce resistance, which generates heat at the joint and creates a cascading failure.
Visual Inspection Checklist
Walk the entire length of the installation. Look for these warning signs:
- Dark or dim sections — indicates voltage drop 7 or a partial connection failure upstream.
- Flickering — often caused by a loose connector or intermittent contact.
- Discolored connectors — browning or blackening at a connector means heat buildup from high resistance.
- Melted plastic — a severe sign that a connection has been overloaded.
- Peeling adhesive near a joint — heat from a bad connection can soften adhesive tape.
Voltage Drop Testing
A multimeter is the most useful tool for connection inspection. Measure DC voltage at these three points:
| Measurement Point | Acceptable Voltage (12V System) | Acceptable Voltage (24V System) | Action If Below Range |
|---|---|---|---|
| Start of run (near driver) | 11.8–12.2V | 23.6–24.4V | Check driver output |
| Midpoint of run | 11.4–12.0V | 22.8–24.0V | Inspect mid-run connections |
| End of run | 11.0–11.8V | 22.0–23.6V | Consider power injection or shorter runs |
If voltage at the end of a run drops below 10% of nominal, you have either a wiring issue or a design problem that needs power injection from the far end. A voltage drop greater than 10% causes visible dimming that clients will notice.
Power Supply and Driver Health
Do not neglect the driver. Listen for buzzing or clicking—this can indicate capacitor degradation or overload. Touch the driver housing briefly (with power on) to check for excessive heat. A warm driver is normal. A driver too hot to touch for more than two seconds is overheating and needs attention.
Check that the total connected wattage does not exceed 80% of the driver's rated capacity. Overloading the driver is one of the fastest ways to shorten the life of the entire system.
Cable and Wiring Condition
Trace every cable run. Look for pinched wires where strips pass through channels, fraying at bend points, and stress at any point where the cable changes direction. In commercial environments with ceiling plenums, cables can shift over time due to airflow or building movement. Re-secure any loose cables with proper clips—not cable ties cinched too tight, which can cut insulation over time.
How can I maintain the integrity of my waterproof LED strips in outdoor environments?
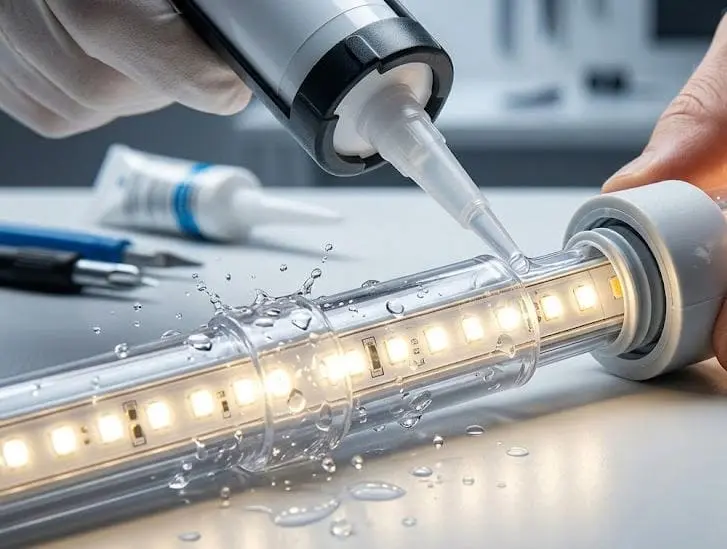
Outdoor LED strip installations face every threat at once—UV, rain, temperature swings, insects, and physical impact. When we develop IP65 and IP67 rated strips 8 for export, we design them to survive harsh conditions, but no IP rating replaces ongoing maintenance.
Maintain outdoor waterproof LED strips by inspecting silicone encapsulation and end caps for cracks or separation, cleaning debris from the strip surface monthly, checking that drainage paths around the installation remain clear, and verifying that all cable entry points remain sealed. Replace any strip section where the waterproof barrier is compromised.
Understanding IP Ratings and Their Limits
IP65 means the strip is protected against water jets. IP67 means it can withstand temporary submersion. IP68 means continuous submersion. But none of these ratings are permanent guarantees. The silicone or polyurethane coatings that provide waterproofing degrade over time due to UV exposure, temperature cycling, and mechanical stress.
In our testing lab, we have seen IP67-rated silicone tube strips maintain full waterproof integrity for over three years in controlled conditions. But in real outdoor installations—especially in coastal Australian environments with salt air—the same strips can show seal degradation within 18 months if not maintained.
Key Inspection Points for Outdoor Strips
Focus your inspection on the most vulnerable areas:
End caps and termination seals. These are the first points of moisture ingress. Check that silicone end caps are firmly bonded and show no cracking, yellowing, or peeling.
Cable entry points. Where power cables enter the waterproof strip, there is usually a sealed transition. Inspect this seal for gaps. Even a pinhole allows capillary action to draw water inside the strip over time.
Silicone sleeve or coating. Run your finger along the entire length. Feel for soft spots, bubbles, or areas where the coating has separated from the PCB. Any separation creates a pocket where condensation can form.
Mounting hardware. Clips, brackets, and channel mounts should be tight. A loose strip that sways in wind creates stress on sealed joints.
Seasonal Maintenance Schedule
| Season | Task | Why It Matters |
|---|---|---|
| Spring | Full visual inspection of seals and coatings | Winter freeze-thaw cycles may have caused cracking |
| Summer | Clean surface, check for UV degradation | UV exposure peaks and accelerates coating breakdown |
| Autumn | Clear debris from channels and drainage | Fallen leaves and debris can trap moisture against strips |
| Winter | Verify cable seals, check for condensation inside covers | Temperature drops cause condensation that can breach weakened seals |
Protecting Against UV Degradation
Prolonged UV exposure degrades both the silicone encapsulation and, in some cases, the phosphor layer on the LED chips themselves. If your outdoor strips are in direct sunlight for most of the day, consider installing them under an overhang, inside a recessed channel with a UV-resistant diffuser, or choosing strips specifically rated for UV resistance.
We have started recommending UV-stabilized silicone encapsulation for all our outdoor-rated products destined for Australia, where UV intensity is among the highest in the world. Even with UV-stabilized materials, annual inspection remains essential.
When to Replace Rather Than Repair
If moisture has entered a waterproof strip, that section should be replaced, not repaired. Once water reaches the PCB, corrosion begins immediately—even if the strip still lights up. The corrosion will spread along copper traces and eventually cause intermittent failures or short circuits. Cut out the affected section, apply a new waterproof splice, and replace with fresh strip. Attempting to re-seal a breached section almost never provides a reliable long-term fix.
What routine checks do I need to perform to prevent color shifting and maintain visual uniformity?
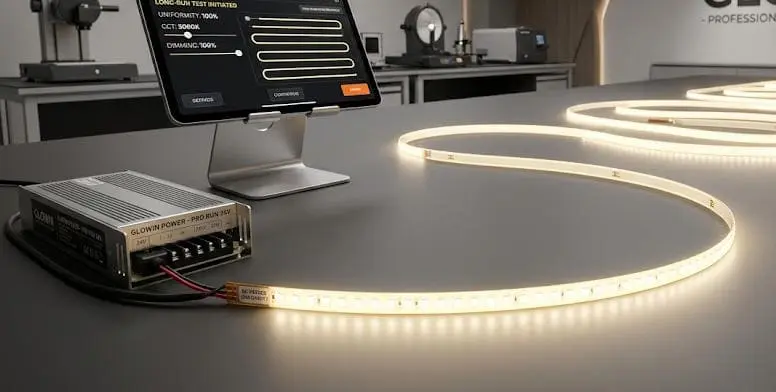
Color consistency 9 is the issue that keeps lighting designers and high-end contractors up at night. On our production line, we bin LEDs within tight SDCM (Standard Deviation of Color Matching) ranges—typically 3-step MacAdam ellipse 10—but even perfectly matched strips can shift over time if maintenance is neglected.
Prevent color shifting by periodically comparing light output across all strip sections under the same conditions, checking that all strips in a project share the same batch or bin code, monitoring driver output stability, maintaining consistent operating temperatures, and replacing any section that shows visible color deviation from adjacent strips.
Why Color Shifts Happen Over Time
Color shifting in LED strips has several root causes, and understanding them helps you know what to check. The most common causes are:
Thermal stress. Sustained high temperatures degrade the phosphor coating on white LEDs faster. Areas of a strip that run hotter—near connectors, in unventilated recesses, or on sections without heat sinking—will shift color faster than cooler sections. The result is visible color banding across what should be a uniform installation.
Voltage inconsistency. In long runs, voltage drops at the far end of a strip. Lower voltage changes the current through each LED, which subtly shifts the color temperature. A strip that measures 4000K at the start may read 3800K at the end of a 10-meter run if voltage drop is not managed.
Component aging. All LEDs age, but they do not all age at the same rate. Sections exposed to more heat, more humidity, or more operating hours will depreciate faster.
Visual Uniformity Checks
The simplest check is also the most effective. Turn on all strips in a project simultaneously. Stand back and look at the entire installation with fresh eyes. Your eye is remarkably sensitive to color differences—most people can detect a shift of 200K or more in color temperature when two sections are side by side.
Do this check in a darkened room if possible. Ambient light masks subtle differences. Take a photo with a fixed white-balance camera setting so you can compare images over time.
What to Measure
If you have access to a handheld spectrometer or a color temperature meter, take readings at consistent intervals:
| Check | Tool | What to Look For | Frequency |
|---|---|---|---|
| Color temperature consistency | CCT meter or spectrometer | Variation greater than 150K between sections | Every 6 months |
| Brightness uniformity | Lux meter at fixed distance | More than 15% variation between start and end | Every 6 months |
| Driver output voltage | Multimeter | Voltage outside ±5% of rated output | Quarterly |
| Surface temperature | IR thermometer | Hot spots exceeding 60°C on any section | Quarterly |
Habits That Preserve Uniformity
Dim to 70–80% of maximum output. Running strips at full power generates more heat and accelerates phosphor degradation. We often advise our contractor clients to specify slightly higher-output strips and then dim them, rather than running lower-output strips at maximum.
Use aluminum channels. Channels spread heat evenly along the strip, reducing localized hot spots that cause uneven aging. The thermal benefit of an aluminum extrusion is one of the most cost-effective investments in long-term color consistency.
Avoid mixing batches. If you need to replace a section, try to source strip from the same production batch. Different batches—even from the same manufacturer—can have slight color differences. We provide batch and bin codes on every reel specifically so our clients can reorder matching product for maintenance replacements.
Implement scheduled off-periods. Even short rest periods allow components to cool. Continuous 24/7 operation accelerates aging more than the same total hours spread over an on-off cycle. If the installation allows it, program rest intervals into the control system.
When Color Shift Cannot Be Fixed by Maintenance
If a section has shifted noticeably and cleaning plus voltage correction does not resolve the issue, the LEDs in that section have degraded beyond recovery. Replace the affected section. This is normal end-of-life behavior. A well-maintained strip in a good thermal environment should maintain acceptable color consistency for 35,000–50,000 hours. Poor maintenance can cut that number in half.
Conclusion
LED strip maintenance is straightforward: keep them clean, keep them cool, keep connections tight, and keep moisture out. A few minutes of regular attention protects your investment, preserves visual quality, and prevents costly failures down the line.
Footnotes
- Explains the overall benefits of regular maintenance for electronic devices. ↩︎
- Details the safe and effective use of isopropyl alcohol for cleaning electronics. ↩︎
- Provides background on thermal energy generation. ↩︎
- Defines the critical temperature of an LED's semiconductor and its impact on reliability. ↩︎
- Explains the electrical concept of voltage drop. ↩︎
- Defines thermal cycling and its mechanical effects. ↩︎
- Explains the phenomenon of voltage loss in LED strips and its consequences. ↩︎
- Clarifies the meaning of the IP67 rating for water and dust protection. ↩︎
- Defines and explains the importance of maintaining uniform color output in LED lighting. ↩︎
- Explains the MacAdam ellipse color matching metric. ↩︎


