Client usually ask questions about LED strips that no longer look quite right waterproof LED strip performance 1. The whites seem warmer. The brightness feels lower. And there is a faint yellow tint along the waterproof coating that was not there six months ago.
Yellowing does affect waterproof LED strip performance. It reduces brightness, shifts color temperature warmer, and can weaken the waterproof barrier over time. The severity depends on whether the yellowing is superficial or structural, with material quality, heat, and UV exposure being the main causes.
This article breaks down exactly what yellowing does to your LED strips, why it happens, and what you can do about it—whether you are specifying products for a new project or troubleshooting an existing installation.
How does the yellowing of waterproof coatings affect the color temperature and brightness of my LED installations?
When we test returned strips from job sites across Australia and Germany, the most common surprise is this: the LEDs themselves are often still fine. The coating on top is the real problem.
Yellowing of waterproof coatings acts as a filter over your LEDs. It absorbs blue wavelengths, making white light appear warmer and dimmer. Over time, this can reduce perceived brightness by 10–30% and shift color temperature noticeably, undermining the design intent of your installation.
How Yellowing Changes What You See
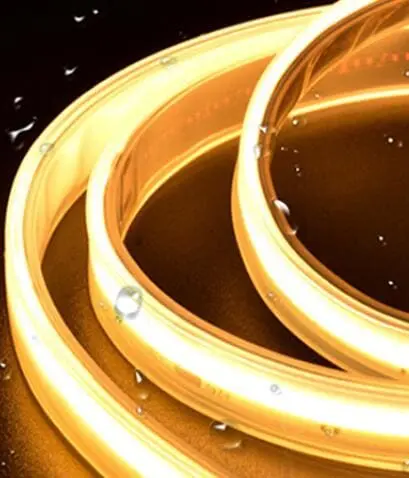
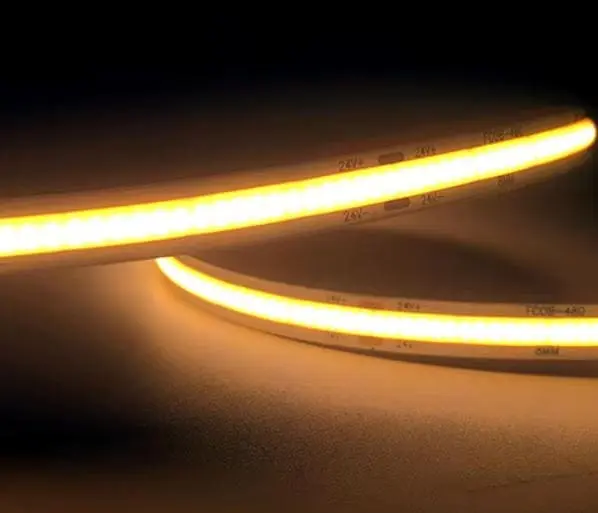
Think of a yellowed waterproof coating like a pair of tinted sunglasses placed over your LEDs. The LEDs may still emit the same spectrum, but the light that reaches your eye has been filtered. Blue wavelengths get absorbed by the discolored material, so the output looks warmer—and weaker.
This matters most for cool white and neutral white installations. A strip specified at 6000K can drift down to 5000K or lower once the coating yellows. In commercial spaces or architectural lighting, that kind of shift is visible and unacceptable.
Brightness Loss Is Real, Not Just Perceived
Yellowed coatings scatter and absorb light. Our internal testing on aged PU-glue samples shows that brightness can drop measurably within the first year if the encapsulation material is not UV-stable. Silicone-based coatings hold up far better, but even they are not immune to extreme conditions.
| Parameter | New Strip (Silicone Coating) | Yellowed Strip (PU Glue, 12 Months) |
|---|---|---|
| Color Temperature 2 | 6000K | ~5200K |
| Relative Brightness | 100% | ~75–85% |
| Visual Appearance | Crisp, neutral white | Warm, yellowish tint |
| Coating Clarity | Clear | Noticeably hazy/yellow |
The Hidden Risk: Heat Buildup
A yellowed coating is often also a degraded coating. As the material breaks down, it can lose some of its thermal conductivity 3 or reflectivity. This traps more heat at the LED junction. Higher junction temperatures accelerate LED aging, creating a feedback loop: the hotter the strip runs, the faster the coating degrades, and the faster the LEDs lose output.
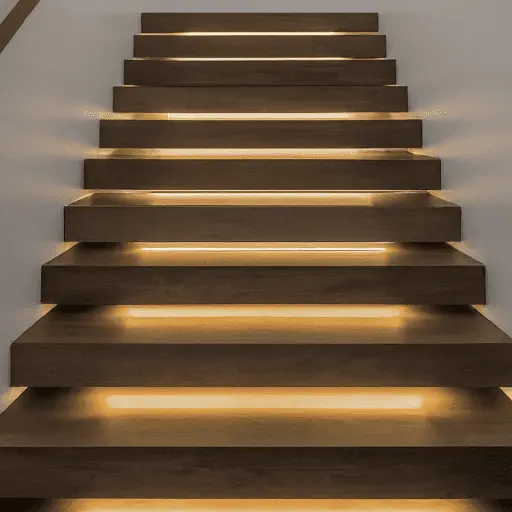
This is why we always recommend mounting strips on aluminum profiles 4. The heat dissipation benefit is significant. It protects both the LEDs and the waterproof layer.
Color Consistency Across a Project
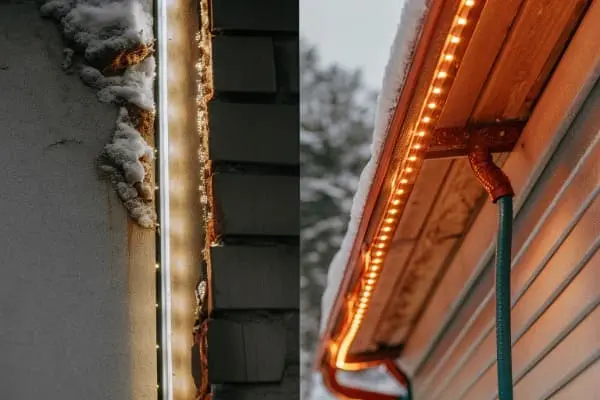
For contractors installing hundreds of meters of strip lighting in a single project, even minor yellowing becomes a major problem if it is uneven. One section might yellow faster because it sits near a heat source or gets more sunlight. The result is visible color variation across what should be a uniform installation. This is one of the top complaints we hear from project estimators and lighting designers.
Why are my outdoor LED strips turning yellow and what materials should I specify to prevent this?
Our production team has tested dozens of encapsulation materials over the years. The difference in yellowing resistance between a cheap PU glue and a high-grade silicone is dramatic—and it shows up fast in the field.
Outdoor LED strips yellow mainly due to UV radiation, excessive heat, and low-quality encapsulation materials like epoxy resin or PU glue. To prevent this, specify strips with silicone-based waterproofing, UV-stable diffuser covers, and proper heat dissipation mounting to ensure long-term clarity and performance.
The Three Main Causes of Yellowing
1. UV Radiation. Sunlight is the biggest enemy of polymer-based waterproof coatings. UV radiation 5 UV breaks down molecular bonds in epoxy and PU materials, causing oxidation. The result is a visible yellow tint that deepens over time. Outdoor installations without UV protection are especially vulnerable.
2. Heat. LED strips generate heat during operation. If that heat is not dissipated properly—through aluminum channels, ventilated mounting, or thermally conductive substrates—the encapsulation material cooks slowly. High temperatures accelerate the chemical breakdown that causes yellowing.
3. Material Quality. This is where specification decisions matter most. Not all waterproof coatings are created equal.
Material Comparison: Silicone vs. PU Glue vs. Epoxy
| Property | Silicone Encapsulation 6 | PU Glue | Epoxy Resin 7 |
|---|---|---|---|
| UV Resistance | Excellent | Poor to moderate | Poor |
| Heat Resistance | Up to 200°C | Up to 80–100°C | Up to 100–120°C |
| Yellowing Onset (Outdoor) | 5–10 years | 6–12 months | 6–18 months |
| Flexibility After Aging | Remains flexible | Becomes brittle | Becomes brittle |
| Cost | Higher | Low | Low to moderate |
| Best Use Case | Outdoor, high-heat, long-term | Budget indoor | Short-term indoor |
This table reflects what we see from manufacturer material testing and field feedback. Silicone costs more, but for outdoor and project-grade applications, the long-term savings are significant.
Secondary Causes Worth Knowing
Chemical exposure. Cleaning agents, airborne pollutants, and even off-gassing from nearby building materials can accelerate discoloration on plastic diffusers and coatings. Always check chemical compatibility before using any cleaner on LED strip surfaces.
Dust and contamination. Surface dirt can mimic yellowing. Before concluding that a strip has degraded, clean it gently with a mild, non-abrasive solution. Sometimes the problem is just grime, not material failure.
What to Specify for Outdoor Projects
If you are writing specifications for an outdoor installation, prioritize these:
- Silicone-based waterproofing (IP67 or IP68 rated)
- UV-stabilized diffuser materials if using aluminum profiles with covers
- Aluminum mounting channels for heat dissipation
- LED chips from reputable bin sources with consistent phosphor formulations
- Request material certifications and UV aging test reports from your supplier
When we prepare quotations for distributors in Germany and Australia, we include material data sheets that specify UV resistance ratings. This helps contractors justify the product choice during project bidding.
How can I ensure the long-term color consistency of my project-grade strips against UV exposure and heat?
We have had clients come back to us after three years with strips that still look as good as the day they were installed—and others who experienced visible yellowing within months. The difference almost always comes down to material selection, thermal design, and installation practice.
To ensure long-term color consistency, choose LED strips with silicone encapsulation, mount them in aluminum heat-dissipation profiles, minimize direct UV exposure where possible, and work with suppliers who provide batch-to-batch color consistency guarantees and UV aging test data.
Start With the Right Product
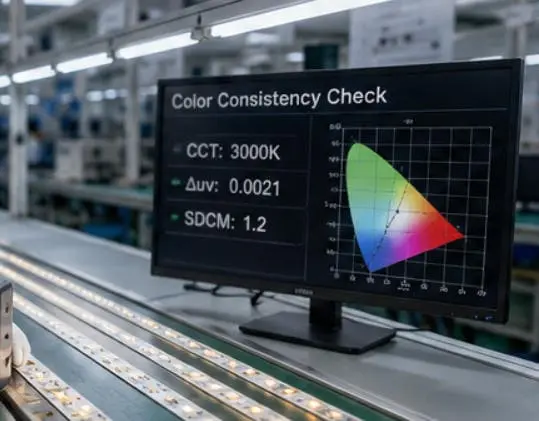
Color consistency begins before installation. It starts at the purchasing stage. When we process orders for project-grade strips, we bin-match LED chips to ensure that every reel in a batch falls within a tight color tolerance—typically within a 3-step MacAdam ellipse 8. This means that strips installed side by side will look uniform to the human eye.
But even perfect LEDs will look inconsistent if the waterproof layer yellows unevenly. So the coating material is just as important as the chip quality.
Thermal Management Is Non-Negotiable
Heat is the silent killer of LED strips. It degrades the phosphor layer inside the LEDs, breaks down the encapsulation material, and shortens the overall lifespan of the installation. For project-grade work, always install strips inside aluminum profiles. The profile acts as a heat sink, drawing thermal energy away from the LEDs and the coating.
Here is a simple comparison of surface temperatures based on mounting method:
| Mounting Method | Surface Temp (Typical, After 4 Hours) | Yellowing Risk |
|---|---|---|
| Direct adhesive on drywall | 55–65°C | High |
| Direct adhesive on wood | 50–60°C | Moderate to high |
| Aluminum profile (no cover) | 35–45°C | Low |
| Aluminum profile (with diffuser) | 38–48°C | Low |
These values vary based on strip wattage and ambient temperature, but the trend is consistent: aluminum profiles reduce surface temperature by 15–25°C compared to direct mounting on non-conductive surfaces.
UV Protection Strategies
For outdoor installations, you have several options:
- Use UV-stable silicone coatings. This is the first line of defense.
- Install under eaves or recessed channels. Reducing direct sun exposure extends coating life dramatically.
- Choose UV-resistant diffuser covers. Polycarbonate diffusers with UV additives resist yellowing better than standard PMMA or bare coatings.
- Apply UV-blocking films in extreme exposure scenarios (e.g., south-facing facades in Australia).
Maintenance Matters
Even the best products need periodic attention. We recommend that installers or end clients inspect LED strip installations at least once per year. Look for early signs of yellowing, adhesion loss, or uneven brightness. Catching a problem early gives you time to address it before it becomes a warranty claim.
Clean the strip surface gently with a soft cloth dampened with mild soapy water or a low-concentration isopropyl alcohol wipe. Avoid abrasive cleaners, acetone, or solvent-based products, as these can damage the encapsulation material and accelerate yellowing.
Work With Suppliers Who Test
Not all suppliers test their products for long-term UV and thermal aging. When evaluating a supplier, ask for:
- UV aging test reports (e.g., ASTM G154 9 or equivalent)
- Thermal cycling test data
- Color consistency specifications (MacAdam ellipse step)
- Material data sheets for the waterproof coating
We provide these documents as standard with our project quotations. They help our clients in Germany and Australia pass project approval stages more smoothly and give contractors confidence in long-term performance.
What steps should I take if my clients report yellowing on the waterproof LED strips I've already installed?
We have walked many contractors and distributors through this exact situation. A client calls to say the lights look different. The first instinct is to panic, but the right response is to diagnose before you act.
When clients report yellowing, first determine whether it is surface contamination, coating degradation, or LED phosphor aging. Clean the surface gently. If yellowing persists, assess the severity: mild discoloration may be cosmetic, but severe or uneven yellowing with coating separation requires partial or full strip replacement.
Step 1: Diagnose the Problem
Not all yellowing is the same. Before committing to any action, figure out what is actually happening.
- Surface contamination. Dust, grease, and airborne pollutants can settle on the strip and create a yellowish appearance. This is the easiest to fix. Wipe the strip with a soft cloth and mild cleaner. If the yellowing disappears, you are done.
- Coating degradation. If cleaning does not help, the waterproof layer itself has likely oxidized. Check if the coating is still clear or has turned hazy and amber-toned. Touch the coating gently—if it feels tacky, brittle, or is peeling away from the PCB, the material has degraded significantly.
- LED phosphor aging. In some cases, the LEDs themselves are the issue. This happens with very cheap chips or when strips have been running at excessive temperatures for extended periods. If you remove or peel back the coating and the light still appears yellow, the LEDs are likely at fault.
Step 2: Assess the Severity
Once you know the cause, decide how much intervention is needed.
- Mild, even yellowing (cosmetic). The strip still works. Brightness is close to original. Color shift is minor. In many cases, the client may accept this with an explanation and a note on expected service life. Document the condition with photos.
- Moderate yellowing (functional impact). Noticeable brightness drop or color shift. The installation no longer matches the original design intent. Consider replacing the affected sections. If using silicone-coated strips, check whether the silicone sleeve can be replaced without changing the entire strip.
- Severe yellowing (structural failure). The coating is separating, cracking, or has lost its waterproof integrity. Moisture may have entered the strip. Replace immediately. Continued use risks electrical failure, short circuits, or damage to surrounding finishes.
Step 3: Communicate Clearly With Your Client
Transparency builds trust. Explain what caused the yellowing, what you recommend, and what steps you will take to prevent it in future installations. If the product was under warranty, coordinate with your supplier—share photos, installation conditions, and operating hours.
When our partners contact us with yellowing issues, we ask for detailed photos, the installation environment description, and the batch number. This helps us trace the materials used and determine whether the issue is isolated or systemic.
Step 4: Prevent Recurrence
After resolving the immediate issue, update your specifications for future projects.
- Switch to silicone-based waterproof coatings if you were using PU or epoxy.
- Ensure all outdoor installations use aluminum profiles for heat dissipation.
- Add a maintenance recommendation to your project handover documents.
- Request UV aging and thermal test data from your supplier before placing the next order.
When to Replace vs. When to Clean
| Symptom | Likely Cause | Recommended Action |
|---|---|---|
| Light yellow film on surface | Dust or contamination | Clean with mild solution |
| Even amber tint, coating intact | Coating oxidation (UV/heat) | Monitor; plan replacement if worsening |
| Uneven yellowing across sections | Localized heat or UV exposure | Replace affected sections |
| Coating peeling or cracking | Material failure | Replace immediately |
| Yellow light output with coating removed | LED phosphor degradation | Replace entire strip |
This decision framework helps you respond quickly and appropriately, without over-reacting to a cosmetic issue or under-reacting to a structural one.
Conclusion
Yellowing is a diagnostic clue, not an automatic death sentence for your LED strips. The right materials, proper thermal management 10, and periodic maintenance go a long way toward preventing it—and knowing how to diagnose and respond keeps your projects looking sharp for years.
Footnotes
- Explains how encapsulants affect LED performance and yellowing due to UV. ↩︎
- Wikipedia provides a comprehensive definition and applications of color temperature. ↩︎
- Discusses aluminum's thermal conductivity for heat dissipation in LED profiles. ↩︎
- Explains how aluminum profiles act as heat sinks to prolong LED lifespan. ↩︎
- Details how UV radiation degrades polymers, causing yellowing and property loss. ↩︎
- Highlights silicone resins as superior for LED encapsulation due to UV resistance and thermal stability. ↩︎
- Replaced with an authoritative source from Chemical Safety Facts detailing epoxy resins, their uses, and properties. ↩︎
- Explains MacAdam ellipses for LED binning and color consistency in lighting design. ↩︎
- Describes ASTM G154 as a standard for accelerated weathering tests using UV light. ↩︎
- Emphasizes thermal management's importance for LED performance, reliability, and longevity. ↩︎


