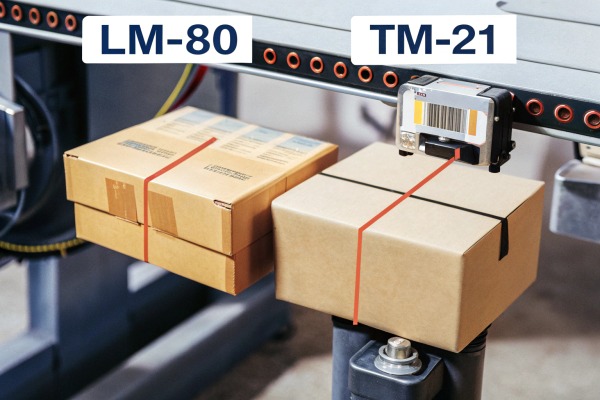
Running a lighting installation 24 hours a day is like asking a runner to sprint a marathon daily without rest LM-80 and TM-21 data 1. In our development lab, we often see standard products fail within months under these conditions, causing costly downtime for facility managers. You need more than just a promise of longevity.
To verify durability for 24/7 projects, you must move beyond theoretical lifespans and request specific photometric reports like LM-80 and TM-21 data. Prioritize physically robust components such as double-layer PCBs with thick copper, ensure advanced thermal management through proper heat sinking, and validate consistency via strict MacAdam ellipse binning standards.
Here is how you can technically evaluate your lighting supplier to ensure their products survive the marathon.
What specific test reports should I request to confirm my LED strips can handle 24/7 operation?
Our engineering team often sees competitors claiming a "50,000-hour lifespan" without providing a single page of data to back it up double-layer PCBs 2. We advise our clients to ignore marketing flyers and instead demand the raw technical reports that validate the chip's endurance.
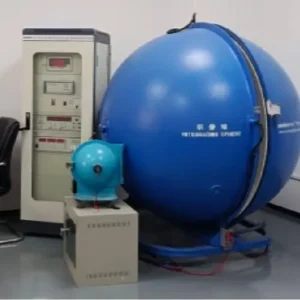
Request the LM-80 report to verify lumen maintenance at different temperatures and the TM-21 calculator results to project long-term lifespan. Additionally, ask for LM-84 data if available, as it tests the entire luminaire system rather than just the LED chip, offering a more accurate prediction of real-world performance.
Understanding the Holy Trinity of LED Testing
When you are sourcing for commercial projects, especially those that never turn off, you cannot rely on trust MacAdam ellipse binning standards 3. You need evidence. The lighting industry uses a standardized set of documents to predict how light sources behave over time. If your supplier cannot provide these, their lifespan claims are likely guesses L70 Metric 4.
LM-80: The Endurance Test
The LM-80 is not a prediction; it is a scorecard. It involves testing LED packages (the chips themselves) for at least 6,000 hours at three different temperatures (usually 55°C, 85°C, and a third manufacturer-selected temperature) LM-84 data 5.
- What to look for: Check the data at the highest temperature (e.g., 85°C or 105°C). If the light output drops significantly at high heat, the chip will fail in a 24/7 enclosed environment.
TM-21: The Crystal Ball
Since nobody can wait 50,000 hours (almost 6 years) to test a light, the TM-21 standard 6 uses the LM-80 data to mathematically project the future.
- The L70 Metric: This is the industry standard for "end of life." It is the point where the light output has dropped to 70% of its original brightness.
- The 6x Rule: A TM-21 report can only project up to 6 times the duration of the LM-80 test. If the chip was tested for 6,000 hours, the maximum valid claim is 36,000 hours. Be skeptical of reports claiming 100,000 hours based on a short test duration.
LM-84: The System Check
While LM-80 tests the chip, LM-84 tests the finished product. This is crucial because a great chip can fail if placed on a bad circuit board.
Comparing Key Standards
Here is a quick reference table to help you understand what each document tells you about your project's longevity.
| Standard | What It Tests | Key Insight for 24/7 Projects |
|---|---|---|
| LM-80 | The raw LED chip (package) only. | Shows how the light source resists heat degradation over time. |
| TM-21 | Mathematical projection algorithm. | Estimates the L70 lifespan (when light dims to 70%) based on LM-80 data. |
| LM-79 | The finished fixture (electrical/photometric). | Provides a snapshot of performance at time zero (not durability). |
| LM-84 | The finished fixture over time. | The most accurate durability test for a complete system, including the PCB and driver. |
Why L70 Matters More Than "Failure"
In 24/7 lighting, lights rarely "burn out" like old incandescent bulbs. Instead, they fade. For a retail store or a hospital, a light that has dimmed by 40% is effectively useless. Requesting these reports ensures you know exactly when that fading will happen, allowing you to plan maintenance cycles accurately.
How do I evaluate if the PCB and components are robust enough for my continuous-use projects?
In our factory, we refuse to use standard thin circuit boards for project-grade orders because we know they cannot handle the thermal stress of constant operation. We have seen too many installations fail because the copper traces were too thin to conduct heat away from the chips effectively.
Evaluate robustness by checking the PCB copper weight, ensuring it is at least 2 ounces to manage heat and voltage drop effectively. Inspect the quality of resistors and solder joints for clean connections, and verify that the ingress protection materials are non-yellowing silicone rather than cheap PVC plastics.
The Backbone: PCB Copper Weight
The Printed Circuit Board (PCB) is the foundation of your LED strip. For residential strips used a few hours a day, a standard "1-ounce" (1oz) copper thickness is acceptable. However, for 24/7 projects, this is often a point of failure.
When electricity flows through copper, resistance generates heat. Thinner copper has higher resistance, leading to two problems:
- Voltage Drop: The LEDs at the end of the run get less power and appear dimmer.
- Heat Buildup: The resistance creates heat that stays trapped in the PCB, cooking the LED chips from below.
For continuous operation, always specify 2oz or 3oz rolled annealed copper. This thicker layer acts as a highway for both electricity and heat, ensuring the current flows smoothly and thermal energy spreads out across the entire strip rather than concentrating under the chips.
Resistors and Component Placement
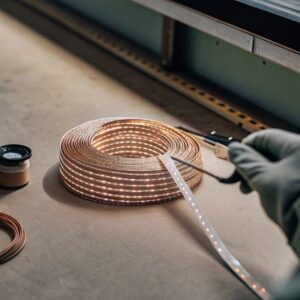
Look closely at the resistors (the small black rectangles on the strip). In cheap manufacturing, suppliers use low-power resistors to save cost. Under 24/7 load, these resistors overheat, often becoming the first component to fail.
What to inspect:
- Brand: Ask if they use reputable resistor brands.
- Rating: Ensure the resistors are rated for higher power than the circuit actually draws (derating).
- Soldering: Check for "cold solder joints"—dull, gray connections that look brittle. A proper solder joint should be shiny and smooth.
Project-Grade vs. Standard-Grade Specifications
Use this checklist to audit the physical samples your supplier sends you.
| Feature | Standard (Residential) Grade | Project (24/7) Grade |
|---|---|---|
| PCB Copper Thickness | 1 oz (35µm) | 2 oz (70µm) or 3 oz (105µm) |
| PCB Structure | Single Layer | Double Layer (better durability) |
| Resistor Load | 100% load (runs hot) | 60-70% load (runs cool) |
| Cover Material | Epoxy or PVC (yellows quickly) | Food-grade Silicone (UV stable) |
| Tape Adhesive | Generic Blue Tape | 3M VHB 8 (Red) or TESA 4965 |
The Material Trap: PVC vs. Silicone
If your project is outdoor or humid, the coating material matters. Many budget suppliers use PVC. While it looks clear initially, PVC degrades under the constant UV exposure from the LEDs themselves and sunlight. It turns yellow and brittle within months. For 24/7 use, Modified Silicone is non-negotiable. It remains flexible and clear for years, protecting the delicate components underneath without altering the light color.
What thermal management features should I look for to ensure my lighting doesn't fail after months of constant use?
We once analyzed a failed project where the LEDs turned blue after just three months because the installer pasted them directly onto wood. We now strictly advise our partners that without a proper thermal path, even the most expensive chip will burn itself out from the inside.
Look for high-quality thermal tape, such as 3M VHB, which aids in heat transfer to the mounting surface. Ensure the LED strip is paired with an aluminum profile of sufficient mass for dissipation, and check that the encapsulation material is high-grade silicone to resist thermal hardening over time.
Heat: The Enemy of Longevity
When an LED chip overheats, it doesn't just pop. The phosphors—the chemical coating that turns blue LED light into white light—begin to degrade. This is why old white LEDs often turn a sickly purple or blue color. For 24/7 projects, keeping the junction temperature (Tj) low is the single most critical factor.
The Thermal Path
You must visualize the journey of heat leaving the LED chip. It travels from the Chip -> PCB -> Adhesive Tape -> Aluminum Profile -> Air. If any step in this path is blocked, heat accumulates.
1. The Adhesive Tape
The double-sided tape on the back of the strip is not just for sticking; it is a thermal interface material.
- Red Flag: Thin, generic tape that feels like paper.
- Gold Standard: 3M VHB (Very High Bond) or thick conductive thermal tapes. These fill the microscopic gaps between the PCB and the aluminum, allowing heat to transfer efficiently.
2. The Aluminum Profile
Never install 24/7 high-power strips directly onto wood, drywall, or plastic. These materials are thermal insulators. You must use an aluminum profile.
- Mass Matters: A thin foil profile isn't enough for high-wattage strips. You need aluminum with enough mass to absorb the heat and enough surface area to release it into the air.
- Wattage Rule: A general rule of thumb is that the surface area of the aluminum profile should be proportional to the wattage of the strip. For strips over 14W/meter, deep or wide profiles are necessary.
Airflow and Environment
Even excellent heat sinks fail if installed in a vacuum.
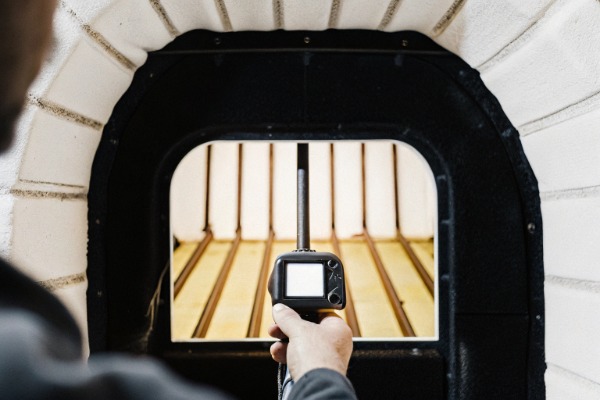
- Enclosed Spaces: If you are installing lights in a cove or a sealed box, you must derate the product (run it at lower power) or install active ventilation.
- Ambient Temperature: Check the manufacturer's
Ta(Ambient Temperature) rating. Most are rated for 25°C. If your factory ceiling is 45°C, standard strips will fail. You need industrial-grade strips designed with high-temperature PCBs and under-driven chips.
Thermal Conductivity Reference
Understanding the thermal properties of materials helps in planning the installation surface.
| Material | Thermal Conductivity (W/m·K) | Suitability for 24/7 Mounting |
|---|---|---|
| Aluminum | ~205 | Excellent (Essential for heat sinking) |
| Steel | ~50 | Fair (Acceptable for low power) |
| Glass | ~1 | Poor (Insulator, traps heat) |
| Wood | ~0.12 | Critical Failure (Do not use directly) |
| Drywall | ~0.17 | Critical Failure (Do not use directly) |
How can I verify that my supplier maintains consistent durability standards across different production batches?
When we export to our long-term partners in Australia, their biggest fear is that the second order will look different from the first. To prevent this, we lock down specific "Bin Codes" in our system, ensuring that every batch uses chips from the exact same manufacturing coordinates.
Verify consistency by requiring a specific MacAdam Ellipse step, usually 3-step or lower, for color uniformity. Demand a fixed Bin Code for all reorders to ensure batches match, and ask if the supplier keeps retention samples from every shipment to compare performance against the original master sample.
The Challenge of Binning
LED manufacturing is like baking cookies; not every cookie comes out exactly the same. Manufacturers sort these LEDs into "bins" based on color (CCT), voltage, and brightness.
For a one-off project, mixed bins might be okay. But for a 24/7 project that might require maintenance or expansion in two years, consistency is durability. If you replace a failed section and the new light is a slightly different shade of white, the project looks broken.
Understanding MacAdam Ellipses (SDCM)
Color consistency is measured in steps of Standard Deviation Colour Matching (SDCM), or MacAdam Ellipses.
- 1-Step: Impossible to see a difference with the human eye. (Very expensive).
- 3-Step: The industry standard for professional lighting. Virtually no visible difference between batches.
- 5-Step or Higher: Visible differences. One strip might look pinkish, another greenish.
Actionable Tip: Specify "3-Step MacAdam" on your purchase order. If a supplier refuses or charges a massive premium, they likely lack tight control over their supply chain.
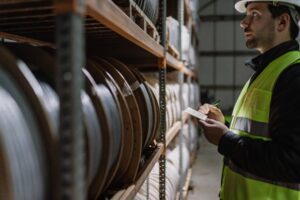
Batch Tracking and Retention Samples
A reliable supplier should treat your LED strips like medical supplies—everything must be traceable.
- Fixed Bin Codes: Ask your supplier to record the specific Bin Code used for your project. If you order again in 6 months, they must use the same Bin Code.
- Retention Samples: We keep a 0.5-meter sample from every major batch we ship. If a client complains about a failure or color shift a year later, we pull our sample from the archive to test it. This helps determine if the issue is a production defect or an installation error (like over-voltage).
- Third-Party Audits: For large-scale projects, do not rely on the factory's internal QC. Hire a third-party inspection agency (like SGS or Intertek) to pull random samples from the production line and run a "burn-in" test for 24-48 hours before shipment.
Traceability Checklist
| Question to Ask Supplier | Good Answer | Bad Answer |
|---|---|---|
| "What MacAdam Step are these?" | "3-Step SDCM" | "Standard white" / "Don't know" |
| "Can you lock the Bin Code?" | "Yes, we will record it for reorders." | "No, batches always vary." |
| "Do you do burn-in testing?" | "Yes, 12-24 hours for every reel." | "We just do a quick light-up check." |
| "Can I trace a reel to a date?" | "Yes, batch numbers are on the PCB." | "No tracking numbers available." |
Conclusion
Verifying durability for 24/7 lighting requires a shift from trusting marketing claims to auditing technical data. By demanding LM-80/TM-21 reports, inspecting PCB copper weight 9, ensuring strict thermal management, and enforcing binning consistency, you protect your project from premature failure and costly maintenance.
Footnotes
- Explains LED lumen maintenance and lifespan projection standards. ↩︎
- Describes the structure of printed circuit boards for improved durability. ↩︎
- Defines the standard for LED color consistency and uniformity. ↩︎
- Replaced 404 energy.gov link with a Wikipedia page explaining lumen maintenance, including the L70 metric. ↩︎
- Describes the test method for measuring lumen maintenance of LED luminaires. ↩︎
- Explains the method for projecting lumen maintenance from LM-80 data. ↩︎
- Details the test method for measuring lumen maintenance of LED light sources. ↩︎
- Describes a specific adhesive tape known for its very high bond and thermal properties. ↩︎
- Explains the significance of copper thickness in printed circuit boards for thermal management. ↩︎