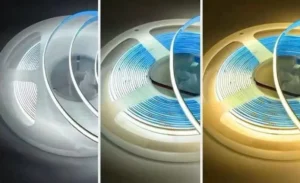
When we test high-density COB strips in lab, the most common failure point is always the corner minimum bending radii 1. Installers often try to force the strip into a 90-degree turn without cutting, damaging the internal PCB copper trace 2. This leads to flickering lights and expensive rework requests that we have to decline. To avoid this, you need to ask the right technical questions before the goods leave the factory.
To inquire with suppliers about mitered corner procedures, you must request specific data on minimum bending radii, recommended cutting tools, and compatible corner connectors. Ask for step-by-step diagrams for cutting angles and inquire about custom pre-soldered corner units to eliminate on-site errors and ensure consistent lighting continuity.
Below, I have outlined the specific questions and technical details you need to discuss with your manufacturing partner to ensure a smooth installation.
How do I ask my supplier for custom mitered corner dimensions to fit my project’s specific layout?
In our experience exporting to the US and Germany, we frequently receive project files where the walls are not perfectly square CAD drawings 3. When we process orders for rigid aluminum profiles, a standard 45-degree cut will result in ugly gaps if the wall is actually 88 or 92 degrees. Communicating these nuances early prevents the headache of trying to fill gaps with silicone on-site.
Ask your supplier if they accept CAD drawings or digital templates to fabricate custom-angle mitered corners. Request a "shop drawing" approval process where you verify all dimensions, including wall angles and channel depths, before production begins to ensure a perfect fit for irregular layouts.
The Importance of Shop Drawings
When dealing with custom mitered corners, you cannot rely on simple text descriptions like "cut at 45 degrees." The most professional way to handle this is to submit a CAD file (DWG or DXF format) to your supplier. At our facility, we take these files and generate a "shop drawing 4." This is a technical document that translates your architectural layout into manufacturing instructions.
You must ask your supplier: "Do you provide shop drawings for approval before cutting?" This step is critical. It allows you to check the inner and outer lengths of the mitered segments. For example, in a cove lighting setup, the inner length is significantly shorter than the outer length. If the supplier cuts based on the wrong reference line, the segments will not fit the ceiling cavity.
Communicating Non-Standard Angles
Real-world construction is rarely perfect. If you are working on a heritage building or a complex commercial space, your corners might be 135 degrees or an odd 112 degrees. You need to ask the supplier if their CNC cutting machines can handle these specific angles. Manual cutting with a chop saw often lacks the precision required for high-end projects.
We recommend using a digital protractor on-site to measure the exact angle of every corner. Send this data in a structured table to the supplier. Below is a checklist of the data fields you should provide to us or any manufacturer to ensure the custom cuts are accurate.
Data Requirement Checklist
| Data Point | Description | Why it Matters |
|---|---|---|
| Wall Angle | The exact degree of the corner (e.g., 90°, 135°, 88°). | Determines the miter cut angle (Wall Angle ÷ 2). |
| Reference Dimension | Specify if the length provided is the inner or outer edge. | Prevents segments from being too short or long. |
| Material Allowance | The specific amount of length to deduct for the thickness of the blade. | Ensures the final assembled run fits the space tight. |
| Corner Type | Inside corner vs. Outside corner. | Inverts the direction of the cut; critical for profile orientation. |
By formalizing this request, you shift the responsibility of precision to the factory, where we have the machinery to execute it correctly.
What technical specs should I request to ensure there is no light leakage or spotting at the joints?
During our QC inspections, even a hairline fracture in the diffuser connection can ruin the visual effect. When we develop high-end linear lighting, we pay close attention to the "dark spot" phenomenon that occurs when the LED strip inside the corner doesn't reach the very edge. You need to define the acceptable tolerances for both the aluminum housing and the light source itself.
Request specifications on the "seamlessness" of the diffuser covers, specifically inquiring about overlapping cover designs or miter-cut tolerances. Ask for the LED pitch data to ensure the corner connector maintains the same diode spacing as the strip, preventing dark spots or hotspots at the junction.
Understanding LED Pitch and Dark Spots
The number one cause of "spotting" at a corner is a disruption in the LED pitch 5. The pitch is the distance between the center of one LED chip to the center of the next. If your LED strip has a pitch of 8mm, but your corner connector creates a gap of 15mm between the last LED of the first strip and the first LED of the second strip, you will see a visible dark shadow.
When inquiring with suppliers, ask: "What is the physical dimension of your corner connector, and does it include an LED chip?" Many cheap "L-shaped" connectors are just copper pads with plastic housing and no light source. These create significant dark spots. You should request connectors that are "pitch-matched" or ask for a soldering method that allows the strip to extend right to the fold.
Diffuser Overlap Techniques
Light leakage doesn't just happen in the light; it happens out of the housing gaps. Even a perfect miter cut on the aluminum channel can have a tiny gap due to thermal expansion 6. To fix this, you should ask the supplier about "diffuser overlap" or continuous lens options.
A superior installation method involves cutting the aluminum profiles at 45 degrees but using a roll-out diffuser lens that covers the entire run, including the corner, without a seam at the corner itself. Alternatively, if the lens must be cut, inquire about the "PMMA expansion coefficient." Plastic expands more than aluminum. If the supplier cuts the lens too short, gaps open up when the lights warm up.
Troubleshooting Light Leakage
The following table outlines common visual defects at mitered corners and the specific technical specification you should request to prevent them.
| Visual Defect | Cause | Technical Spec to Request |
|---|---|---|
| Dark Corner Shadow | Gap between LEDs is larger than the standard pitch. | "Pitch-maintaining corner connectors" or "Zero-gap soldering." |
| Hotspot at Joint | Connector pushes the strip closer to the diffuser. | "Low-profile connectors" or "Solder-pad flat cabling." |
| Light Leak on Wall | Gaps in the aluminum miter joint. | "Light-blocking end caps" or "Aluminum foil tape backing." |
| Yellowing at Cut | Exposed PCB or oxidation at the cut point. | "Clear protective conformation coating" for cut edges. |
Asking these detailed questions signals to the supplier that you are a professional buyer who understands the product, prompting them to offer their higher-grade solutions rather than standard off-the-shelf components.
Can I get pre-assembled corner connectors from my supplier to reduce my on-site installation time?
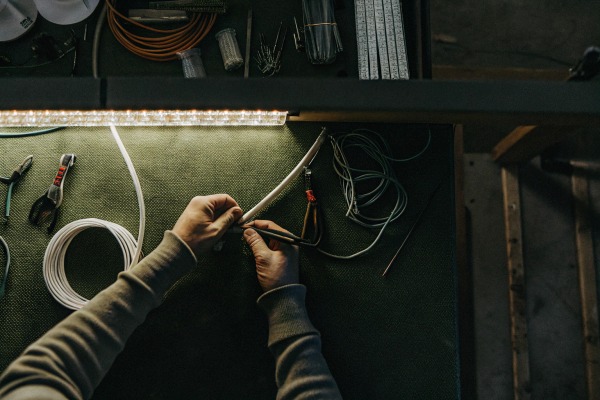
Our assembly team creates thousands of solder joints every day. We know that soldering on a workbench is fast and precise, while soldering on a ladder at a job site is slow and risky. From our interactions with contractors, we know that labor costs in countries like Australia and Germany are incredibly high. Pre-assembly is often the smartest logistical move you can make.
Yes, reputable suppliers often provide pre-soldered corner connectors or "L-shaped" modules. Ask for "plug-and-play" corner units that match your strip's wattage and color temperature. These factory-assembled units significantly reduce labor costs and eliminate the risk of poor manual soldering connections on-site.

Factory Assembly vs. Site Assembly
When you ask a supplier for pre-assembled corners, you are essentially outsourcing the most delicate part of the installation to a controlled environment. In our factory, we use temperature-controlled soldering irons and perform pull-tests to ensure wire strength. On a construction site, dust, unstable power, and awkward angles often lead to "cold solder joints 7" that fail after a few months.
You should inquire about "semi-custom" lengths. For example, instead of buying standard 5-meter reels and cutting them yourself, ask the supplier to produce two 2-meter segments connected by a 15cm flexible wire specifically for a corner. This is often called a "link cable" or "jumper." This removes the need for any soldering or clip-on connectors on site.
The Problem with Clip-on Connectors
Many buyers assume that if they don't solder, they must use plastic "solderless" clips (hippoconnectors). While convenient, these are often the weak link. They can loosen over time due to thermal cycling. By asking the supplier for soldered corner units, you get the reliability of a soldered connection with the convenience of a plug-and-play install.
Ask your supplier: "Can you provide pre-soldered L-corners with female/male DC jacks?" This allows your team to simply click the corners into place. It is vital to confirm that the wire gauge used in these pre-made corners matches the current load of your system to prevent voltage drop.
Cost and Efficiency Comparison
| Feature | Field Soldering / Cutting | Pre-Assembled Supplier Units |
|---|---|---|
| Installation Speed | Slow (requires stripping, soldering, sealing). | Fast (Plug-and-play). |
| Reliability | Variable (depends on technician skill). | High (QC tested at factory). |
| Tool Requirements | Soldering iron, wire strippers, heat gun. | None (or simple screwdriver). |
| Cost Structure | High labor cost, low material cost. | Slightly higher material cost, low labor cost. |
| Waterproofing | Difficult to seal perfectly on a ladder. | Can be injection molded or glue-sealed at factory. |
For large commercial projects, the savings in labor hours usually outweigh the small extra cost of the pre-assembled units.
How do I verify that the supplier’s mitered joints will maintain the IP rating for my outdoor installation?
Water intrusion is the enemy of LED longevity. When we analyze returned products from outdoor projects, the water almost always enters through a poorly sealed cut or connector, not the strip body itself. If you are cutting a waterproof strip to make a corner, you are technically breaking its IP rating 8. You must ask how to restore it.
Verify that the supplier uses injection-molded end caps or glue-filled heat shrink specifically designed for mitered angles. Request IP-rated certification reports for the modified joints, not just the strip, and ask for a demonstration of their recommended sealing adhesive to ensure long-term waterproofing.
Restoring the IP Rating
An LED strip might be rated IP67 (submersible for short periods) coming off the reel. However, the moment you cut it to make a mitered corner, that cut end is IP00—completely unprotected. You need to ask the supplier: "What is your recommended protocol for resealing cut ends?"
Professional suppliers will offer a specific "neutral cure silicone glue" and compatible end caps. It is crucial to specify neutral cure because acidic cure silicones (often smelling like vinegar) can corrode the copper pads on the LED strip over time. Ask the supplier to supply this specific glue with your order. Do not rely on generic hardware store silicone, as it may not bond with the silicone or PVC material of the strip sleeve.
Injection Molding vs. Manual Sealing
For the highest security, ask if the supplier offers "mold injection" services for corners. This is where we place the soldered corner connection into a steel mold and inject liquid waterproofing material around it, fusing it into a solid piece. This creates a factory-grade seal that is far superior to sliding a shrink tube over the joint manually.
If injection molding is too expensive for your budget, ask for "glue-lined heat shrink tubing." This tubing has a layer of adhesive inside that melts when heated, filling the gaps around the wires and creating a watertight barrier.
Footnotes
- Provides technical guidelines for flexible circuits to prevent damage. ↩︎
- Explains the function and importance of copper traces in PCBs. ↩︎
- Authoritative and accessible Wikipedia page. ↩︎
- Explains the purpose and importance of shop drawings in construction and manufacturing. ↩︎
- Clarifies the technical term "LED pitch" and its impact on lighting uniformity. ↩︎
- Explains the physical phenomenon of thermal expansion relevant to material fitting. ↩︎
- Describes what a cold solder joint is and why it's a failure point. ↩︎
- Defines IP ratings and their significance for product protection against elements. ↩︎