
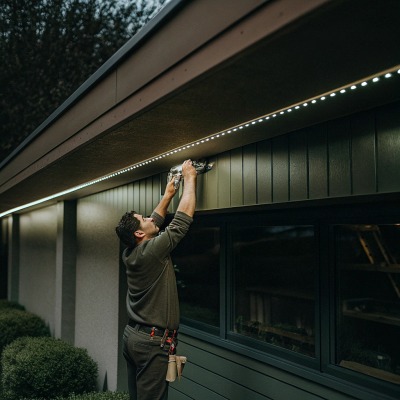
Nuestras tiras de LED para contratistas que las instalan en entornos muy diferentes, y el método de instalación a menudo importa más que la propia tira.
Los mejores métodos de instalación de tiras LED incluyen respaldo adhesivo, canales de montaje de aluminio, clips o soportes, cinta de refuerzo de doble cara, conectores sin soldadura y uniones soldadas. Cada método se adapta a diferentes superficies, presupuestos y objetivos del proyecto, por lo que el enfoque ideal depende de su entorno específico y de los requisitos de rendimiento.
No existe una forma única de instalar tiras de LED "correcta" CE para Europa 1. El método que funciona perfectamente en una cocina limpia y seca puede fallar completamente en una pared exterior con textura. A continuación, desglosamos las decisiones clave que enfrentarás y te ayudamos a elegir en función de condiciones del mundo real en lugar de suposiciones.
¿Cómo decido entre respaldo adhesivo y perfiles de aluminio para mi proyecto de iluminación comercial?
Cuando realizamos muestras de producción para nuestros clientes de exportación, siempre hacemos una pregunta primero: ¿a dónde va esta tira? La respuesta determina todo, desde el método de montaje hasta el diseño térmico.
Para iluminación comercial, la cinta adhesiva funciona mejor en superficies lisas, limpias y interiores donde el costo y la rapidez son lo más importante. Los perfiles de aluminio son la mejor opción cuando necesitas un acabado profesional, una mejor disipación del calor y una durabilidad a largo plazo, especialmente para instalaciones de alta potencia o de larga duración.
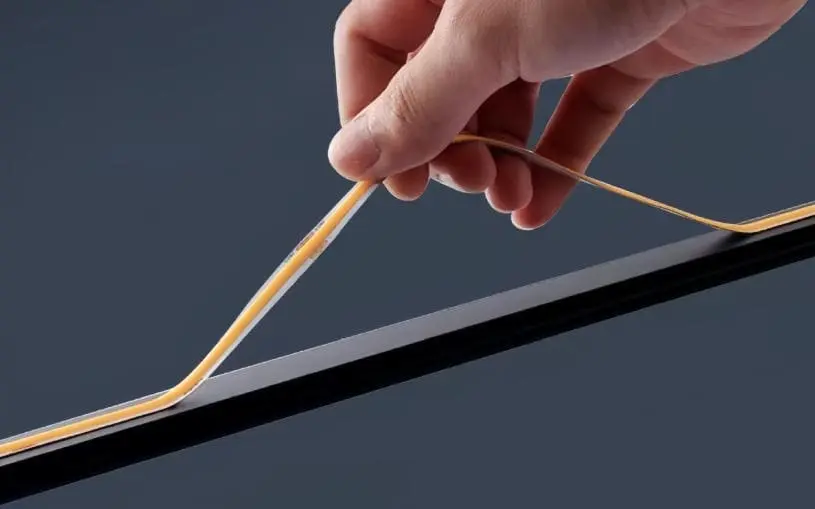
Comprendiendo el respaldo adhesivo
El respaldo adhesivo es la forma más rápida y económica de montar tiras de LED. La mayoría de las tiras de calidad vienen con cinta VHB de 3M 2 pre-aplicada. Solo despegas, presionas y listo. Para superficies lisas como vidrio, metal o madera sellada, funciona bien. Pero aquí está el truco: el adhesivo solo es tan bueno como la superficie debajo de él.
Una preparación deficiente de la superficie es la principal causa de fallos del adhesivo. Antes de aplicar, limpia la superficie con alcohol isopropílico 3 y déjala secar completamente. Evita pegar tiras en superficies polvorientas, aceitosas o con textura. Un consejo de nuestro equipo de control de calidad: despega y presiona una sección corta a la vez. No remuevas toda la protección de una vez. Esto mantiene la tira recta y reduce la desalineación.
Comprendiendo los perfiles de aluminio
Los canales de aluminio, también llamados perfiles o extrusiones, son la opción preferida para instalaciones de grado profesional. Cumplen tres funciones a la vez. Primero, actúan como un disipador de calor 4, disipando el calor de los LED y prolongando su vida útil. Segundo, protegen la tira de daños físicos. Tercero, cuando se combinan con una cubierta difusora, eliminan los puntos LED visibles y crean una salida de luz suave y lineal.
La desventaja es el costo y el trabajo. Los perfiles de aluminio requieren medir, cortar y montar con tornillos o clips. Añaden gasto en material. Pero para proyectos de alta gama en retail, hostelería o arquitectura, casi siempre valen la pena.
Cuándo elegir cuál
| Factor | Respaldo adhesivo | Perfil de aluminio |
|---|---|---|
| Velocidad de instalación | Muy rápido | Moderado — requiere medición y montaje |
| Costo | Bajo | Más alto — material y mano de obra |
| Gestión del calor | Mínimo | Excelente — actúa como disipador de calor |
| Apariencia | Puntos LED visibles | Luz lineal limpia y difusa |
| Durabilidad | Depende de la superficie y el entorno | Alto — la tira está protegida |
| Mejor Uso | Superficies interiores lisas, instalaciones temporales | Instalaciones comerciales, arquitectónicas y de larga duración |
| Facilidad de remoción | Fácil pero puede dejar residuos | Más permanente, requiere retirar el hardware |
Un equilibrio práctico
Muchos de nuestros clientes contratistas utilizan un enfoque híbrido. Aplican tiras adhesivas dentro de canales de aluminio, obteniendo la rapidez de la cinta con los beneficios de rendimiento del perfil. Esto es especialmente útil para iluminación de cocina debajo de los armarios, iluminación de molduras en hoteles y instalaciones en paredes de medios donde la apariencia es crítica.
Si tu proyecto implica tiras de alta potencia (más de 14W por metro), molduras cerradas o tramos de más de 5 metros, recomendamos encarecidamente canales de aluminio. La acumulación de calor por sí sola puede degradar el adhesivo y reducir la vida útil del LED. Para iluminación de acento de baja potencia y corta duración en un espacio interior seco, generalmente el adhesivo es suficiente.
¿Cuáles son las mejores formas de instalar tiras de LED impermeables en mis proyectos exteriores o en ambientes húmedos?
Nuestro equipo de ingeniería ha probado docenas de configuraciones de tiras con clasificación IP para clientes en España y Alemania, donde las normas de cumplimiento para exteriores son estrictas. La impermeabilización no solo se trata de la tira — sino de todo el sistema de instalación.
Para entornos exteriores o húmedos, utiliza tiras de LED con clasificación IP65 o IP67 combinadas con conectores sellados, tapas finales impermeables y hardware de montaje resistente a la corrosión. Las tiras recubiertas de silicona (IP65) son adecuadas para áreas exteriores protegidas, mientras que las tiras completamente encapsuladas (IP67/IP68) son necesarias para exposición directa al agua o inmersión.
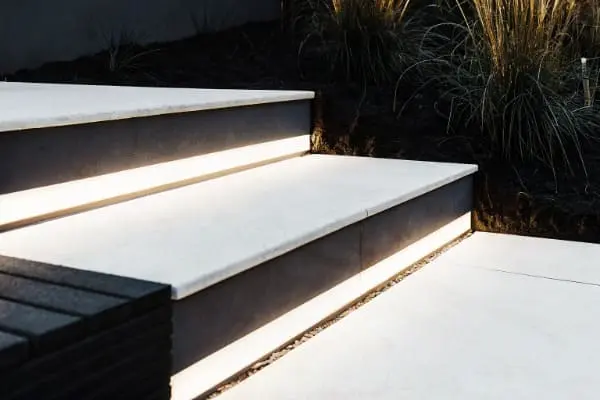
Explicación sencilla de las clasificaciones IP
IP significa Protección contra Ingresos. Clasificaciones IP 5 El primer dígito indica la resistencia al polvo. El segundo indica la resistencia al agua. Para tiras de LED, las clasificaciones más comunes son:
| Clasificación IP | Nivel de protección | Uso típico |
|---|---|---|
| IP20 | Sin protección contra el agua | Solo para interiores en áreas secas |
| IP65 6 | Revestimiento de silicona en la superficie — a prueba de salpicaduras | Patios cubiertos, baños, áreas exteriores cubiertas |
| IP67 | Encapsulado con funda de silicona — sumergible brevemente | Exterior expuesto a la lluvia, caminos de jardín |
| IP68 | Totalmente sellado — inmersión continua | Piscinas, fuentes, elementos submarinos |
Elegir una clasificación IP incorrecta es un error común y costoso. Hemos visto contratistas usar tiras IP20 bajo aleros exteriores, pensando que están "cubiertas". Pero la condensación, la lluvia impulsada por el viento y la humedad aún alcanzan la tira. Para cualquier aplicación exterior, IP65 es el mínimo.
Métodos de montaje para ambientes húmedos
Solo la cinta adhesiva con respaldo no es confiable en exteriores. La humedad, las variaciones de temperatura y la exposición a los rayos UV debilitan la cinta con el tiempo. En su lugar, utilice estos métodos:
- Perfiles de aluminio con tapas finales selladas. El perfil protege la tira y las tapas selladas evitan la entrada de agua en los extremos. Use tornillos de acero inoxidable o aluminio para evitar la oxidación.
- Clips de montaje clasificados para uso exterior. Clips de plástico o acero inoxidable sujetan la tira mecánicamente. Funcionan bien en ladrillo, piedra o madera donde la cinta adhesiva fallaría.
- Canales llenos de silicona. Para máxima protección, algunos instaladores llenan el canal con silicona transparente después de colocar la tira en su interior. Esto crea una unidad completamente sellada.
Conectores y Uniones
Cada punto de conexión es un posible punto de fallo en exteriores. Utilice conectores impermeables con juntas de silicona. Si debe soldar, selle la unión con tubo termocontraíble y aplique silicona de grado marino. Los conectores sin soldadura son convenientes en interiores, pero en exteriores corren el riesgo de entrada de humedad en los puntos de contacto.
Drenaje y Ventilación
Incluso las tiras impermeables pueden fallar si se acumula agua a su alrededor. Monte las tiras con un ligero ángulo o en canales con orificios de desagüe para que el agua se drene. En climas húmedos, permita cierta ventilación alrededor de la tira para evitar la acumulación de condensación en cajas selladas.
Nuestro equipo siempre recomienda realizar una prueba completa de maqueta antes de comprometerse con una instalación exterior grande. Realice una sección de prueba de un metro en el entorno real durante 48 a 72 horas. Verifique condensación, rendimiento del adhesivo y la integridad del conector. Este pequeño paso ahorra costos enormes de retrabajo posteriormente.
¿Cómo puedo prevenir la caída de voltaje y la discontinuidad de la luz en instalaciones largas de tiras de LED?
Caída de voltaje 7 las uniones visibles son dos de las quejas más comunes que recibimos de distribuidores y contratistas. Cuando desarrollamos nuestras líneas de tiras de alto voltaje, resolver estos problemas fue nuestro principal objetivo de ingeniería.
Para prevenir la caída de voltaje en tiras LED largas, utilice cableado en paralelo o múltiples puntos de inyección de energía en lugar de conectar las tiras en serie. Para la discontinuidad de la luz, elija tiras con LEDs muy juntos y use conectores sin costuras o uniones soldadas para eliminar puntos oscuros en las conexiones.
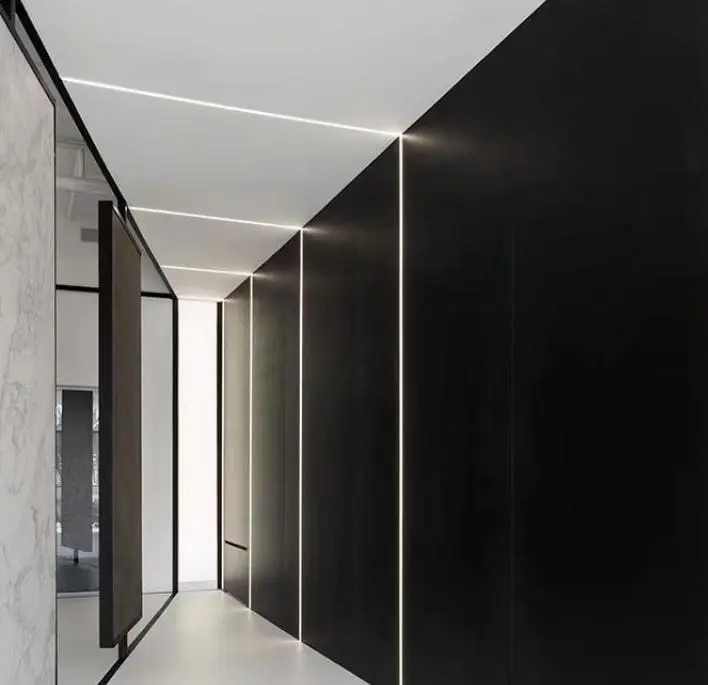
¿Qué causa la caída de voltaje?
Las tiras LED son esencialmente placas de circuito largas y delgadas. A medida que la corriente viaja por las trazas de cobre, la resistencia provoca que el voltaje disminuya con la distancia. El resultado: los LEDs en el extremo lejano de la tira parecen más tenues y a veces cambian en temperatura de color 8. En una tira de 5 metros de 12V, la caída de voltaje suele ser visible en el último metro. En una carrera de 10 metros, puede ser dramática.
Soluciones prácticas
Existen varias formas comprobadas de gestionar este problema:
Inyección de potencia. En lugar de alimentar la energía desde un solo extremo, inyecte energía en ambos extremos o en intervalos regulares a lo largo del recorrido. Esto acorta la distancia efectiva que la corriente debe recorrer. Para recorridos superiores a 5 metros, recomendamos puntos de inyección cada 5 metros como mínimo.
Tiras de mayor voltaje. Una tira de 24V transporta la misma potencia con la mitad de corriente que una de 12V, lo que significa menos caída de voltaje en la misma distancia. Para recorridos muy largos, las tiras de 48V o de alto voltaje en corriente alterna (como 220V) reducen aún más la caída. Nuestras líneas de alto voltaje están diseñadas específicamente para recorridos continuos de 10 a 50 metros en entornos comerciales.
Trazas de cobre más gruesas. No todas las tiras son iguales. Las trazas de cobre más anchas o más gruesas en las PCB llevan más corriente con menos resistencia. Al especificar tiras para recorridos largos, consulte a su proveedor sobre el ancho de la traza. Nosotros usamos cobre de 2 oz en nuestros productos de recorrido largo para reducir este problema desde la fuente.
Eliminación de la discontinuidad de luz
La discontinuidad de luz — esas manchas oscuras visibles o espacios en los puntos de conexión — es un problema separado pero relacionado. Ocurre cuando:
- El espaciamiento de los LED cerca del punto de corte deja un espacio.
- Los conectores añaden distancia física entre segmentos de LED.
- Las tiras se doblan bruscamente en las esquinas, causando una salida de luz desigual.
Soluciones para una luz sin costuras
| Problema | Causa | Solución |
|---|---|---|
| Manchas oscuras en las uniones | Brecha física entre segmentos de la tira | Utilice conectores sin espacio o soldadura directa |
| Extremos tenues en recorridos largos | Caída de voltaje por distancia | Agregue puntos de inyección de energía o utilice tiras de mayor voltaje |
| Cambio de color en el extremo lejano | Cambio de temperatura de color dependiente del voltaje | Utilice tiras de corriente constante o inyecte energía en ambos extremos |
| Puntos visibles en lugar de línea | Espaciado de LED demasiado amplio | Elija tiras con 120 o 160 LED por metro |
| Luz desigual en las esquinas | El doblado brusco daña las trazas | Utilice conectores flexibles para esquinas o incline la tira en segmentos |
Planificación del suministro de energía
Siempre calcule potencia total 9 antes de seleccionar una fuente de alimentación. Sume la potencia en vatios por metro a lo largo de toda la longitud. Luego añada un 20 a 25 por ciento de margen de seguridad. Una fuente de alimentación de tamaño insuficiente causa parpadeo, atenuación y una vida útil más corta. Por ejemplo, una carrera de 10 metros a 14.4W por metro necesita 144W. Con un margen del 20 por ciento, especifique una fuente de 180W.
Para recorridos comerciales muy largos, considere fuentes de alimentación distribuidas colocadas a intervalos a lo largo del recorrido en lugar de una sola fuente central grande. Esto también reduce los requisitos de calibre del cable y simplifica el mantenimiento.
¿Qué técnicas de instalación me ayudarán a minimizar los costos laborales y simplificar mi cadena de suministro basada en proyectos?
A lo largo de los años, hemos trabajado estrechamente con contratistas y mayoristas que nos dicen lo mismo: la tira en sí es solo una parte del coste. La mano de obra, la coordinación y las retrabajos afectan rápidamente los márgenes. Ese feedback influyó en cómo empaquetamos, cortamos y accesorios nuestros productos.
Para minimizar los costes de mano de obra, elija tiras LED con adhesivo preaplicado y conectores preinstalados, utilice conectores de clip sin soldadura para uniones rápidas, especifique longitudes pre-cortadas que coincidan con el diseño de su proyecto y obtenga tiras, perfiles y accesorios de un solo proveedor para reducir la carga de coordinación.
Tiras pre-cortadas y pre-conectadas
Una de las formas más sencillas de reducir la mano de obra en el sitio es trasladar la preparación fuera del lugar. Cuando realizamos pedidos de proyectos, podemos pre-cortar las tiras a longitudes exactas, soldar previamente los cables de alimentación y pre-adjuntar los conectores según los planos del cliente. Esto significa que el instalador abre la caja y monta — sin cortar, sin soldar, sin conjeturas.
Para contratistas que gestionan múltiples obras, los kits pre-cortados reducen drásticamente el tiempo de mano de obra especializada. Un técnico que dedicaría 30 minutos midiendo, cortando y conectando puede completar la misma sección en menos de 10 minutos con un kit preconstruido.
Conectores sin soldadura vs. soldadura
Esta es una compensación práctica que cada proyecto debe sopesar:
| Factor | Conectores sin soldadura | Uniones soldadas |
|---|---|---|
| Velocidad | Muy rápido — clip y listo | Lento — requiere hierro, flux, habilidad |
| Fiabilidad | Bueno a corto plazo, puede aflojarse con el tiempo | Excelente — unión permanente |
| Habilidad requerida | Mínimo | Moderada a alta |
| Apariencia | Ligeramente voluminoso | Compacto y al ras |
| Mejor para | Instalaciones temporales, rotaciones rápidas, bricolaje | Instalaciones comerciales permanentes, exteriores, de alta vibración |
| Costo | Bajo por conector | Bajo costo de material, alto costo de mano de obra |
Para la mayoría de los proyectos comerciales en interiores, los conectores sin soldadura ofrecen el equilibrio adecuado. Son rápidos, no requieren herramientas especiales y funcionan bien en entornos estables. Para instalaciones exteriores, de alta vibración o de alta gama, la soldadura sigue siendo el estándar de oro.
Cadena de suministro de fuente única
Un costo oculto en muchos proyectos de tiras LED es la coordinación entre múltiples proveedores. Un proveedor para las tiras, otro para los perfiles, un tercero para las fuentes de alimentación y un cuarto para los conectores. Cada proveedor tiene diferentes tiempos de entrega, horarios de envío y estándares de calidad. Cuando algo no encaja, nadie asume la responsabilidad.
Resolvemos esto ofreciendo un enfoque de kit completo. Tiras, canales de aluminio, difusores, tapas finales, conectores, fuentes de alimentación y controladores — todo de una sola fuente, probado en conjunto antes del envío. Esto elimina las dudas sobre compatibilidad y reduce la carga de adquisición.
Controles inteligentes y mantenimiento futuro
Los proyectos comerciales modernos cada vez requieren controles inteligentes — regulación de intensidad, ajuste de color, programación e integración con aplicaciones o voz. El método de instalación afecta dónde colocas los controladores, cómo enrutas el cableado y qué tan accesibles son los componentes para el mantenimiento futuro.
Planifica la ubicación del controlador durante la fase de diseño, no después. Oculta los controladores en cavidades accesibles — no sellados detrás de la pared de yeso. Usa conectores de desconexión rápida en las uniones del controlador para que un controlador defectuoso pueda ser reemplazado sin cortar cables. Estas pequeñas decisiones durante la instalación ahorran costos de servicio significativos posteriormente.
Certificación y cumplimiento
Para la adquisición basada en proyectos, tener las certificaciones adecuadas no es opcional. SAA para Australia 10, CE para Europa, UL o ETL para Norteamérica. Mantenemos estas certificaciones en nuestras líneas de productos principales para que nuestros clientes puedan incluir la documentación de cumplimiento directamente en sus ofertas de proyecto. Esto elimina la demora de esperar informes de prueba o solicitar certificaciones especiales.
Cuando simplificas la cadena de suministro a una fuente calificada, también simplificas el rastro documental. Una factura, un conjunto de informes de prueba, un punto de contacto. Para los estimadores de proyectos y responsables de compras, esto suele ser tan valioso como el propio producto.
Conclusión
El mejor método de instalación de tiras LED es casi siempre una combinación: adhesivo o canales para montaje, conectores o soldadura para uniones, y una planificación adecuada para la alimentación y el entorno. Elige en función de tus condiciones reales, no de suposiciones.
Notas al pie
- Detalles de la marca CE como certificación obligatoria para productos vendidos en la Unión Europea, garantizando salud y seguridad. ↩︎
- Página oficial del producto para las cintas 3M VHB, detallando sus propiedades y aplicaciones. ↩︎
- Guía sobre preparación de superficies, incluyendo el uso de alcohol isopropílico para limpiar antes de aplicar el adhesivo. ↩︎
- Explica qué es un disipador de calor, cómo funciona y su importancia en la disipación de calor de componentes electrónicos. ↩︎
- Explicación oficial de la IEC sobre las clasificaciones de protección contra intrusiones (IP), definiendo el estándar y su código de dos cifras. ↩︎
- Explicación detallada de la clasificación IP65, especificando su protección contra polvo y chorros de agua. ↩︎
- Explica la caída de voltaje en circuitos eléctricos, sus causas (resistencia) y las consecuencias para el rendimiento del equipo. ↩︎
- Define la temperatura de color de la iluminación, su medición en Kelvins y su impacto en el efecto visual. ↩︎
- Guía para calcular la potencia en aparatos eléctricos, diferenciando entre potencia aparente y real. ↩︎
- Explica la certificación SAA como requisito de seguridad obligatorio para productos eléctricos en España y países de la región. ↩︎

 English
 Spanish
 German
 Russian
 Arabic
 French
 Portuguese