Every year, production team sees returns from projects where LED strips failed—not because of bad chips, but because moisture crept in and destroyed the insulation IEC 62031 1. It's frustrating. The strip looks perfect on the bench, but install it in a bathroom, a coastal hotel lobby, or an underground car park, and within months you get flickering, dead zones, or worse—electrical shorts. The root cause is almost always the same: nobody tested the insulation under real humidity conditions before the product shipped.
To test insulation performance of high-density dotless COB LED strips in humid environments, use a combination of controlled humidity chamber exposure, insulation resistance measurement with a megohmmeter, and post-exposure electrical verification. Focus on seal integrity at solder joints, connectors, and silicone encapsulation endpoints to detect moisture ingress before deployment.
This guide walks you through every step—from measuring insulation resistance 2 to verifying waterproofing and checking certifications. Whether you're a contractor specifying strips for a wet-area project or a distributor validating a new supplier, you'll find practical, field-proven methods below. Let's get into it.
How do I accurately measure the insulation resistance of my high-density COB LED strips?
When we run quality checks on our production line, insulation resistance is one of the first things we verify for any strip rated IP65 or above. A single weak point can cause a project-wide failure months after installation.
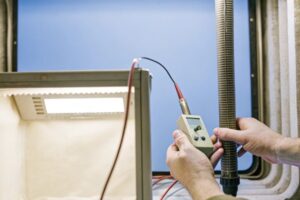
Use a megohmmeter (insulation resistance tester) set to 500V DC, applied between the LED circuit conductors and any exposed metallic or grounding surface. A reading above 100 MΩ indicates strong insulation. Test before and after humidity exposure to detect degradation. Always test at multiple points along the strip length.
What Is Insulation Resistance and Why It Matters
Insulation resistance (IR) tells you how well the non-conductive materials in your LED strip prevent current from leaking where it shouldn't go. In a high-density COB strip, the LED chips sit extremely close together on the substrate. The phosphor layer, silicone encapsulation, and PCB coating all serve as insulation barriers. When moisture enters, these barriers weaken. The IR value drops. Low IR means leakage current, which leads to flickering, color shift, overheating, or a direct short circuit.
Equipment You Need
You don't need a lab full of expensive gear. Here's the basic setup:
| Equipment | Purpose | Typical Specification |
|---|---|---|
| Megohmmeter 3 (Insulation Tester) | Measures resistance between conductors and ground | 500V DC test voltage, range up to 10 GΩ |
| Digital Multimeter | Checks continuity and voltage before/after test | Standard DMM with resistance mode |
| Environmental Chamber 4 | Controls humidity for pre-conditioning | 25°C–60°C, 50%–95% RH adjustable |
| Thermocouple Probes | Monitors surface temperature during test | Type K, ±1°C accuracy |
Step-by-Step Measurement Process
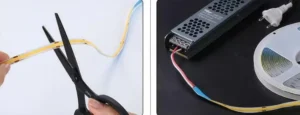
First, cut a sample length of at least 500mm. Let it acclimate at room temperature for two hours. Connect one probe of the megohmmeter to the positive conductor on the strip. Connect the other probe to the aluminum substrate or any metallic backing. Set the test voltage to 500V DC. Press and hold for 60 seconds. Record the reading.
A healthy, dry COB strip should read well above 100 MΩ. Anything below 10 MΩ is a red flag. If you're testing after humidity exposure, compare pre-exposure and post-exposure values. A drop of more than 50% signals insulation degradation, even if the absolute number still looks acceptable.
Where to Probe
High-density COB strips have vulnerable spots. Focus your probes on:
- Solder pads where segments connect
- Cut points where the silicone coating terminates
- Connector ends where wires attach
- Mid-span to check the general encapsulation
Our engineers always test at least three points per meter of strip. This catches localized weaknesses that a single-point test would miss.
Common Mistakes
Don't test with wet hands or on a damp bench—it will give you a false low reading. Don't skip the post-humidity test. A strip that reads 500 MΩ dry but drops to 5 MΩ after 48 hours at 90% RH is not suitable for any humid installation. Also, make sure the strip is fully de-energized and discharged before connecting the megohmmeter. Safety first.
What testing methods can I use to ensure my dotless strips won't short circuit in humid conditions?
On our R&D bench, we've learned that the simplest test often catches the biggest problems. You don't always need a million-dollar lab—but you do need a structured approach.
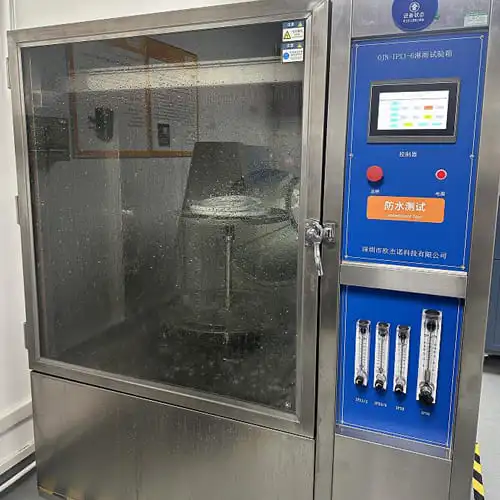
Key methods include temperature-humidity cycling tests, constant high-humidity soak tests, accelerated aging at 60°C/60% RH for 360 hours, and real-time power-on monitoring during exposure. After each test, perform visual inspection, insulation resistance checks, and luminous flux measurement to confirm the strip has not degraded or developed short-circuit risks.
The Core Testing Methods Explained
The truth is, this topic doesn't need to be overcomplicated. At its core, you're checking one thing: after the strip gets wet or sits in high humidity for a while, does it leak current, short circuit, or behave abnormally? We typically run a straightforward sequence. Place the strip in a sealed humidity chamber. Raise the relative humidity. Leave it for a set period. Then power it on and watch what happens. Flickering, tripping, or dead sections all indicate failure.
Here's a breakdown of the main test protocols our team and many testing labs use:
| Test Method | Conditions | Duration | What to Monitor |
|---|---|---|---|
| Temperature-Humidity Cycling | -20°C to 50°C, 50–90% RH, 0.5h per cycle | 8 full cycles | Flickering, dead LEDs, visible condensation inside seal |
| Constant High-Humidity Soak | 40°C, 93% RH | 48–96 hours | IR drop, color shift, surface corrosion |
| Accelerated Aging 5 | 60°C, 60% RH | 360 hours | Luminous flux retention (must stay >85%), leakage current |
| Power-On Humidity Exposure | 25°C ±2°C, 90% RH, strip energized | 10–24 hours | Real-time current draw, thermal hot spots, visual defects |
Temperature-Humidity Cycling
This test simulates real-world conditions where temperature swings cause condensation. Think of an outdoor canopy light that bakes in daytime sun and cools rapidly at night. Each cycle stresses the seals and adhesive bonds. After eight cycles between -20°C and 50°C, a well-made strip should show zero condensation under the silicone sleeve and no change in IR readings.
Constant High-Humidity Soak
This is the endurance test. You place the strip in a chamber at 40°C and 93% relative humidity and leave it there for 48 to 96 hours. We've seen strips that look fine after 24 hours but start developing micro-corrosion on exposed copper pads by hour 72. When you pull the strip out, check every solder joint and connector under magnification.
Power-On Monitoring
This is the most practical test. Energize the strip inside the humidity chamber and monitor it in real time. Use a clamp meter to watch current draw. A sudden spike means a short is forming. Use an infrared camera or thermocouple to spot thermal anomalies. If one section runs 15°C hotter than the rest, moisture has likely compromised the insulation there.
DIY Approach for Small Buyers
If you don't have access to an environmental chamber, you can still do a basic version. Seal a plastic storage box with a damp towel inside. Place the LED strip sample inside. Close the lid and leave it for 48 hours in a warm room. Then power it on and inspect. It's not lab-grade, but it catches obvious failures. We've recommended this to several of our distributor partners in Australia who wanted to do incoming quality checks without investing in chamber equipment.
Post-Test Checklist
After any humidity test, run through this:
- Visual check for condensation, discoloration, or corrosion
- Insulation resistance measurement at three or more points
- Power on and check for uniform light output
- Measure luminous flux—compare to pre-test baseline luminous flux measurement 6
- Check color temperature for shift (>200K shift is a concern)
How do I verify that my supplier's waterproofing process provides the electrical insulation my project requires?
We work with contractors and distributors in Germany and Australia who install strips in demanding environments—pool areas, commercial kitchens, coastal facades. They can't afford guesswork. So when they ask us to prove our waterproofing works, we walk them through a very specific verification process.
Request sample strips from your supplier, then independently test them using humidity soak and insulation resistance methods. Inspect the silicone extrusion or epoxy seal quality at joints, solder pads, and end caps. Ask for third-party test reports showing IP ratings, accelerated aging results, and flux retention data. Cross-check physical samples against the documentation.
Don't Just Trust the Datasheet
Datasheets are marketing tools. They tell you the best-case scenario. What you need is evidence that the product performs under stress. Start by ordering samples—at least one meter of each variant you plan to use. Run your own humidity tests using the methods described above. If the supplier won't send samples for testing, that's a red flag.
What to Inspect Physically
When you receive samples, look at them carefully before any electrical test. The quality of waterproofing is often visible to the naked eye.
Silicone extrusion uniformity: Run your fingers along the strip. Feel for bumps, thin spots, or gaps. A consistent silicone tube with no air bubbles is what you want.
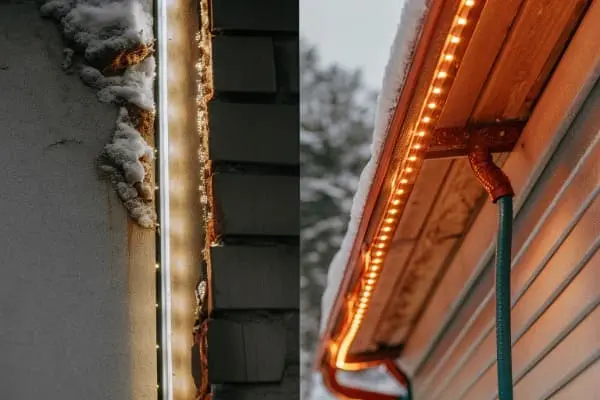
End caps: These are the most common failure points. Press gently on the end cap. If it pops off or shifts, moisture will enter there first. Our production process uses heat-sealed silicone end caps that bond chemically to the tube. Not all suppliers do this.
Solder joints at cut points: If the strip was cut and reconnected, the solder area must be fully encapsulated. Any exposed copper is a future corrosion site.
Ask for These Documents
| Document | What It Proves | Red Flag If Missing |
|---|---|---|
| IP Test Report (Third-Party Lab) | Actual ingress protection level verified by independent testing | Supplier claims IP67 but only has self-tested IP65 data |
| Accelerated Aging Report | Strip survives 360h at 60°C/60% RH with >85% flux retention | No aging data means unknown long-term durability |
| Insulation Resistance Report | IR values before and after humidity exposure | Only dry IR values provided, no post-humidity data |
| Material Safety Data Sheet (Silicone/Epoxy) | Encapsulant is UV-stable, non-yellowing, rated for temperature range | Generic or missing MSDS suggests low-quality encapsulant |
| Salt Spray Test Report (for coastal projects) | Substrate and coating resist saline corrosion | Critical for seaside installations, often skipped by budget suppliers |
Cross-Check Samples Against Claims
One thing we always recommend: after you get the test reports, test the physical sample yourself. Do the reports match reality? If the report says IR is 500 MΩ post-humidity but your sample reads 20 MΩ after a 48-hour soak, the report may not reflect the batch you'll receive. Production consistency matters just as much as peak performance.
The Solder Joint Problem
This is worth highlighting. Many COB strips look perfectly sealed along their length, but the weak link is where the strip was soldered—either at factory connections between reels or at custom cut points. In our facility, we apply a secondary silicone potting compound over every solder joint before the strip enters the extrusion line. This adds cost, but it eliminates the most common point of water entry. Ask your supplier specifically how they handle solder joint sealing. If they can't answer clearly, their process probably has gaps.
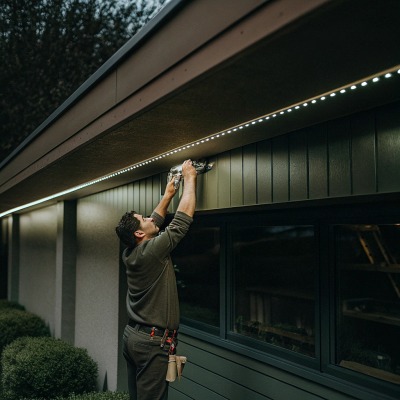
Field Validation Tips
For high-value projects, consider installing a small test section in the actual environment for two to four weeks before committing to the full order. Monitor it daily. If it survives with no visible issues and stable current draw, you have real-world confidence that the full installation will hold up. We've done this with several hotel and retail projects in Australia, and it saves enormous headaches down the line.
Which safety certifications should I check to ensure my LED strips are safe for wet environment installations?
Our export team fields this question constantly, especially from partners in Germany and Australia, where electrical safety regulations are strict and non-negotiable. Getting the wrong certification—or no certification—can block a project at inspection.
For wet environment LED strip installations, check for IEC 60598-1 (luminaire safety), IEC 62031 (LED module safety), IP65 or higher ingress protection ratings, and regional marks like CE for Europe, SAA/RCM for Australia, or UL/ETL for North America. Also verify that the LED driver carries matching certifications for wet or damp locations.
Why Certifications Matter Beyond Compliance
Certifications aren't just paperwork for customs. They represent a structured set of tests that verify the product won't cause fires, shocks, or failures under defined conditions. For a COB LED strip going into a humid or wet location, the relevant certifications specifically test insulation, leakage current, dielectric strength, and resistance to environmental stress. Without these, you're relying solely on the manufacturer's word.
Key Certifications Explained
IEC 60598-1 is the international standard for luminaire safety. It covers electrical insulation, thermal performance, and mechanical strength. Any LED strip assembly intended for permanent installation should comply.
IEC 62031 specifically addresses LED modules. It includes tests for insulation resistance, electric strength (hi-pot), and fault conditions. This is the standard that directly validates whether the strip's insulation can handle voltage stress without breaking down.
IP Ratings are not certifications in the traditional sense—they are test results that demonstrate ingress protection. IP65 means dust-tight and protected against water jets. IP67 means submersion up to 1 meter for 30 minutes. IP68 means continuous submersion at specified depth. For humid environments (not submerged), IP65 is usually the minimum. For areas with direct water contact, IP67 or IP68 is required.
Regional Certification Requirements
| Region | Required Certification | Relevant Standard | Notes |
|---|---|---|---|
| European Union | CE Marking 8 (with LVD + EMC) | EN 60598-1, EN 62031 | Must include Declaration of Conformity |
| Australia / New Zealand | RCM (SAA approved) | AS/NZS 60598.1 | Mandatory for electrical products sold in AU/NZ |
| North America | UL or ETL Listing 9 | UL 8750, UL 2108 | "Suitable for Wet Locations" marking required |
| United Kingdom | UKCA | BS EN 60598-1 | Post-Brexit replacement for CE in UK market |
| International | CB Scheme Certificate | IEC 60598-1 10, IEC 62031 | Facilitates acceptance across multiple countries |
The Driver Matters Too
A common oversight: the LED strip is certified, but the driver is not rated for wet or damp locations. If the driver fails or leaks current due to humidity, the entire system is compromised. Always confirm that the driver carries the same location rating as the strip. For example, if you're installing IP67 strips in an outdoor canopy, the driver should also be rated for outdoor or wet use, not just indoor dry locations.
How to Verify Certification Authenticity
Ask for the actual certificate document, not just a logo on the packaging. Check the certificate number against the issuing body's online database. For UL, use the UL Product iQ database. For CE, request the Declaration of Conformity and the test report from a Notified Body. For RCM in Australia, verify the supplier's registration on the EESS (Electrical Equipment Safety System).
We've seen cases where suppliers print a CE mark on the box but have no supporting documentation. This puts the importer at legal risk. In Australia, selling non-compliant electrical products can result in fines and product recalls. In Germany, the BNetzA (Federal Network Agency) actively enforces compliance for products sold on the market.
Certifications and Insurance
For contractors, there's another angle: insurance. If a fire or shock incident occurs and the installed product lacks proper certification, the contractor's liability insurance may not cover the claim. This is why many of our contractor partners in Australia specifically require RCM-certified strips and matching drivers. It protects their business.
Beyond Standard Certifications
For specialized humid environments—like swimming pools, saunas, or food processing areas—additional requirements may apply. SELV (Safety Extra Low Voltage) compliance is often required, limiting the circuit to 12V or 24V DC. Some jurisdictions require specific food-safe or chlorine-resistant material certifications for strips used near pools or in commercial kitchens. Always check local building codes and consult with the project's electrical engineer.
Conclusion
Testing insulation in humid conditions comes down to a clear process: measure IR, simulate real humidity, inspect physical seals, and verify certifications. Skip any step, and you risk project failures that cost far more than the testing itself.
Footnotes
- Specifies the international standard for LED module safety. ↩︎
- Explains the fundamental concept of insulation resistance. ↩︎
- Defines the specialized instrument for measuring high resistance. ↩︎
- Wikipedia provides a comprehensive overview of environmental chambers, their purpose, and types. ↩︎
- Details a method to predict long-term product durability. ↩︎
- Explains a key metric for LED performance degradation. ↩︎
- Clarifies the meaning and purpose of Ingress Protection ratings. ↩︎
- Explains the mandatory European conformity mark. ↩︎
- Wikipedia's page on UL (Underwriters Laboratories) is an authoritative source for safety standards, which are often referenced by ETL (Electrical Testing Laboratories). Both are Nationally Recognized Testing Laboratories (NRTLs) recognized by OSHA. ↩︎
- Identifies the international standard for luminaire safety. ↩︎