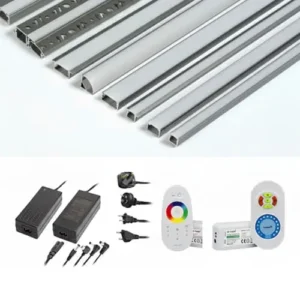
When we review failure reports from contractors, and one pattern stands out clearly — most LED strip incidents trace back to installation mistakes or substandard components, not the LED technology 1 itself.
LED strip lights can cause fire or electric shock, but only under specific conditions such as wrong voltage, poor-quality components, overloaded circuits, or improper installation. When you use certified products, match power supplies correctly, and follow proper installation practices, these risks become minimal and fully preventable.
Below, I will walk you through real risk factors, how to spot them, and what to do about each one — whether you are a contractor installing strips on a job site or a distributor sourcing products for resale.
How can I identify if my LED strip installation poses a genuine fire risk?
After shipping thousands of reels to project sites, our technical support team has learned that fire risk almost never comes from the LED chips themselves — it comes from everything around them UL or ETL listing 2.
You can identify a genuine fire risk by checking for voltage mismatch between the strip and driver, overloaded circuit runs, poor heat dissipation, loose or corroded connections, and proximity to flammable materials. Any one of these conditions can cause overheating that leads to fire.
Why LED Strips Produce Less Heat Than Traditional Lighting
LED strips convert a much higher percentage of electrical energy into light compared with incandescent or halogen bulbs 3. An incandescent bulb wastes roughly 90% of its energy as heat. An LED strip, by contrast, typically converts 70–80% of energy into light RCM (SAA) certification 4. That is why the baseline fire risk is low. But "low" does not mean "zero." The remaining heat still needs somewhere to go.
The Conditions That Turn Low Risk Into Real Danger
Here are the most common conditions that create a genuine fire hazard:
- Voltage mismatch. Connecting a 12V DC strip to a 24V driver doubles the current. The strip overheats fast.
- Overloaded runs. Daisy-chaining strips beyond the manufacturer's recommended maximum length increases resistance and heat at connection points.
- No ventilation. Mounting strips inside sealed enclosures or behind insulation traps heat against the PCB.
- Flammable surfaces. Adhesive-mounting strips directly onto wood, fabric, or plastic without a heat sink creates a contact point for ignition.
- Damaged insulation. Nicked wires or cracked silicone coatings expose conductors that can arc.
Quick Self-Inspection Checklist
Use this table to audit an existing installation:
| Check Point | What to Look For | Action If Found |
|---|---|---|
| Power supply label vs. strip label | Voltage mismatch 5 (e.g., 24V supply on 12V strip) | Replace supply or strip immediately |
| Total strip length on one run | Exceeds manufacturer's max run length | Split into separate parallel feeds |
| Mounting surface | Flammable material without aluminum channel | Add aluminum heat-sink profile |
| Connection points | Discoloration, melting, loose clips | Re-terminate or solder properly |
| Enclosure airflow | Sealed box with no vents | Add ventilation or switch to open mounting |
| Wire gauge | Undersized wire for the load | Upgrade to correct gauge per amperage |
A Real-World Example
One of our Australian partners once reported flickering and a burning smell on a hospitality fit-out. The installer had daisy-chained six 5-meter reels of 24V strip end to end — a total of 30 meters on a single feed. Our recommended maximum run for that product was 10 meters. The voltage drop at the far end caused the near end to draw excess current. The solder pads turned brown. Caught early, it was an easy fix: they split the run into three parallel feeds from the driver. No fire, no damage. But without that inspection, the outcome could have been different.
The key takeaway is simple. LED strips are inherently low-risk, but installation errors can push them into dangerous territory. A five-minute visual check can prevent a serious incident.
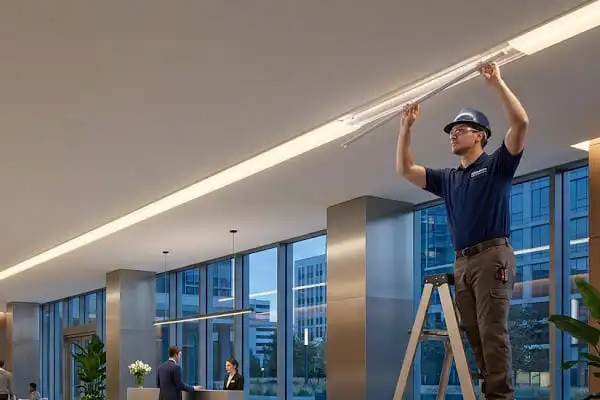
What steps should I take to prevent electric shock when installing high-voltage LED strips?
When we develop high-voltage LED strip products rated at 220V or 110V AC for our export markets, our engineers build in multiple layers of insulation — but the installer's work on site matters just as much as what leaves our factory.
To prevent electric shock with high-voltage LED strips, always disconnect power before handling, use insulated tools, verify that all connectors and end caps are rated for mains voltage, install a residual current device (RCD/GFCI) on the circuit, and ensure the strip's IP rating matches the environment — especially in wet locations.

Low Voltage vs. High Voltage: Understanding the Shock Risk
Most LED strips run on 12V or 24V DC. At these voltages, the risk of dangerous electric shock through dry skin is extremely low. However, high-voltage LED strips — commonly 110V AC or 220V AC — connect directly to mains power. Contact with a live conductor at these voltages can cause serious injury or death.
| Parameter | Low-Voltage LED Strip (12V / 24V DC) | High-Voltage LED Strip (110V / 220V AC) |
|---|---|---|
| Shock risk on dry skin contact | Very low | High — potentially fatal |
| Requires transformer / driver | Yes (AC-to-DC driver) | No (connects to mains directly) |
| Typical applications | Cove lighting, furniture, display | Long outdoor runs, building facades |
| Recommended protective device | Fuse or overcurrent protector | RCD / GFCI + overcurrent protector |
| Insulation requirement | Standard PVC or silicone | Reinforced double insulation |
| IP rating for wet areas | IP65 minimum | IP67 or IP68 recommended |
Step-by-Step Safety Protocol
- Kill the power. Switch off the breaker and lock it out. Use a non-contact voltage tester to confirm the circuit is dead.
- Wear insulated gloves. Even with the power off, treat every conductor as live until verified.
- Inspect connectors. High-voltage strips must use connectors rated for mains voltage. Never use low-voltage snap connectors on a 220V strip.
- Seal the end cap. An exposed cut end on a high-voltage strip is a live conductor. Always install the manufacturer's end cap with silicone sealant.
- Install an RCD/GFCI. This device cuts power within milliseconds if it detects current leaking to ground — for example, through a person's body. residual current device (RCD/GFCI) 6
- Use correct IP rating. For bathrooms, kitchens, or outdoor installations, choose IP65 or higher. For submersible or direct water contact, use IP67 or IP68.
- Label the circuit. Mark the breaker and the strip's junction box clearly so future workers know the voltage.
Special Considerations for Wet Environments
Water dramatically lowers skin resistance, which means even moderate voltages become more dangerous. In our experience exporting to Australia, contractors there follow AS/NZS 3000 wiring rules that require RCD protection on virtually all lighting circuits. This is a best practice everywhere. If you install any LED strip in a bathroom, pool area, or outdoor facade, an RCD is not optional — it is essential.
When to Call a Licensed Electrician
If you are not a licensed electrician, do not install high-voltage LED strips yourself. In most jurisdictions — including Germany and Australia — mains-voltage electrical work 7 must be performed or at minimum inspected by a licensed professional. Low-voltage 12V or 24V systems are more forgiving for DIY installation, but high-voltage work is a different category entirely.
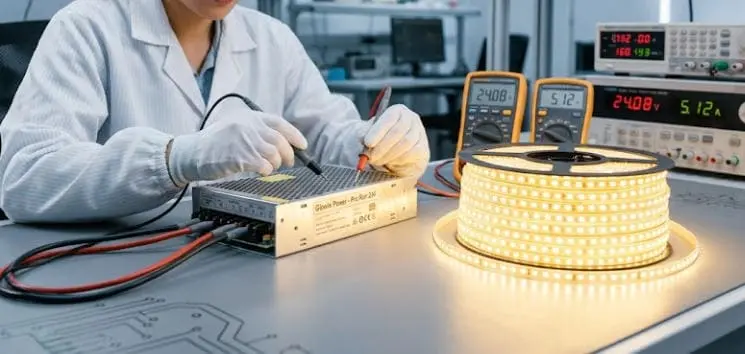
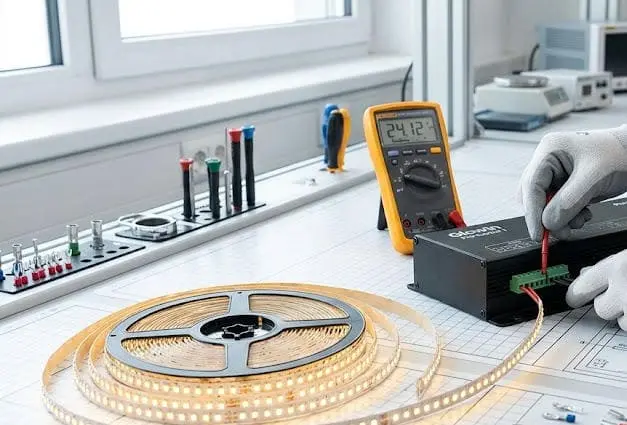
How do I verify that my supplier's QC process effectively eliminates overheating and short-circuit hazards?
Sourcing LED strips from China — or any country — means you are trusting another company's quality control with your customers' safety. Our own QC line runs seven distinct test stations, and we still catch defects. The question is whether your supplier catches them too.
Verify your supplier's QC by requesting their test reports for hi-pot (dielectric withstand), thermal aging, overcurrent protection, and solder joint inspection. Ask for third-party audit results, visit the factory if possible, and require batch-level test data — not just type-test certificates from years ago.
What a Robust QC Process Looks Like
A reliable LED strip manufacturer tests at multiple stages: incoming material inspection, in-process checks during SMT (surface-mount technology) soldering 8, and final outgoing quality control. Each stage catches different types of defects.
| QC Stage | What Is Tested | Why It Matters for Safety |
|---|---|---|
| Incoming material | LED chip binning, PCB copper weight, resistor tolerance | Wrong resistor values cause overcurrent; thin copper overheats |
| SMT process | Solder paste volume, reflow temperature profile | Cold solder joints create high-resistance points that overheat |
| Post-reflow inspection | AOI (automated optical inspection) for missing or misaligned parts | A missing resistor can short-circuit an entire segment |
| Aging test | Strips powered at full load for 8–24 hours in a thermal chamber | Reveals early failures and thermal weaknesses before shipping |
| Hi-pot test | 1,500V–3,000V applied between conductors and ground | Confirms insulation integrity — prevents shock and arcing |
| Final visual inspection | Connector fit, silicone coating, cut marks, labeling | Catches physical damage that automated tests miss |
| Batch sampling (AQL) | Random sample tested per AQL 2.5 or stricter | Statistical assurance that the entire batch meets spec |
Questions to Ask Your Supplier
When we onboard a new distribution partner, we encourage them to ask us these exact questions — and we share the answers openly:
- Do you perform 100% hi-pot testing or only sample testing?
- What is your AQL level for critical defects?
- Can you provide batch-specific aging test data, not just the original type-test report?
- Do you have a third-party factory audit 9 from a recognized body like SGS, TÜV, or Bureau Veritas?
- How do you control LED binning to ensure color consistency across batches?
- What happens when a batch fails? Do you have a documented corrective action process?
A supplier who cannot answer these questions clearly is a red flag.
The Hidden Risk of "Too Cheap" Pricing
Price pressure is real. But when a supplier's price is 30–40% below market, the savings usually come from somewhere unsafe: thinner copper on the PCB, lower-grade LED chips, skipped aging tests, or no hi-pot testing. These shortcuts do not show up in photos or samples. They show up six months later, on a job site, as a failure — or worse, a fire.
Third-Party Testing vs. Self-Declared Compliance
Self-declared compliance means the manufacturer says their product meets a standard. Third-party certification means an independent lab tested the product and confirmed it. There is an enormous difference. For safety-critical components like LED strips used in commercial buildings, always require third-party test reports from an accredited laboratory.
Which safety certifications do I need to look for to ensure my project complies with local electrical codes?
When we prepare shipments for Germany versus Australia, the certification paperwork is completely different — and getting it wrong can halt a project at final inspection.
For local electrical code compliance, look for UL or ETL listing in North America, CE marking with EN standards compliance in Europe, SAA (RCM) certification in Australia, and always confirm the certification covers the specific product model, voltage, and IP rating you are installing. Generic or expired certificates will not pass inspection.

Certification Requirements by Region
Different countries and regions require different safety marks. Using a product with the wrong certification — or no certification — can void insurance, fail building inspections, and expose you to legal liability.
| Region | Required Certification | Relevant Standards | Who Issues It |
|---|---|---|---|
| United States | UL Listed or ETL Listed | UL 2108, UL 8750 | UL, Intertek (ETL) |
| Canada | cUL or cETL Listed | CSA C22.2 | UL, Intertek |
| European Union | CE Marking 10 (self-declared, with test reports) | EN 61347, EN 62031, EN 60598 | Manufacturer declares; labs like TÜV verify |
| Germany | CE + often GS Mark for retail | EN 60598, EN 62471 (photobiological safety) | TÜV, VDE |
| Australia / New Zealand | RCM (SAA) | AS/NZS 60598, AS/NZS 62031 | SAA-approved labs |
| United Kingdom (post-Brexit) | UKCA | BS EN 61347, BS EN 62031 | UKAS-accredited labs |
What Each Certification Actually Proves
- UL / ETL listing means an accredited lab tested the product against specific safety standards and conducts periodic factory inspections. This is the gold standard in North America.
- CE marking in Europe is a self-declaration by the manufacturer that the product meets EU directives. It is only as trustworthy as the test reports behind it. Always ask for the Declaration of Conformity and the supporting test reports.
- RCM (formerly SAA) in Australia requires testing by an SAA-approved laboratory and registration on the national database. Australian electrical inspectors routinely check for this mark.
- GS mark in Germany is voluntary but highly valued. It means an independent body like TÜV has verified both the product and the factory.
How to Spot Fake or Irrelevant Certificates
We have seen competitors present certificates with expired dates, certificates for a different product model, or even certificates with forged lab logos. Here is how to verify:
- Check the certificate number on the issuing lab's online database. UL, ETL, TÜV, and SAA all have public lookup tools.
- Match the model number. The certified model on the certificate must match the product you are buying exactly.
- Check the date. Certificates have validity periods. An expired certificate is not valid.
- Verify the scope. A certificate for a 12V indoor strip does not cover a 220V outdoor strip, even from the same factory.
Why Certification Matters for Project Bidding
For contractors and distributors, having the right certifications is not just about safety — it is a commercial requirement. Many tender specifications explicitly list required safety marks. If your product does not have the correct certification, your bid is disqualified before it is even reviewed. Our team at Glowin keeps current certifications for all major export markets specifically because our partners need this documentation for their project submissions.
The Cost of Getting It Wrong
Installing non-certified LED strips in a commercial building can result in failed inspections, project delays, costly rework, voided insurance, and in worst cases, legal liability if an incident occurs. The cost of proper certification is a fraction of these consequences.
Conclusion
Use the right products, install them correctly, and verify your supplier's quality process — that is how you keep LED strip lighting safe. The risks are real but preventable, and every step you take toward proper sourcing and installation protects your projects and your reputation.
Footnotes
- Explains how LEDs work and their efficiency compared to traditional lighting. ↩︎
- Provides information on UL's product certification services and safety standards. ↩︎
- Provides detailed information on the operation and efficiency of incandescent bulbs. ↩︎
- Explains the RCM mark, its coverage, and registration requirements in Australia/NZ. ↩︎
- Explains general electrical hazards, including those related to incorrect voltage application. ↩︎
- Provides a detailed explanation of RCDs/GFCIs and their function in preventing electric shock. ↩︎
- Outlines regulations and requirements for electrical work, emphasizing the need for licensed professionals. ↩︎
- Describes the step-by-step process of surface mount technology in electronics manufacturing. ↩︎
- Describes the benefits and importance of independent third-party audits for quality and compliance. ↩︎
- Official European Union information on the purpose and requirements of CE Marking. ↩︎