Every year, we ship thousands of LED strip orders to contractors and wholesalers across Germany and Australia Ingress Protection 1. And every year, we still get calls from buyers who paired a perfectly good strip with the wrong power supply. The result? Flickering lights, overheated drivers, dim far-ends, or strips that fail within months. It is a frustrating problem, but it is also entirely preventable.
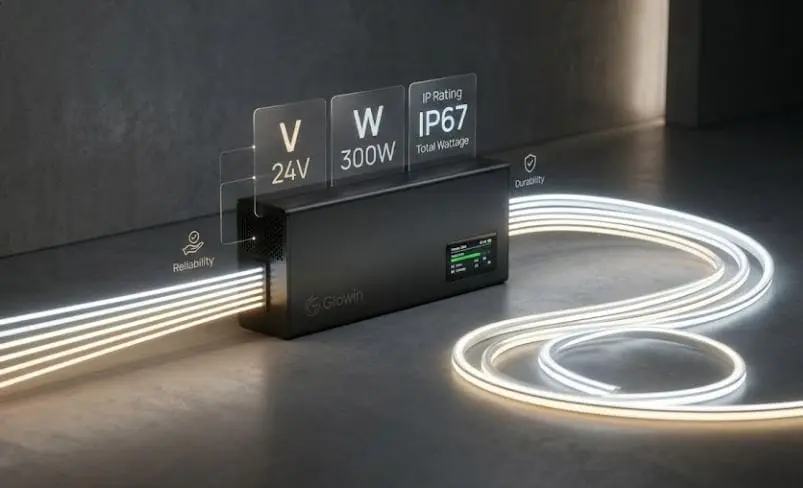
To select the right power supply for LED strip lights, you need to match the output voltage exactly to the strip's rated voltage, calculate total wattage with a 20–30% safety margin, confirm dimming and control compatibility, and choose the correct IP rating for your installation environment.
This guide breaks each step down in plain language. Whether you are specifying supplies for a 50-meter cove lighting run or a short under-cabinet accent, the logic is the same. Let me walk you through it.
How do I calculate the total wattage needed for my large-scale LED strip installation?
Undersized power supplies are the number-one cause of premature failure we see when reviewing returned products from project sites. The math is simple, but skipping it—or guessing—can cost thousands in rework.
Multiply the strip's wattage per meter by the total installed length, then divide by 0.8 to add a 20% safety margin. For harsh or outdoor environments, increase the margin to 30–50%. This ensures the power supply runs below its maximum rating, reducing heat and extending lifespan.
Step-by-step calculation
The formula is straightforward. First, check the strip's datasheet for its wattage per meter (W/m). This figure changes by product. A basic 2835 strip might draw 4.8 W/m, while a high-density 2835 strip could draw 22 W/m or more. Our engineers always print the rated W/m on the reel label and spec sheet, so there is no guessing.
Second, measure or plan the total strip length in meters. If you are running 30 meters of strip rated at 14.4 W/m, the total load is:
30 m × 14.4 W/m = 432 W
Third, add your safety margin 2. For a standard indoor commercial install, divide by 0.8:
432 W ÷ 0.8 = 540 W
You need at least 540 W of power supply capacity. You could use a single 600 W unit, or split the load across multiple smaller supplies—something I strongly recommend for runs over 10 meters.
Why the safety margin matters
Running a power supply at 100% capacity generates excess heat. Heat degrades electronic components 3. Over time, this shortens the supply's life and can cause mid-project failures that are expensive to fix, especially in ceilings, coves, or exterior facades where access is limited.
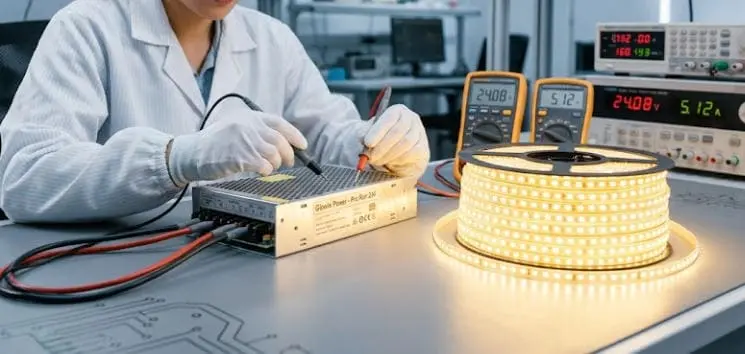
We have tested units on our aging racks and the data is clear: a supply loaded at 80% runs significantly cooler and lasts longer than one loaded at 95%.
Indoor vs. outdoor margin recommendations
| Environment | Recommended Margin | Effective Load Factor | Why |
|---|---|---|---|
| Indoor, climate-controlled | 20% | 80% of rated capacity | Stable temperatures, low risk |
| Indoor, warm or enclosed space | 30% | ~77% of rated capacity | Reduced airflow increases heat |
| Outdoor, sheltered | 30–50% | 67–77% of rated capacity | Temperature swings, moisture exposure |
| Outdoor, fully exposed | 50–100% | 50–67% of rated capacity | Extreme weather, voltage drop 4 over long cable runs |
Splitting the load across multiple supplies
For large-scale installations—say a 100-meter retail cove—do not try to power everything from one massive supply. Instead, use multiple supplies positioned at intervals along the run. This reduces voltage drop, simplifies wiring, and means a single supply failure does not kill the entire installation. When we work with contractors on these projects, we typically recommend one supply point every 10 to 15 meters, depending on the strip's current draw and the wire gauge used.
Should I choose a 24V or 48V power supply to prevent voltage drop in my long-run projects?
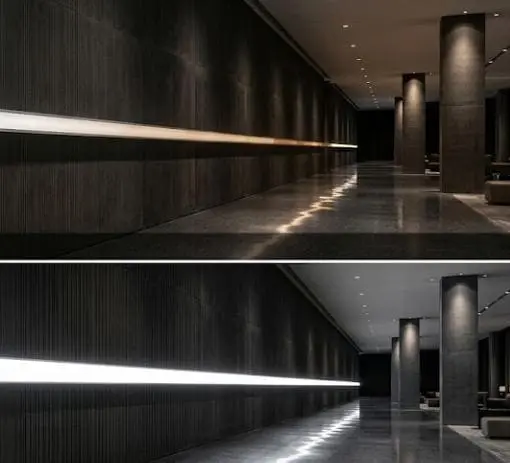
Voltage drop is the silent killer of long LED strip runs. We have seen beautifully designed hospitality projects ruined because the last few meters of strip glow noticeably dimmer than the first. It is a physics problem, and fixing it after installation is painful.
For runs over 5 meters, 24V systems significantly reduce voltage drop compared to 12V. For runs exceeding 15–20 meters, 48V systems cut voltage drop further, delivering more consistent brightness across the entire length. Always pair the supply voltage with the strip's rated voltage—never mix them.
What is voltage drop and why does it matter?
Every wire has resistance. As current flows through the wire and the strip, a small amount of voltage is lost along the way. The longer the run, the more voltage the strip loses by the time power reaches the far end. Lower voltage at the end means less current through the LEDs there, which means dimmer light. In a 12V system, even a 1V drop represents an 8.3% loss—enough to see with the naked eye.
12V vs. 24V vs. 48V: a practical comparison
| Factor | 12V System | 24V System | 48V System |
|---|---|---|---|
| Typical max single run | 5 m | 10 m | 15–20 m |
| Current draw for 60W load | 5.0 A | 2.5 A | 1.25 A |
| Voltage drop sensitivity | High | Moderate | Low |
| Wire gauge needed | Thicker (higher cost) | Moderate | Thinner (lower cost) |
| Component availability | Very common | Very common | Growing, less common |
| Best use case | Short accent runs, small projects | Most commercial & residential projects | Long-run architectural, large-scale |
The key takeaway: higher voltage means lower current for the same wattage, and lower current means less voltage drop across the same wire. This is basic electrical engineering 5, and it has a direct impact on your project's visual quality.
When 48V makes sense
We have been supplying 48V strip systems to contractors in Australia who do long exterior facade runs—sometimes 30 meters or more in a single stretch. At 48V, the current is halved compared to 24V, so the wiring is simpler, the voltage drop is smaller, and the brightness uniformity across the full run is noticeably better. However, 48V strips and compatible power supplies are less widely stocked, so lead times can be slightly longer. If you are planning a project that needs this, reach out early so we can schedule production.
Practical tips to fight voltage drop
Even with the right voltage, there are additional steps you should take:
- Use thicker wire. For runs over 5 meters, move up at least one wire gauge size.
- Power from both ends. Feeding power into both ends of a strip run effectively halves the distance current must travel.
- Add mid-point power injection. For very long runs, tap in a new power feed every 5–10 meters.
- Keep the power supply close to the load. Long cable runs between the supply and the first LED add unnecessary resistance.
These are the same recommendations we give to every contractor we work with, and they consistently produce even, professional results.
How do I select a waterproof power supply that meets my project's specific safety and IP requirements?
When our team prepares shipments for outdoor projects—pool surrounds in Sydney, building facades in Munich—the power supply spec is just as critical as the strip's IP rating. A waterproof strip paired with a non-waterproof power supply is a failure waiting to happen.
Choose a power supply with an IP rating that matches or exceeds your installation environment. IP20 suits dry indoor spaces, IP65 handles dust and water jets for sheltered outdoor use, and IP67 or IP68 is required for submersible or fully exposed wet locations. Always confirm the rating on the supply's datasheet, not just the marketing description.
What do IP ratings actually mean?
IP stands for Ingress Protection 6. The two-digit number tells you exactly what the enclosure can resist. The first digit rates solid particle protection (dust, debris). The second digit rates liquid protection (water drips, jets, submersion).
| IP Rating | Dust Protection | Water Protection | Typical Use Case |
|---|---|---|---|
| IP20 | Protected against objects >12.5 mm | No protection | Indoor, dry rooms |
| IP44 | Protected against objects >1 mm | Splash-proof from any direction | Indoor bathrooms, covered porches |
| IP65 | Dust-tight | Protected against water jets | Sheltered outdoor, carports, eaves |
| IP67 | Dust-tight | Protected against temporary immersion (up to 1 m) | Exposed outdoor, ground-level |
| IP68 | Dust-tight | Protected against continuous submersion | Pools, fountains, underground |
Matching the supply to the environment
A common mistake we see: a buyer selects an IP67 strip for an outdoor garden install, but mounts the power supply in a ventilated indoor utility box with no waterproof rating. That works fine—as long as the supply stays dry. But if it is mounted in an exposed junction box under a deck, even a little condensation can corrode terminals and cause failure.
Here is the rule of thumb: if the power supply will be exposed to any moisture, dust, or outdoor air, use IP65 at minimum. If it will be in a sealed box underground or near water, go IP67 or IP68.
Thermal considerations for sealed units
Sealed, potted power supplies (IP67/IP68) do not have ventilation fans or open heatsinks. All heat must dissipate through the metal casing. This means they can run hotter in enclosed spaces. To compensate, either derate the supply (use a larger unit than your wattage calculation suggests) or ensure the mounting surface acts as a heat sink 7—aluminum channels or metal enclosures work well.
When we spec outdoor projects with our partners, we typically recommend bumping the safety margin from 20% to at least 30% for IP67 sealed supplies, precisely because of this thermal limitation.
Regional certifications matter too
Beyond IP ratings, different markets require specific safety certifications. In Australia, your power supply should carry SAA approval. In Germany and the EU, CE marking 8 is mandatory, and many specifiers also request TÜV or ENEC certification. We work with buyers to ensure the correct marks are on both the product and the documentation, so project tenders and inspections go smoothly.
What quality standards should I look for to ensure my power supply maintains long-term reliability and avoids project failures?
We learned this lesson the hard way early on. A batch of budget power supplies we sourced for a client failed within six months. The callback cost and reputation damage far exceeded the savings. Since then, we have been extremely selective about the supplies we recommend alongside our strips.
Look for power supplies with recognized safety certifications (UL, CE, SAA, TÜV), high Power Factor Correction (PFC ≥ 0.9), rated operating life of at least 50,000 hours, quality capacitor brands (such as Rubycon or Nippon Chemi-Con), and a minimum two-year manufacturer warranty to ensure long-term reliability.
Certifications are non-negotiable
For any professional project, the power supply must carry safety certifications relevant to the installation country. Without them, the product may not pass inspection, the installer may lose their license, and insurance coverage could be voided.
Here are the most common certifications and where they apply:
- UL / cUL — United States and Canada
- CE — European Union (mandatory self-declaration)
- TÜV / ENEC — EU (voluntary but highly respected, often required in tenders)
- SAA / RCM — Australia and New Zealand
- CB Scheme — International mutual recognition
We always confirm certification status before recommending a supply to our buyers. If a product does not have the right marks, we will not pair it with our strips regardless of price.
Power Factor Correction (PFC)
For larger installations or commercial projects, active PFC is important. A power supply with PFC ≥ 0.9 draws current more efficiently from the mains, reduces harmonic distortion on the electrical grid, and is often required by building codes for loads above a certain threshold. Without PFC, the supply draws more apparent power 9 than it actually needs, which can overload branch circuits and trip breakers in large installations.
Component quality inside the supply
The components inside the power supply matter as much as the specs printed on the label. Cheap electrolytic capacitors 10 are the most common point of failure. They dry out, lose capacitance, and eventually cause the supply to flicker, hum, or stop working entirely. Look for supplies that use capacitors from reputable Japanese brands like Rubycon, Nichicon, or Nippon Chemi-Con. These cost more, but they last years longer.
Thermal protection and efficiency
A reliable supply should have built-in protections:
- Over-voltage protection (OVP) — shuts down if output voltage exceeds a safe threshold
- Over-current protection (OCP) — limits output if the load draws too much current
- Short-circuit protection (SCP) — prevents damage if wires are accidentally shorted
- Over-temperature protection (OTP) — reduces output or shuts down when internal temperature is too high
Efficiency also matters. A supply rated at 90% or higher efficiency converts more input power into usable DC output and wastes less as heat. This is especially important in enclosed installations where heat buildup is a concern.
Warranty and after-sales support
A manufacturer that offers only a one-year warranty on their power supply is telling you something about their confidence in the product. We recommend insisting on at least a two-year warranty, and ideally three to five years for commercial or architectural projects. Ask the supplier if they have a process for replacements and whether they stock spare units. In our experience exporting to Germany and Australia, having replacement stock available locally or in a bonded warehouse saves weeks of project delay when an issue arises.
A quick quality checklist
Before you finalize a power supply purchase, confirm the following:
- Output voltage matches the strip exactly
- Wattage includes a 20–30% safety margin (or more for outdoor)
- Relevant safety certifications for your country
- PFC ≥ 0.9 for commercial projects
- Japanese-brand capacitors inside
- Built-in OVP, OCP, SCP, and OTP protections
- Efficiency ≥ 88%
- Minimum two-year warranty
- Correct IP rating for the install environment
This checklist has saved our buyers from countless headaches. Print it, share it with your team, and use it every time you spec a new project.
Conclusion
Choosing the right power supply comes down to four things: match the voltage, size the wattage with margin, confirm the IP rating, and verify quality certifications. Get these right, and your LED strip installation will perform reliably for years.
Footnotes
- Explains the IEC Ingress Protection (IP) code and its significance. ↩︎
- Discusses the importance of safety margins in electronic design and manufacturing. ↩︎
- Provides broad background on electronic components and their heat sensitivity. ↩︎
- Explains the physics concept of voltage drop in electrical circuits. ↩︎
- Provides a comprehensive overview of the field of electrical engineering. ↩︎
- IEC is the authoritative body that defines Ingress Protection standards. ↩︎
- Describes heat sinks as passive heat exchangers for electronic devices. ↩︎
- Official EU portal detailing mandatory CE marking requirements. ↩︎
- Explains apparent power in AC circuits and its relation to PFC. ↩︎
- Provides background on electrolytic capacitors and their failure modes. ↩︎